My preference would be the wetsaw, I was in a similar situation last year, for a customer. Just a tiny 6' x 5' bathroom, in a commercial building, I had to do a gut rehab in this bathroom was in rough shape, also re-designed the new bathroom for them, to include 12" x 12" ceramic tile flooring, which had to be ordered. I wanted it to look nice since it was to accomodate the new office.
I had heard of the other type of cutter that you are using, but just decided to grab that $80 wet saw at Lowes, certainly did not need the $400 dollar and or up models unless I was going to do a lot of tile, even then, this one I bought really made short work of the cuts I needed, and I did not have to worry about losing material, only so many tiles in a box, special order tight schedule, they were moving into the office asap etc.
Now the kicker is, I don't ever recall doing any ceramic tile work in the past, but I've always been quick to learn, so I figured it out, used top quality materials, from a reputable supply house, portland cement based ashesive, thoroughly cleaned the old concrete floor up, laid the tile out, pulled em back up, made the cuts as I went along, used the the right size fluted trowel, grouted the next day, cleaned, and applied grout sealer after the grout cured. I did not think it was difficult, it's still work, but the end product is a durable floor.
That saw, although the cheap low end model, really made the difference, need to shave a little off, or make an odd cut, no problem, it collects dust now, a friend just borrowed and returned it for a small repair, wish you were closer, or I could fit it into an envelope ! I know how it is on a low budget, but if you could get your hands on one, I'd think you would like it and might not damage any material when cutting. The thing I like about this material is that properly set, it's durable, looks great and was almost a little fun to learn about and install.
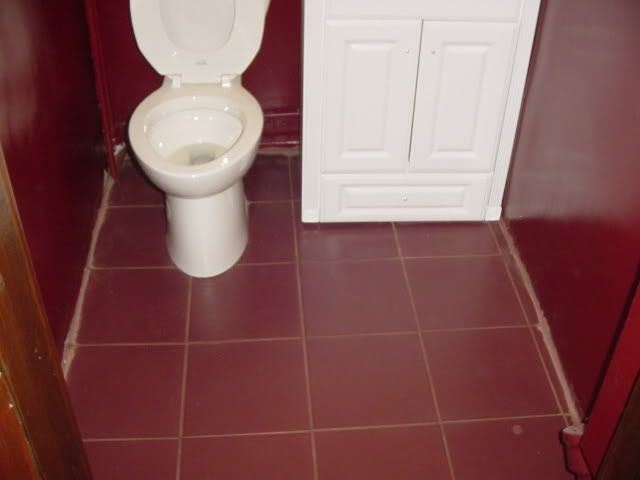
Not too bad for an amateur, burgundy 12" x 12" tiles, dark but matching grout, no base trim on yet, walls change color to white 1/2 way up, with a stained chair rail molding between, to match the old door and trim from the late 40's, the floor really made the room, from a neglected mechanics bathroom to something respectable, the before photo shows a really untidy old bathroom:
We sell tractor parts! We have the parts you need to repair your tractor - the right parts. Our low prices and years of research make us your best choice when you need parts. Shop Online Today. [ About Us ]
Today's Featured Article - Repairing A Massey Harris 22 - by John Reeves. I have just given this old girl (boy?) a replacement RH rear axle. I was lucky enough to find an axle in good shape at a reasonable price - also a replacement for the right rear brake assembly which was
... [Read Article]
Latest Ad:
For sale Farmall super A tractor is complete and has just been setting for awhile,it was running when pulled out of the barn,shouldn’t take to much to get it going asking 1100.00
[More Ads]
All Rights Reserved. Reproduction of any part of this website, including design and content, without written permission is strictly prohibited. Trade Marks and Trade Names contained and used in this Website are those of others, and are used in this Website in a descriptive sense to refer to the products of others. Use of this Web site constitutes acceptance of our User Agreement and Privacy Policy
TRADEMARK DISCLAIMER: Tradenames and Trademarks referred to within Yesterday's Tractor Co. products and within the Yesterday's Tractor Co. websites are the property of their respective trademark holders. None of these trademark holders are affiliated with Yesterday's Tractor Co., our products, or our website nor are we sponsored by them. John Deere and its logos are the registered trademarks of the John Deere Corporation. Agco, Agco Allis, White, Massey Ferguson and their logos are the registered trademarks of AGCO Corporation. Case, Case-IH, Farmall, International Harvester, New Holland and their logos are registered trademarks of CNH Global N.V.