"Also what is the wiring schematics for this tractor to the coil, distributor, etc."
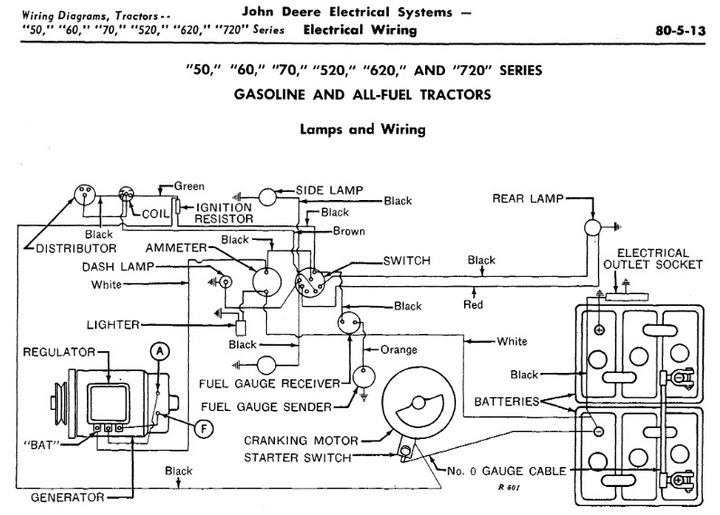
Take a look at the Lamps and Wiring diagram below.
"It was time to replace the distributor cap, rotor, and I also replaced the coil, still no spark. Any thoughts?"
Presuming you have a gasoline or all fuel tractor, take a look at the Lamps and Wiring diagram above.
Note that current/power flows from the NEGATIVE battery terminal to the NEGATIVE terminal on the ammeter.
Note that current/power flows from the POSITIVE terminal on the ammeter to the BAT terminal on the ignition switch.
Note that current/power flows from the BAT terminal on the ignition switch to the IGN terminal on the ignition switch.
Note that current/power flows from the IGN terminal on the ignition switch to the input terminal on the ignition resistor.
Presuming there is current/power flowing as described above, then start by turning the ignition switch ON to the first position.
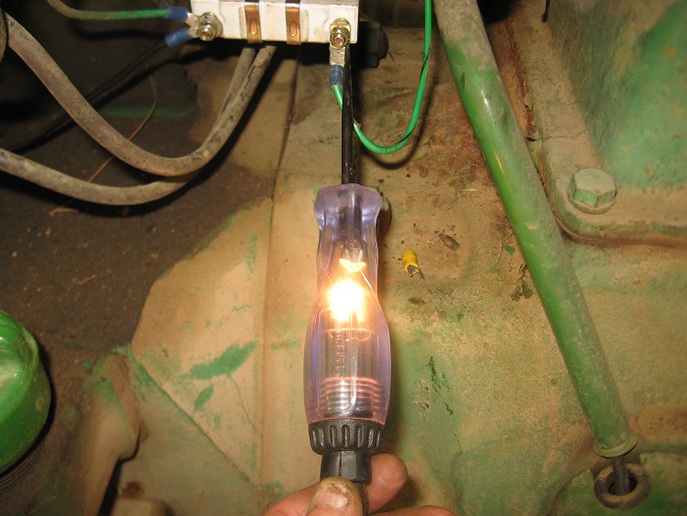
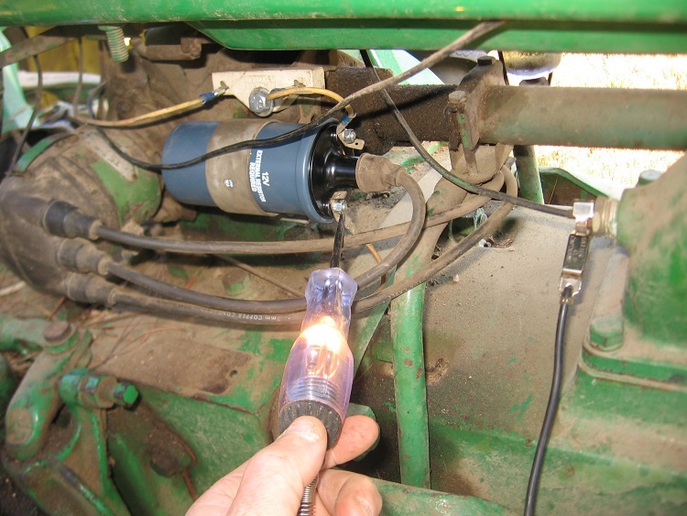
Using a test light, check for current/power at the input terminal on the ignition resistor.
If there is no current/power at the input terminal, then check the IGN terminal, BAT terminal, both POSITIVE and NEGATIVE ammeter terminals, NEGATIVE terminal, and last the POSITIVE ground,
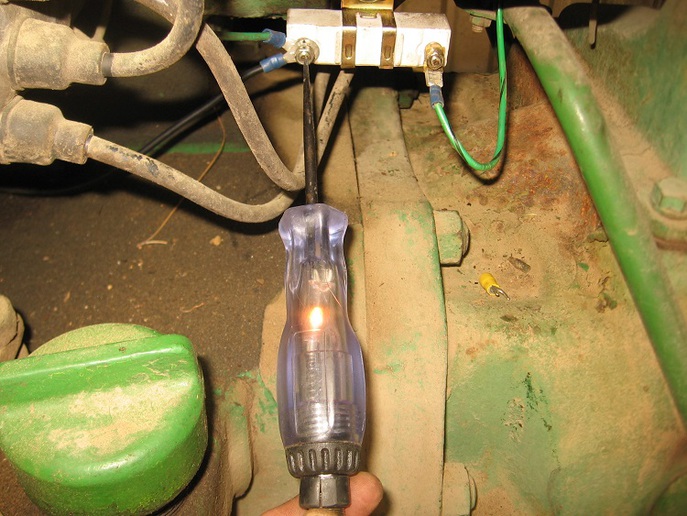
If there is current/power at the input terminal, then check for current/power at the output terminal on the ignition resistor.
If there is no current/power at the output terminal, then replace the ignition resistor.
If there is current/power at the output terminal, then check for current/power at the NEGATIVE terminal on the coil.
If there is no current/power at the NEGATIVE terminal, then repair/replace the green lead wire connections.
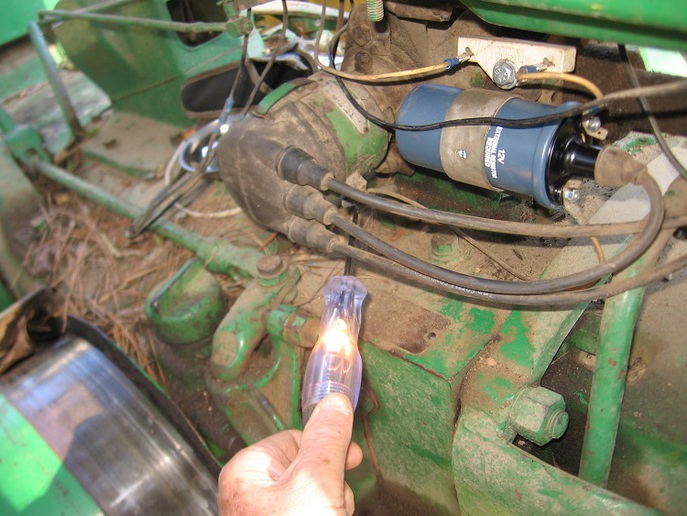
If there is current/power at the NEGATIVE terminal, then check for current/power at the POSITIVE terminal on the coil.
If there is no current/power at the POSITIVE terminal on the coil, then replace the coil.
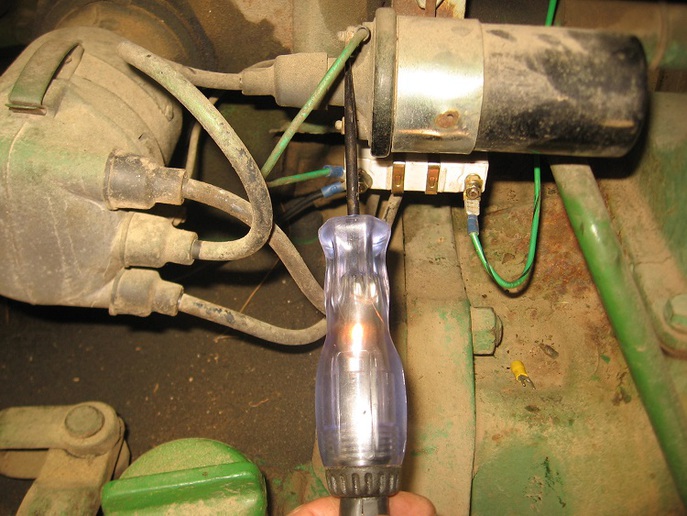
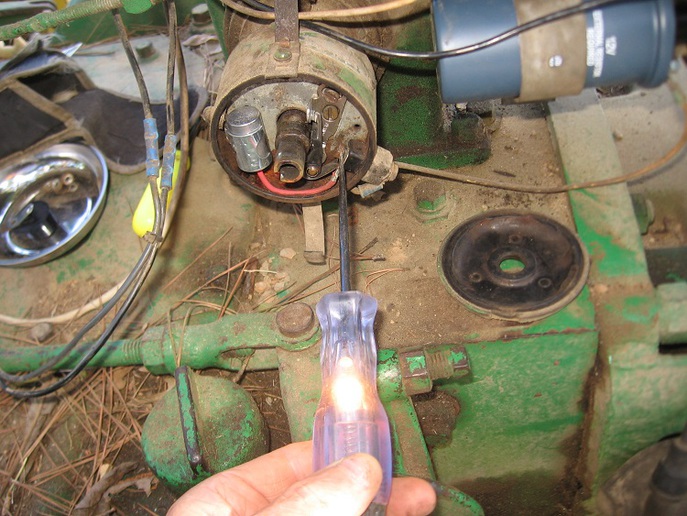
If there is current/power at the POSITIVE terminal on the coil, then check for current/power at the breaker plate to housing screw on the distributor.
If there is no current/power at the breaker plate to housing screw on the distributor, then repair/replace the black lead wire connections.
If there is current/power at the breaker plate to housing screw on the distributor, then check for current/power at the breaker plate to housing screw retainer inside the distributor.
If there is no current/power at breaker plate to housing screw retainer inside the distributor, then repair/replace the breaker plate to housing gasket.
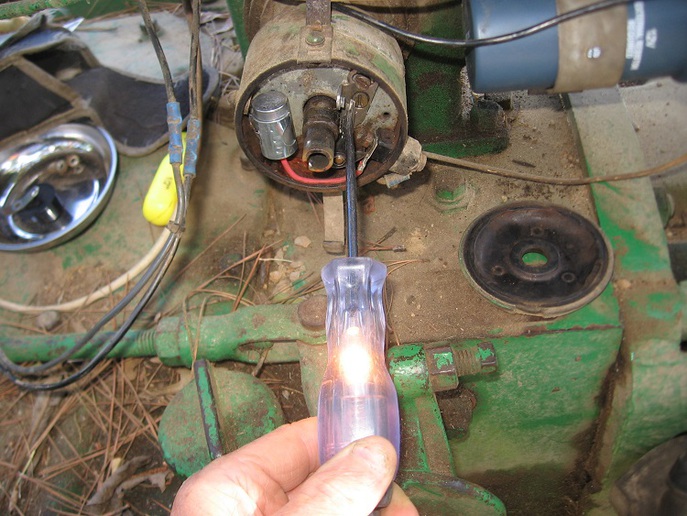
If there is current/power at breaker plate to housing screw retainer inside the distributor, then check for current/power at the breaker points.
The following is one method of checking for spark from the distributor.
Presuming that the gap has already been set on the breaker points, you might consider cranking the engine with the distributor cap off and check for spark at the points.
Replace the rotor and distributor cap.
CAUTION: Make sure the fuel is turned OFF and/or drain the carburetor and/or cover the open spark plug holes.
Remove the spark plugs and attach the plug wires.
Lay the each spark plug either on the block or frame.
Crank the engine and check for spark at each spark plug.
If there is still no spark, then replace either the plug, plug wire, distributor cap, or rotor.
Upload one or more videos to your post. Photo filesizes should be less than 300K and Videos, less than 2MB. Formats allowed are gif, jpg, png, ogg, mp4, mov, and avi. Be sure to use filenames without spaces or special characters, and filetypes of 3 digits lower case.
We sell tractor parts! We have the parts you need to repair your tractor - the right parts. Our low prices and years of research make us your best choice when you need parts. Shop Online Today. [ About Us ]
Today's Featured Article - Tuning Up Your Tractor: The Battery - by Curtis Von Fange. Buried somewhere beneath the sheetmetal, under the gas tank, or stuffed in front of the radiator is the battery. This elusive and neglected component of the tractor is the hardest to get to when it is dead and in need of a jump. But usually, the storage battery is a storehouse of electrical energy waiting to be released a the flick of a switch. A few maintenance tips and periodic cleaning will keep it charged for the duration of its life span. The battery is made up of a number of lead bas
... [Read Article]
Latest Ad:
For sale Farmall super A tractor is complete and has just been setting for awhile,it was running when pulled out of the barn,shouldn’t take to much to get it going asking 1100.00
[More Ads]
All Rights Reserved. Reproduction of any part of this website, including design and content, without written permission is strictly prohibited. Trade Marks and Trade Names contained and used in this Website are those of others, and are used in this Website in a descriptive sense to refer to the products of others. Use of this Web site constitutes acceptance of our User Agreement and Privacy Policy
TRADEMARK DISCLAIMER: Tradenames and Trademarks referred to within Yesterday's Tractor Co. products and within the Yesterday's Tractor Co. websites are the property of their respective trademark holders. None of these trademark holders are affiliated with Yesterday's Tractor Co., our products, or our website nor are we sponsored by them. John Deere and its logos are the registered trademarks of the John Deere Corporation. Agco, Agco Allis, White, Massey Ferguson and their logos are the registered trademarks of AGCO Corporation. Case, Case-IH, Farmall, International Harvester, New Holland and their logos are registered trademarks of CNH Global N.V.