
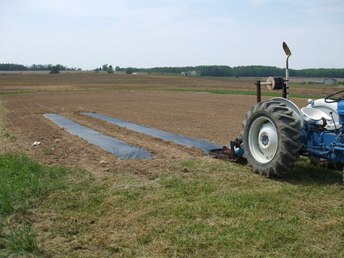
A few years ago I picked up a mulch layer thinking if I ever scaled up vegetable production is would come in handy. It didn’t hurt that it was extremely cheap either. Here is a shot of the first two rows.
So for those who welcome some personal experience here is the abridged version of laying mulch.
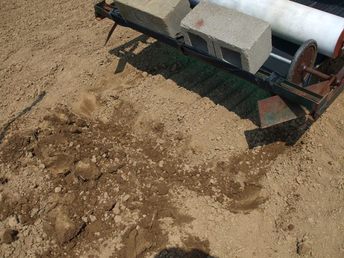
Step 1 – Dig out a trench for the mulch. Not only will you need the end but the sides up to the press wheels. This will ensure the sides of the ends get covered.
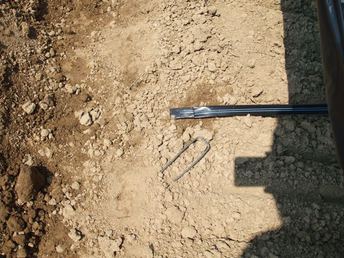
Step2 – I installed drip tape irrigation. The End of the tape is sealed around a staple I made to hold it in place. Just pin it down at the start of the row.
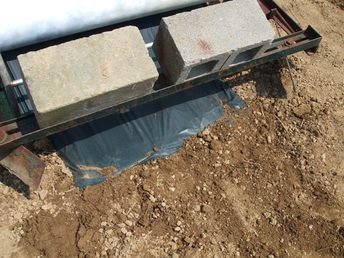
Step 3 - Bury the end of the mulch in the trench keeping it tight and in line with the press wheels.
Step 4 – Drive the length of the row as straight as you can. In hind sight I could have used a tag line but I was only doing 50’ runs. I drove with the engine at idle, in low gear. I think that works out to about ½ mile per hour on my Ford. SLOW is the key. Once there trim and bury this end. On the drip tube I pulled out and extra foot, temporarily sealed it. I will be hooking up irrigation later.
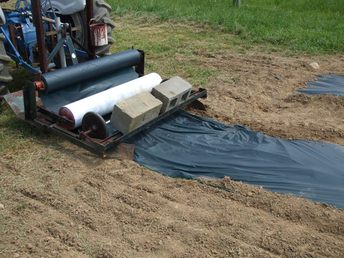
So for those who welcome some personal experience here is the abridged version of laying mulch.
Step 1 – Dig out a trench for the mulch. Not only will you need the end but the sides up to the press wheels. This will ensure the sides of the ends get covered.
Step2 – I installed drip tape irrigation. The End of the tape is sealed around a staple I made to hold it in place. Just pin it down at the start of the row.
Step 3 - Bury the end of the mulch in the trench keeping it tight and in line with the press wheels.
Step 4 – Drive the length of the row as straight as you can. In hind sight I could have used a tag line but I was only doing 50’ runs. I drove with the engine at idle, in low gear. I think that works out to about ½ mile per hour on my Ford. SLOW is the key. Once there trim and bury this end. On the drip tube I pulled out and extra foot, temporarily sealed it. I will be hooking up irrigation later.