plastic guage dumb question

Jimmydog

Member
So the earlier post got me thinking -and I'm probably going to show off my youthful ignorance here, but just how did people determine bearing clearance before plastic gauge? Ever since I've been turning wrenches it's always been available. Just wondering, heck maybe even just forgot.

JD
 
(quoted from post at 19:04:03 01/02/20) So the earlier post got me thinking -and I'm probably going to show off my youthful ignorance here, but just how did people determine bearing clearance before plastic gauge? Ever since I've been turning wrenches it's always been available. Just wondering, heck maybe even just forgot.

JD
A bore gauge and a set of micrometers. Plastigage only works if everything's nice and round.
 
Okay so mic the crank, put the dial calipers on the bearing, and use my brand new borescope on the rods and mains? Seems to me like you'd get a more accurate running fit measurement using the plastic stuff, after all it's all cinched up. Well I guess I can do it old school if I have to, besides anybody have any ideas how long that plastic stuff is good for? Some of the stuff I have is twenty plus years old. No "best if used buy" dates on things back then.

JD
 
Many old engines used shims to adjust the poured babbit type bearings. Take out an even number of shims and snug it up, if it was tight just add 1 more back in and good to go.
 
With a crankshaft installed in the engine it is difficult to measure main bearing clearances with
a ordinary set of micrometers. Even a micrometer made to measure journal that is in engine is not
simple.

The way it was done is simply with shim stock. It can be brass or paper. You measure the
thickness of the shim stock. Cut off a piece like half inch wide, full width of journal and lay
it on journal. If it locks crank tight with cap on, you have less than shim. If it drags some you
are right near that clearance. If turns free you have more clearance than shim.

I prefer shim but do use plastic gauge , micrometer and shim depending on situation. Plasti gauge
gives lots of false reading if everything isn't just right , like temp of the plastic and
condition of crankshaft. That is why mfgs recommend using micrometer readings if possible.
 
The shims on rods is how I first learned to adjust clearance on my '41 chev. Fact is, that chev was the reason I became a grease monkey. I had it six days when it broke crankshaft and block. All down hill since then. No, I hadn't been inside of that engine before it let loose but someone else had.
 
my dad used some lead wire. put it on journal or bearing, tighten down the remove and measure thickness of crushed wire with micrometer
 
Most technical manuals show a spec for clearance and I go by that, if not start with the smallest diameter plastigauge and work your way up.
 
Old rule of thumb was .001 for every inch dia. Fitting babbitt brgs. rod & main caps had a laminated shim pack. Remove shims on
rod or main caps until you have a slight drag on complete revolution then add .002 to.003 shims on each sides of rod or main brg.
cap for oil clearance. A lot of the older engines ran low pressure 20-25 lbs. But pumps had more volume. Using plastigauge on main
brgs in the frame use a jack next to the main you are checking clearance so that you know the crank is up against the upper main
brg. then it will give you a accurate reading.
 
My Cousin from Mother's generation did it that way. He learned back in the Model T days.

If the rod had no play but would click (he called it 'snap') and forth a tiny bit on the journal when pushed, He said the fit was "just about right". And he was right too.

He taught me several tricks that weren't covered in Automotive Mechanics class back in the '80s.
 
Many people do not use Plasti-Gage the way it gives a true reading.

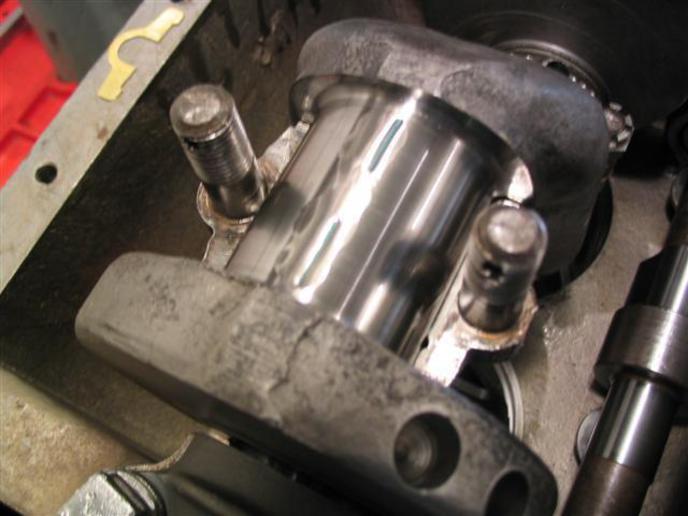
The shaft, and bearing have to be wiped very clean, and then a couple of drops of oil on the shaft, and bearing. The oil will let the Plasti-gage spread out,
or it will have the tendency, to push straight in. Put about a 1/2 inch of Plasti-gage on the ends of the bearing, each end. The middle is not important.
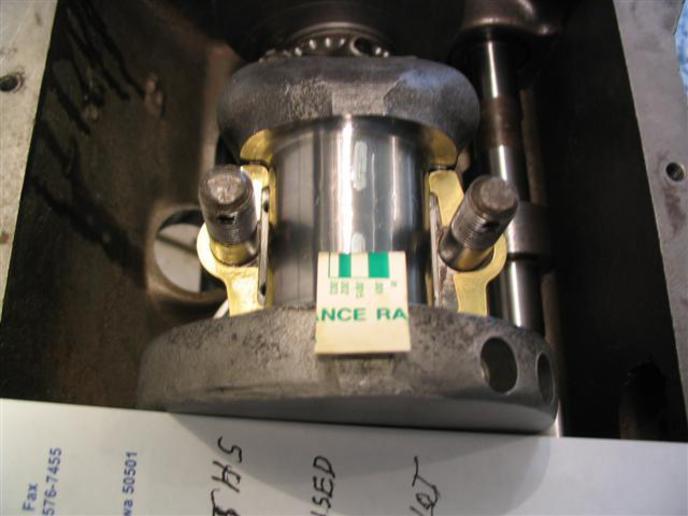
Torque the bolts, and leave for 15 seconds, and remove the bolts. Read the crank shaft only, not the bearing. Then either leave, or adjust.

" Adjustment " some shim packs have .002, and .003 pieces, in a stack. If a bearing is loose, take out a two, or three, and then if it is to tight, make a .001
and put back that in. The same for the .003 thickness, use a .001, or .002 in any combination.

Do not ever use bearing clearance, stated in books or manuals, as they are in Minimum, and Maximums, and neither are the best to use. What to use is .001 per
inch of shaft, Plus another, .000-50 thousandths. So a 3-1/2 inch shaft, will have, .003-50 thousandths clearance, Plus an extra .000-50 thousandths would be
.004-00 total on a 3-1/2 inch.

Now, when that 3-1/2 shaft is up to operating temperature, it will expand to about 3-1/2 thousandths so the shaft clearance will be some where around .006
thousandths, when broken, in. give, or take some tenths.

All machining of Rod bearings, Line boring mains, spun poured Cam bearings is done with an inside Mic, and then out side Mic over the inside Mic. Doing it that
way, we can repeatedly measure a bearing to a tenth, of a thousandths.

Herm.
cvphoto7130.jpg


cvphoto7131.jpg
 

We sell tractor parts! We have the parts you need to repair your tractor - the right parts. Our low prices and years of research make us your best choice when you need parts. Shop Online Today.

Back
Top