Tore into the AC WD front wheel hub and I am confused now.

Will Herring

Well-known Member
Finally got around to taking the first front hub off the WD. This is the side that had been damaged before apparently, as there was a gas cap looking thing welded on the hub itself (I assume the spindle cut thru it at some point in the past, at least 30+ years ago). And the hub has a good 1/4" to 1/2" of play in and out on the spindle.

tazycoW.jpg


Had to go out and buy a giant wrench so I could get the hub cap off in tandem with a pry bar, and when I did, all of the thick goop came out. Castle nut was held in place with a nail instead of a cotter pin.


Q8uYAnA.jpg


Here is the inside of the hub:

FCJeQmJ.jpg


Here is the outside of the hub, along with what I believe to be the inner flat washer and the ... bearing spacer? Unless old felt seals were just really hard and rigid? :

3iwp4uB.jpg


Here's all the pieces that came out... The top left is the hub cap. The bottom is the inner and outer bearing. But on the upper right side is three washers that were between the castle nut and the first bearing... And that confuses the daylights out of me. I see no reason why those should have been in there.

9GQ7ifh.jpg


Here's the spindle with all the parts that are laying on the board already removed -- does anything else look like it should still come off the spindle still? :

7to0OQC.jpg


So... Anybody have any ideas where I should go from here? Next on my list is to clean everything up so I can see better any wear or damage, but the three extra washers/spacers really has me puzzled.
 
Go to the AGCO parts book and look up the parts diagram of the front. It will show you the parts! Log in as a guest and go to AGCO-Allis
 
(quoted from post at 14:32:08 06/07/19) Go to the AGCO parts book and look up the parts diagram of the front. It will show you the parts! Log in as a guest and go to AGCO-Allis

NeFOzv1.jpg


According to this, there should not be three washers between the adjustment nut and the outer bearing & cup.
 
Maybe the extra washers were to compensate for wear or to get the nut on some better threads on the spindle. Sounds like it
needs more than washers!
 
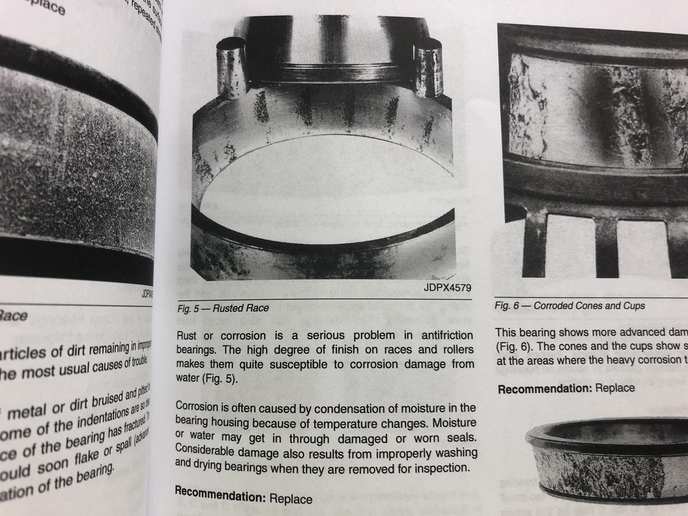
Things look pretty normal. When cleaned to metal only, you will be able to see the wear. running loose will
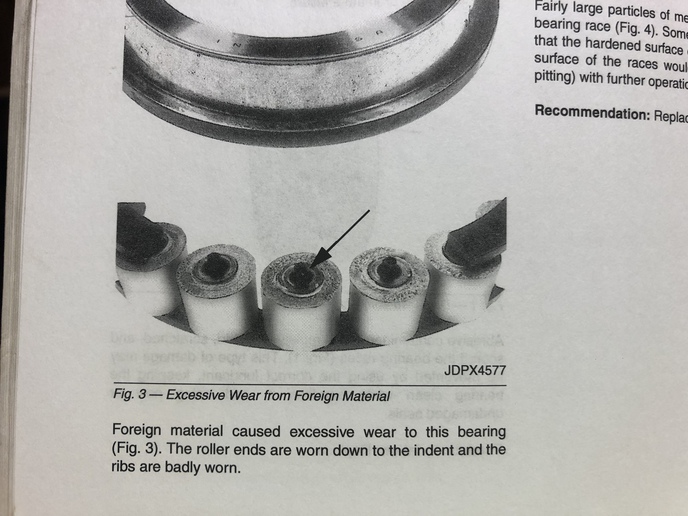
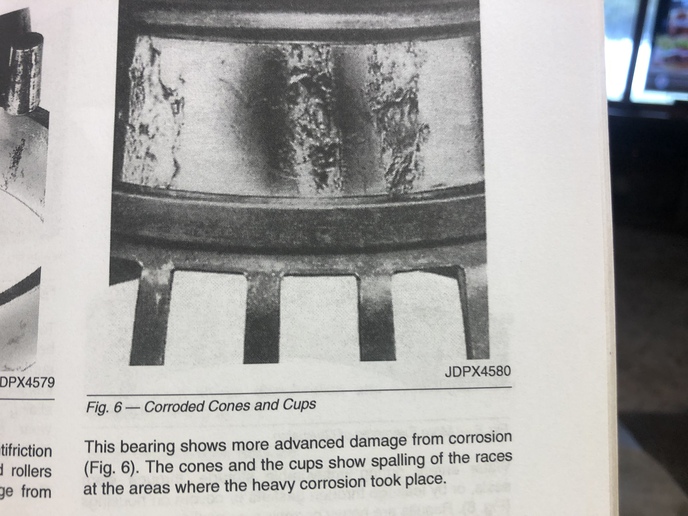
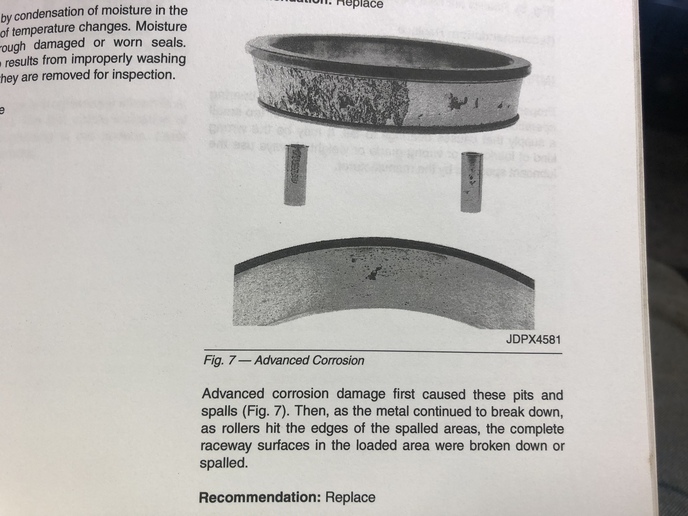
destroy the bearings, so be prepared for that. There are two terms that apply: spalling, and brenelling. Search
for roller bearing spalling, and roller bearing brenelling in google images. Spalling is where the surface has
flaked away from its foundation and left a pit, or pits. Brenelling is indentation of the surface from foreign
material getting between the rollers and the races. (probably from spalled flakes!). Rubbing from being crooked
also applies.and may be found on your bearings. Each race will have a code number on it stamped into the edge.
these are industry standard numbers and allow you to buy new parts at a store like Motion Industries. The seal
may be standard, or may be AC only, check with the bearing company. To remove the outer raced, you will need a
long punch 10 inches long with a 1/4" tip. Use this to punch out the outer races from the hub. From inside out,
you will find 2 slots that allow you to put a punch tip on the race. Alternate between these two slots working the
race out of the hub. Then the other race. clean again. Put the new races into their recess, aiming the correct
way (big size out on each). Use the old race as a driver with a brass hammer (you needed one any way) they will
seat with a distinct sound change in the event. Grease up the inside till it looks like the one you took off
using real wheel bearing grease (stringy goo acts like warm mozzarella)

Repack the bearings by taking a egg sized plop of wheel bearing grease and place it in the palm of your non
primary hand. Holding the cone and roller (inside assembly with the rollers) so the big side is down, smish
grease into the spaces between the rollers by pressing the assembly into the edge of the plop of grease and
pushing that little scoop against your palm. Repeat and move around the bearing for 5 minutes or so till grease
comes out the top side of each space between rollers. Messy, but satisfying. After the grease has squirted out
all around, use more grease till it looks kinda like the picture you posted. Lay it aside and do the other one.
Put the big bearing into the hub facing so the small end in inward, then put the seal into the hub using the brass
hammer. Now coat the spindle with WB grease to look like your old one. take the hub and slide it on the spindle
till it stops. Make sure the inner cone and roller is seated on the shaft. Pick up the outer bearing cone and
roller and insert it, Follow that with one washer (should have a tab sticking out to the inside that goes in a
slot in the threads. Put the nut on and tighten it while pushing the hub farther on. do not just crank it
tighter, work the parts to assure it is going together, the clearances are tight. When you have the nut just
barely tighter than finger tight, look at the back side of the flange to see if it is close to as far as it was
running before. now tighten the nut a little more (about the weight of your new adjustable wrench sticking out
sideways. remove the wrench, and whack the flange with the brass hammer toward farther on, and around the sides
some. this seats everything and probably loosened the nut. Use the wrench as above and allow that torque of the
hanging wrench weight to be your guide. Look at the cotter pin hole and you may tighten the nut only to the next
aligned hole if needed, (no backing up!), apply the cotter pin, and bend so it does not scrape the new cap. Find a
new dust cap and apply it to the hub. Check the tightness of the nut after a few days of driving it around.
(no tighter than the weight of that wrench) Jim
 
Like Russ said, just look at your threads on the spindle, they aren't great. By replacing the bearings and races could put you out to the better threads but not likely. I do like the fuel can dust cap for the hub. Just replace the bearings, races, and nut and see how it is, still might need a washer or two. chris
 
That is what I was thinking too.
And if your threads are questionable get a nut for a Ford tractor ( swager type )I think this site even sells them. They have a collect type affair that draws down into the worn threads. I have used them on some worn out JD spindles with good success.
 
Thanks, I enjoy teaching (university prof) so being as clear and inclusive as possible helps the learner, and keeps me from repeating myself.
 
I think if dirt, mud or dust gets into the bearing over time it acts as a lapping compound and the bearings get loose. I have had to add a washer to get a bearing
adjustment as the nut wouldn't go on far enough. I know the bearings were worn and should have been replaced but I wanted to get going so I put it together. Point is even
if the bearings look OK they might still be worn. OK for a slow a speed application like tractor front wheel bearings is different from OK for other higher speed or
higher load conditions and it depends on how much use the tractor will get what you can get away with.
 
The extra washers could be a result of the races turning in the hub, recessing further into the hub that originally machined.

When you go to remove the races from the hub, they should be tight, not able to turn in the hub. If they are a little loose, they will still work, but they shouldn't be really wallowed and recessed.

The other thing that comes to mind, there is a spacer on the spindle, looks to be part of the felt seal by the diagram Will Herring posted. It appears to be there in your picture, but when you get it all cleaned up, be sure it is there and not worn thin by the bearing turning against it.
 
Could be worn bearings and races or the wrong parts in there,at any rated I'd go with new bearings and races.If you could come by my place I have a bunch of those old WD tractors
for parts and get the whole thing off.
 

Some manuals specify that when tightening the nut that holds the bearings and hub that the wheel should be turning to help it find its "snug" place without too much force.
 
The bearing races are probably loose and spun themselves into the hub three washers deep.
 
Thank you so much for all the great information everyone. So I have brand new bearings and other parts to put inside the hubs, but I was hoping the original hubs would be salvageable. Are there any dimensions or wear marks to check for once I knock the old races out? I bought a punch so I can remove the old races.

Going to clean everything up and see what kind of wear and other damage I have (such as on the splindles and the threads and inside the hubs). Any critical dimensions to watch for?

It is just crazy to me with those three extra washers, that I still had like 1/2" of side to side play in this wheel hub. And the other side does it to (though the cap never was welded on).

Janicholson -- Oh my goodness, thank you so much for this write-up. Gives me a real good idea of what to do step by step, you're my hero!
 

We sell tractor parts! We have the parts you need to repair your tractor - the right parts. Our low prices and years of research make us your best choice when you need parts. Shop Online Today.

Back
Top