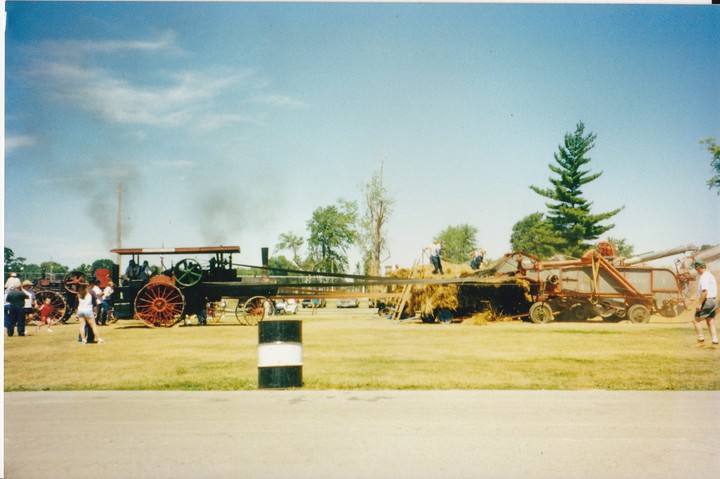
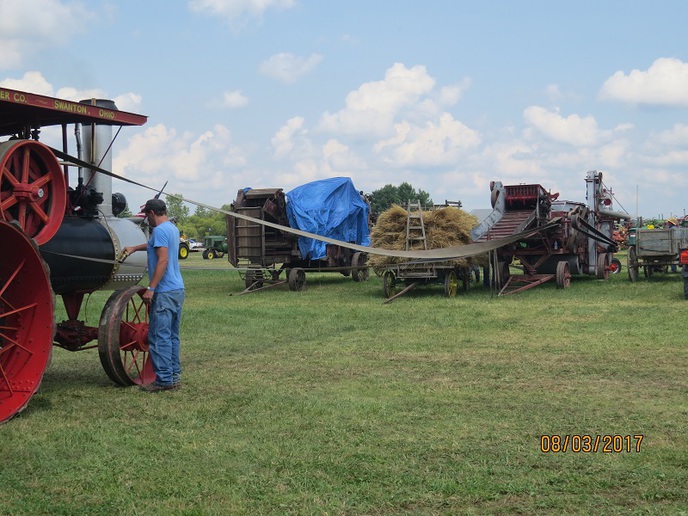
Steam engine, threshing machine pic.

fixerupper

Well-known Member
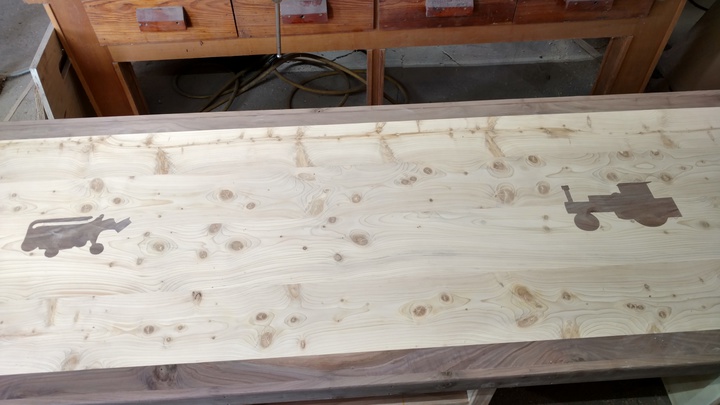
Do any of you guys have a full side view of a steam engine belted to a threshing machine? I need a picture to look at to get the proper belt twist orientation and belt sag for an inlay I am doing in the top of a desk I made. I can't come up with a perfect side view on the net. Found a fairly good view on you tube but I can't figure out how to save a still picture off of You Tube. I took a picture of the You Tube vid with the cell phone but I would prefer a good picture I can enlarge. Thanks
 
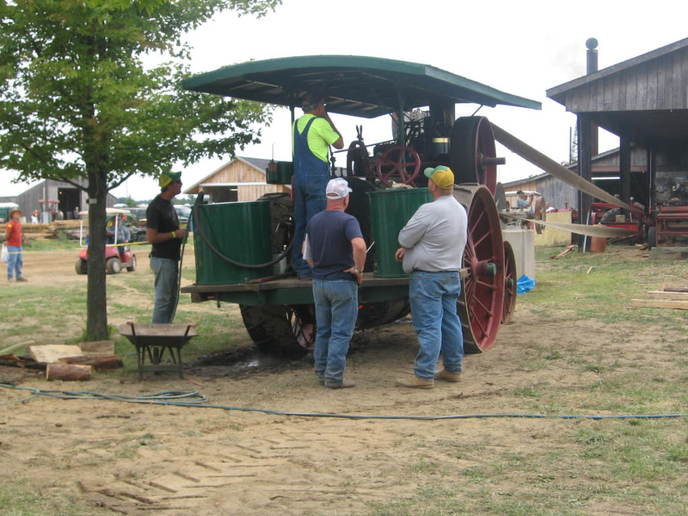
Here is what I am working with.
a260304.jpg
 
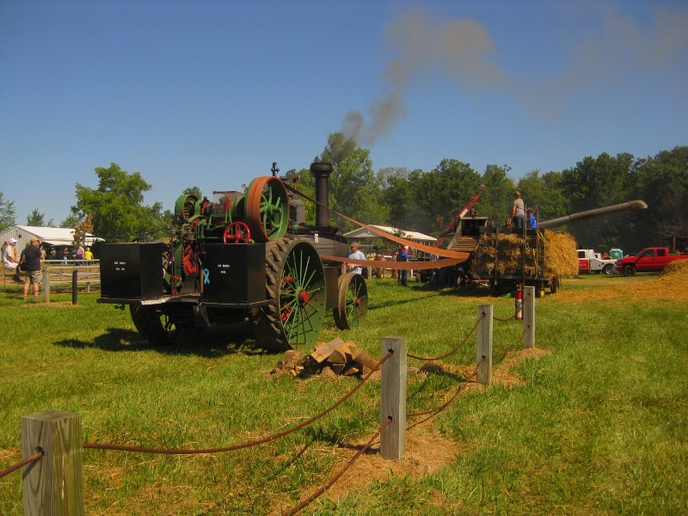
Since a steam engine will run either clockwise or counter clockwise most of them were run with one twist in the belt.
 

Thanks for the quick pic Loren. Yours shows more of a sag on the slack side than the picture I have but of course every belt setup varies. This belt I am routing and inlaying into the desk top is a one shot deal, there is no turning back once the groove is cut. I plan on free handing this thing so wish me luck!
 
the thing is, the harder the pull the more sag you will have. i was taught that you twist the belt towards the pulley.
 
Looking nice but in my opinion a little too far apart. Sounds crazy but you can pull up a movie that has some very good farm action with belted machines. Of Mice and Men. They have a lot of action around the threshing machines with belts hanging right in you face. It was made in 1937. Very creepy story. Good though.
 
I agree they are too far apart. 1/2 that distance, or twice the size each. Belt sag can be 1/2 pulley diameter at the center. (lowest point of the belt if twisted. If the images are painted on already, bigger ones would cover them! Jim
 
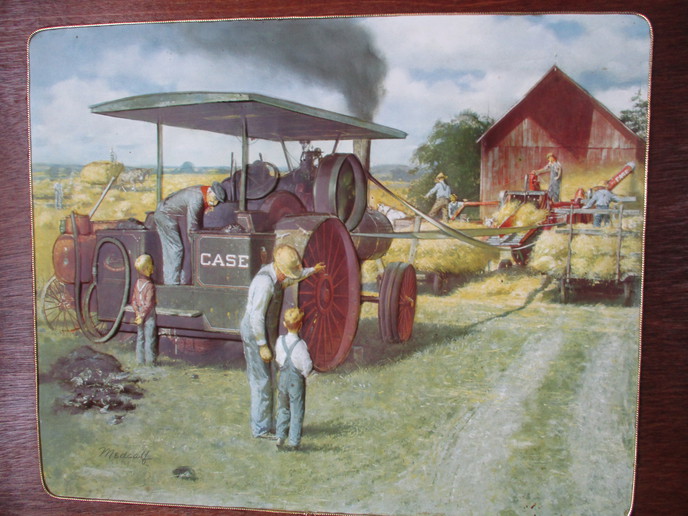
HA! I knew I had a picture somewhere. Sometimes it takes me days to find them in my files. You got lucky,it only took half an hour to find this one.
a260320.jpg
 
Ya they are too far apart but I put them too far apart on purpose. Two people will be sitting at this desk and each machine is straight in front of each person. In retrospect I should have made the inlays bigger but I just couldn't blow up pictures to use for a diagram any bigger than that with the computer. I could have gone to some professional printer and I'm too tight to do that. LOL So this is what it is. The inlays are only silhouettes and not very accurate at that. The engine is a 110 Case and the separator is I think a Deere. Those two were the easiest and simplest to trace and cut out with the equipment I have. This desk will be where the show PA announcer will be in the gas station at the Albert City Threshing show along with the show information person. Well, I guess both of them are there to give out information. If this was a fine office desk I definitely wouldn't have made it out of Concolor Fir wood and it would be more refined.
 
Here's another question; would it be best to just forget about the belt because of the spacing? It would save me several hours of nail biting.
 
Looks like he's running inside/ out there. Makes it tough to run the snuff can through the flywheel.
 
the belt would have been 100 ' endless , so about 50 ft between units. agree u need bigger machines.
 
Are you just looking for opinions? It's gonna just look like a line across the desk without any meaning.
 
Darn, I wish the edit feature worked. Maybe I should paint the belt with a brush and walnut stain instead of inlay. i just tried routing free hand on scrap wood and it's way too wiggly. I think I can sweet talk Marilyn into painting it for me as my hands just aren't that steady. This thing will have 12 coats of urethane put on when I'm done with sanding between each coat for a final thickness of six coats. This is more of an abstract art thing anyway.
 
Loren, I got that very picture. When I was in high school a favorite swimming place was at Lake George county park. That lake had pockets in the bottom that were about a foot deeper then the rest. The pockets were about the size of a pickup box and you never new when you were going to step into one. The salesman for Case dealer was a little short round guy and he stepped into one of them and water went over his head. He was frantically screaming each time he came up and I went over and saved him. If I would not have been foot taller then him he would have drowned me too because once he grabbed me there was no breaking away from him. Luckily I could keep my head above by standing on my tip toes. So next day he comes to our home to thank me for saving his life and gave me that picture in a nice frame. Probably 50 years ago but I still have it. Not hanging on wall right now but it will again sometime.
 
In the pictures I have seen so far it looks like the twist is about 1/3 of the way back from the separator because of the smaller pulley on the separator. I might lay some dark ribbon down on the desk between the two inlays to see if a belt will attract or detract from the whole scheme of things. The rest of the desk has enough contrasting features to stand out already. Will show a pic of the finished product in a couple of weeks.
 
I agree with the comment that the belt is not going to be depicted well in your design. Beautiful piece of wood, hate to suggest this but maybe turn it over and modify your concept. Steam tractor could be pulling something...?
 
How about this. Have a couple of odds and ends between them. Couple of
horses with a rack wagon, people, stack of grain sacks, hay stacks, a
tree, etc. Think about it. Liven up your design with little effort.
Just a thought.
 
(quoted from post at 19:47:51 03/07/18) How about this. Have a couple of odds and ends between them. Couple of
horses with a rack wagon, people, stack of grain sacks, hay stacks, a
tree, etc. Think about it. Liven up your design with little effort.
Just a thought.

I have thought about adding a horse or horses to the center since we do have a bunch of horses at the show though I am not a horse lover. We are known for our horse drawn trolleys, maybe a trolley would fit in there. If I was real patient I would add a small inlay to each corner of the desk top but it’s all time consuming hand work and The clock is ticking toward getting ready for upcoming field work.

I got some ribbon and laid two ribbons out between the steamer and separator to simulate a belt just to see what it would look like. It looked BAD. Nix the belt idea! The rest of the desk has lots of contrast with walnut and concolor fir boards arranged in 45 degree angles on the front and sides. I might just leave it as it is. Will post pics of the whole works when I’m done with the finish in two weeks.
 

We sell tractor parts! We have the parts you need to repair your tractor - the right parts. Our low prices and years of research make us your best choice when you need parts. Shop Online Today.

Back
Top