Roto-tiller adjustment - front tine style

bc

Well-known Member
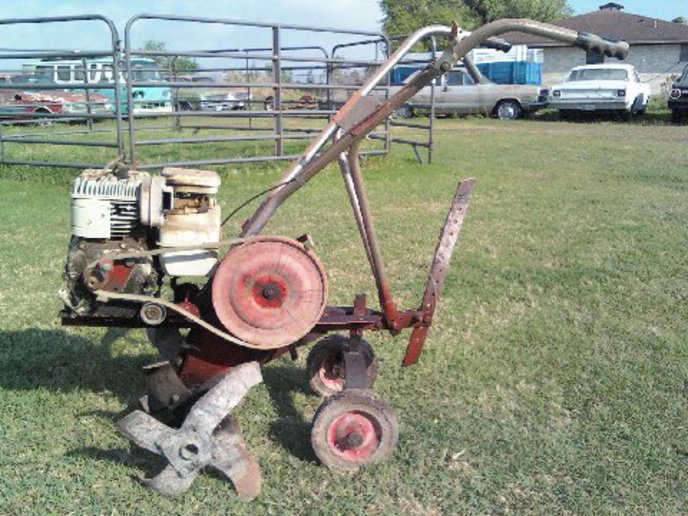
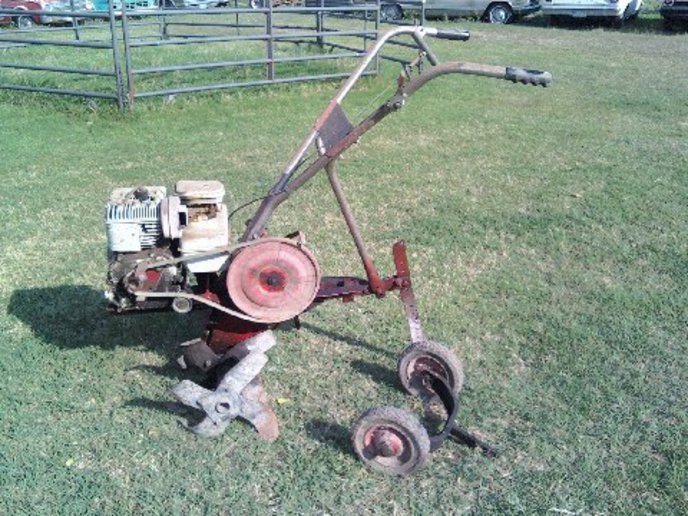
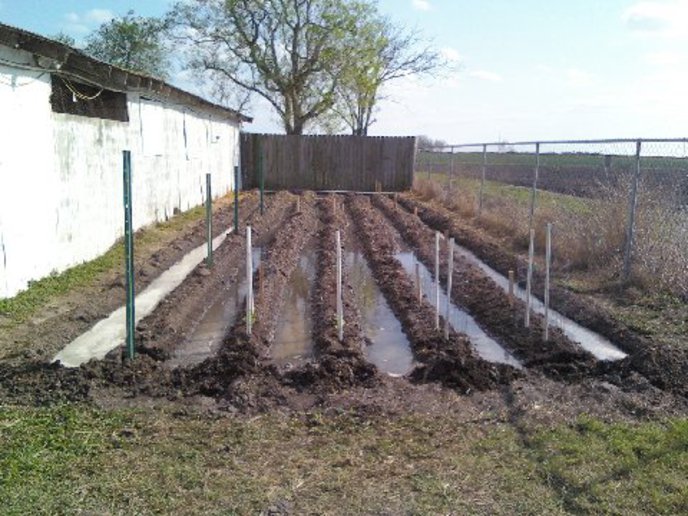
Hi, Started roto tilling for the garden but I'm not sure how to adjust it so I don't have to hold it back when it jumps around breaking sod. It's an old style front tine tiller.

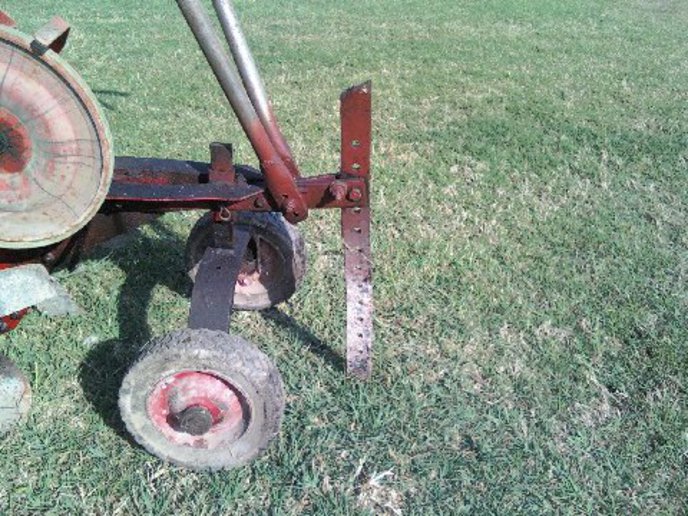
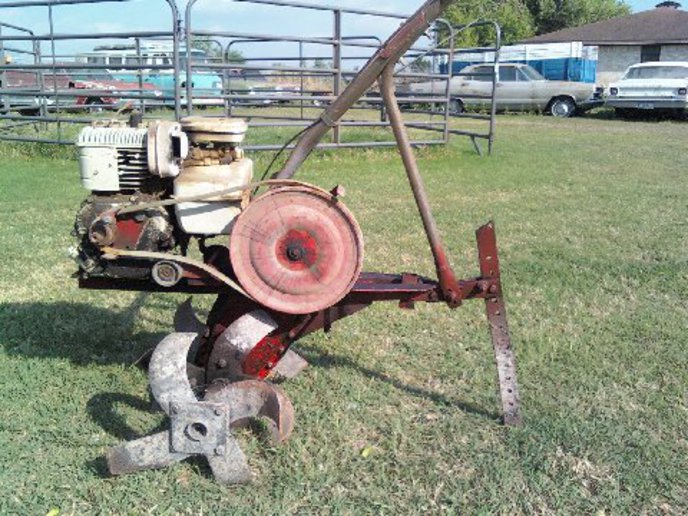
It has a yoke in the back with 2 or 3 adjustment holes held by one bolt. It swivels up and down as it only has one bolt which also holds the handle bar brackets.

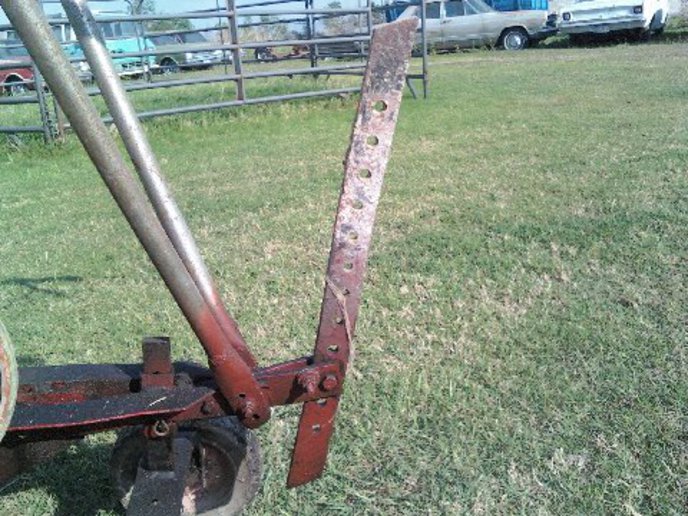
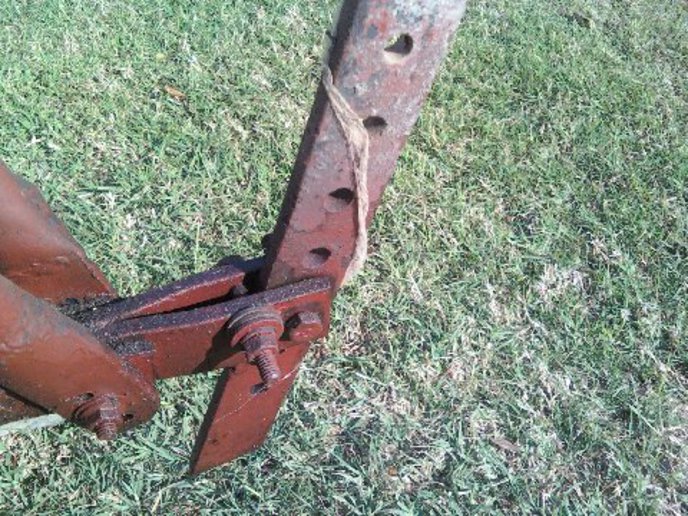
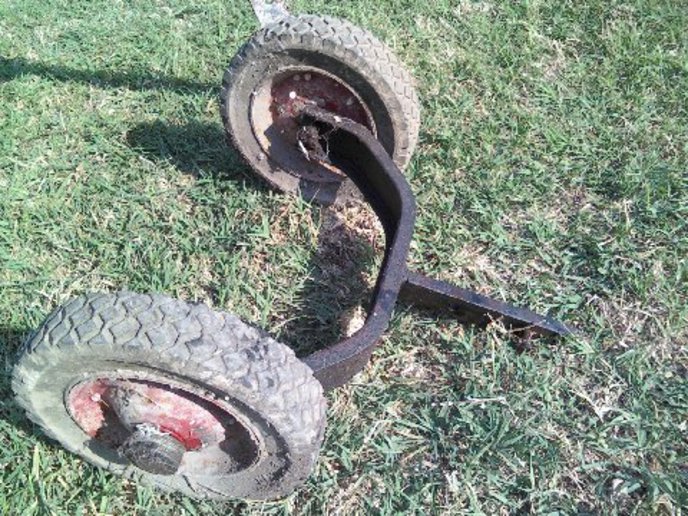
The back of the yoke has a hole for a long piece of flat bar with angled ends and plenty of adjustment holes. I think that is how it is supposed to hold the tiller down but since the yoke swivels it doesn't do it.

The wheels are also adjustable up and down but are on the lowest setting.

Thanks for any help on how to set it so it is easier to use.
 
Got a picture?
The wheels should be up, or removed. My old front tine (that I quit using when I bought the rear tine a few years ago) could have the wheels removed with just a clip.
The drag bar in the rear (the thing I think your calling a yolk) has to be secured so it won't swivel. It will be dropped down into the dirt like a drag, which is what keeps the tiller from trying to go forward. I assume the other bar with may actually be the drag bar?
Again, a picture is worth a thousand words.
I can take a picture of mine tomorrow if you don't get any help from the others, it might help you compare what you have.
Meanwhile, here is a picture of one I got from Google.
WhiteFT600.jpg

See the bar in back, that would lower down into the ground to act like an anchor to keep the machine from lunging forward, and of course the wheels would either pivot up or be romoved completly. ***YOU NEVER WANT TO ROTOTILL WITH THE WHEELS DOWN*** unless you just enjoy beating yourself to death!
 
Push downward on handles to control the agressiveness of the digging, pulling action. We had one for years, learned to control machine by down pressure on handles. We removed rear tine, which was supposed to control the depth. Worked much better without it. If your wheels are adjustable, that would be the way to control the depth. What you're doing is pivoting on the wheels to control how the tines attack the ground. Rear tine tillers can be controled similarly by lifting handles to control agressiveness of tines.
 
Thanks. The one in the picture has the same style of adjusting bar in back. Guess I'll tighten up the bolt that will keep the horizontal yoke from moving up and down and then play with moving the flat bar up and down so I get the right depth. Right now the wheels are all the way up. I'll try holding the handles down but I've usually been busy holding it back to make it dig in and prevent it from running away.
 
bc,
I drug the old tiller out of the barn this morning and took a few pics so hopefully you can compare this one with yours and help with understanding how it's supposed to work.
In this first picture, this would be in the transport mode, for moving it from storage to where you want to begin tilling. Wheels down, drag bar up:
a35327.jpg

In the next 2 pictures, you will see a close up of the drag bar and how it's mounted and what keeps it from folding back when in use:
a35328.jpg

.
a35329.jpg

In the next picture, I lowered the drag bar but left the wheels in place. The wheels are just barely off the ground:
a35330.jpg

Next shows the wheels removed, they slide in and out and are held in place with a pin and clip. I've also seen some that fold up out of the way:
a35331.jpg

And next is a picture of it ready to till with the wheels removed and the drag bar in the down position. Notice there are multiple holes in the drag bar so you can adjust the tilling depth:
a35332.jpg

And the last 2 pictures show the amount of play in the drag bar. This works well because if you need to pull it back a little bit you can without lifting, but the bar is pretty well vertical when tilling as shown in the last picture:
a35333.jpg

.
a35334.jpg

As Ray stated below, you push down on the handles to keep the tiller from going forward. Simply adjust the height of the drag bar to adjust how deep you wish to go. Bar deeper means tilling deeper. Ray also said he leaves the wheels down, but I disagree. Whenever the wheels touch the ground, that keeps the drag bar from engaging which means the tiller wants to pull forward and your still having to hang on to try to keep it from going forward. Let the machine do the work as it's designed to and you will be amazed at how easy it really is to use.
A couple of other suggestions, if your tines and worn and dull it helps to sharpen them as they will cut easier and lessen the bouncing. Also if your cutting new soil with grass, the grass bunches up around the cutting edges of the tines and that is like trying to drive nails with your forehead. Best to get rid of the grass first, or keep the tines clear of grass the best you can.
Hope that helps, and enjoy your garden this year!
 
Thanks for the pics and explanation Downsouth. That makes sense. It never dawned on me to remove the wheels which would limit the depth and affect the leverage. In the past, I've had the drag bar set sticking forward and off the ground so I could use my foot to push down on it for leverage in picking up the tines when moving it around or turning corners. I'll tighten up the bolt so the drag bar yoke will stay horizontal. Then try the down pressure trick.

By the way, for spring seed bed preparation, how deep would one want to till? Seems like I was getting about 8" or so yesterday. Thanks.

I also intend to plant my rows so I can remove the two center tines and run down each row to get rid of the weeds unless I just put straw down. Kinda like my grandpa did with the cultivator behind his David Bradley.
 
I would say 8 inches would be sufficient, but then it also depends on what your planting. Deep root veggies like carrots may require you to go deeper. I normally don't plant carrots because it gets hot early here. Going to be close to 90 today. Our garden has been in for at least a month now, tomatoes I have in a seperate bed have been in for about 6 weeks now and are growing nicely. One other small bed has onions and radishes. The radishes are all but gone now and the onions are almost full size.
Have fun!

Pic below just after planting and adding water. Water courtesy of the Rio Grande River.
a35339.jpg
 
In my experience, the front tine tillers do buck pretty bad, and are especially bad when you are trying to break sod. On the other hand, I like a front tine better for weeding between rows, since the rear tine tillers are so long and hard to turn around at the end of the row.

When I put in a new garden plot in an area that had previously been lawn, I had a neighbor come over with his smallish JD tractor and PTO driven rototiller. He was able to totally prepare the garden area for planting in about half an hour. I had been trying to break ground with my old Troy-Bilt Horse for several hours before that, and I was pretty tired of having it jump around and lunge ahead. The neighbor charged me $50 and drove the tractor to my place. I thought it was $50 very well spent.

I suppose that eventually I would have got the area prepared with the Troy-Bilt, but I bet it would have taken many hours to get the garden as smooth and deeply tilled as my neighbor was able to do in half an hour.

Years ago, my Dad had front drive tillers, and we did our gardens with them after first plowing deeply with a moldboard plow. It was hard work then and I am a lot older now. No Thanks! I think that breaking sod with a front drive tiller would be a real nightmare...so I would be looking for someone who has the correct machinery to do it for me. Good luck!
 

We sell tractor parts! We have the parts you need to repair your tractor - the right parts. Our low prices and years of research make us your best choice when you need parts. Shop Online Today.

Back
Top