(quoted from post at 23:46:52 03/20/11) How long did it take to replace that seal? I need to
do mine. Was it a tough job? Rick
Before I tackled it I would work at removing the steering wheel,,, Mine needed replacement any ways so I broke up the plastic and used a Ho-made puller to get it off...
Disconnect battery and swing out . Remove hood, air filter, mount the voltage regulator is on ,,,just the plate leave reg attached and wires,,, This makes it EZ'er to remove the cowl "WINK",,, tack cable at gen are were ever the drive end is,,, instrument cluster (tack-gauges) mark and note were wires/lights go, disconnect tach cable,, throttle (take a pix of the lower actuator assy),,, couple of bolts at the rear cowl support to steering gear,,, take the 15/16 nut off for ignition switch, head lite switch (has a Allen screw that retains the pull knob , push'em thru leave wires connected,,, choke cable at carb, and what ever bolts hold the cowl at the front.
Blow/clean off rats nest on top of fuel tank
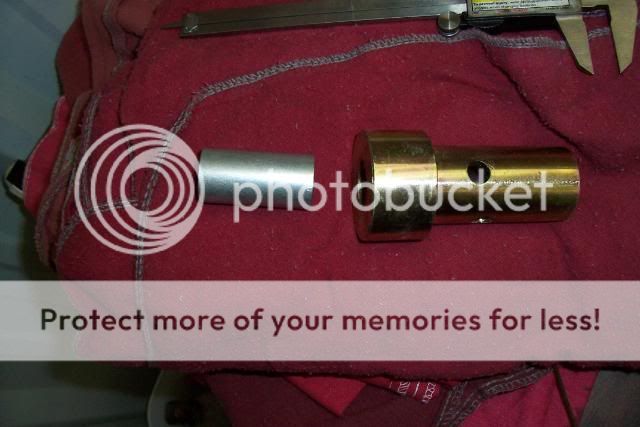
All clear blow the the steering gear clean,,, pry upper bushing out of tube around steering shaft from the top (just under were the steering wheel sets) This may B optional more work than needed),,,remove the 3 bolts that retain the upper housing (pan under tractor to catch P/S fluid),,, Hold the section under it and lift off,,, Sand the ware mark free of rust that the old seal left on the shaft,,, Figger out how you are going the use the tool in the seal set to drive on the speedy sleeve,,, tap the sleeve into place,,, I had already figgered out were i wanted the sleeve to live the rest of its life but when all said and done the sleeve bottomed out just were i wanted it... ( I did add a drop of lock-tite to the I.D. of the sleeve :twisted: )... I pried the old seal out of the housing with a crowfoot bar and drove the new seal home (spring side up look'n at ya) till it bottomed out... Reverse assy...
Dunno time,,, I took it apart 1 to 1 1/2 hr. Ordered the parts took a few days,,, did the speedy sleeve seal 15 min. let it set till Friday afternoon,,, worked about 1 hr till my legs gave up on me,,, late Saturday went back at it maybe a hour to put it back together,,, I find a extra 1/4" bolt so go look'n and find I did not tighten the muffler clamp that holds the air pipe to the filter on so the hood comes back off,,, find were the bolts goes,,, I did split it a year ago so I did not have the normal stuck bolts deal you normal will run into...
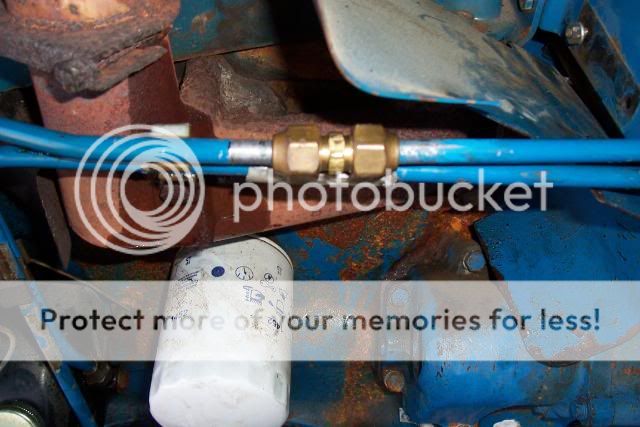
First one I would say 4hr give are take.,,, next one a EZ 2 1/2 to 3hr.,,, The power steering line made more work out of it,,, the insulator for the power steering line on the left were one hood bolt goes is stripped out,,, was gonna put a heli coil in it but out of inserts so will have to R&R the hood again some day to take care of that...
Work on the wheel and the bolts that bolt the hood on,,, once you got that whooped its just wranching on a tractor...
Seal kit for my 69 3000 was SRK632AA (TISCO)
dunno why the seal failed,,, all looked good even the original seal...
Look the positive battery cable over good for cuts were it goes under the cowl.
http://ytforums.ytmag.com/viewtopic...ostorder=asc&highlight=cable&start=15
And install a foot feed
http://ytforums.ytmag.com/viewtopic.php?t=591546&highlight=foot+feed


 [/img]
")