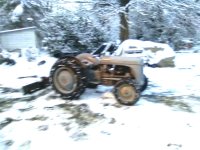
New to me Franken-Fergie

Mad Farmer

Well-known Member
Location
Northeast
Hi folks, first post here, I'm usually next door on the N Ford forum.

What brings me here is I've gotten a good deal (I think) from a friend on what seemed to be a TO20.

Turns out to be a Franken-Fergie. I started working on it today and has ser# for 51 TO20 on dash, but a 52 Z129 TO30 engine. I knew in advance two tractors had been used to make this one.

Has been sitting two years inside and it just got evicted from the barn. I'm trying to get it running before I move it. Looks to be original except engine, and 3-wire Delco alternator 12V conversion w/an amp meter (seems correct wiring). Older paint job, sheet metal fine except a few rust holes below radiator

Checked distributor, some mud duabbers moved into the cap. Cleaned that up and the contacts on cap and rotor. Blues Streak points were usable, close to correct gap, cleaned them up and set static timing.

No gas in tank or carb. Added a gallon and no fuel out of carb drain, or fuel line to carb. Took off sediment bowl and just got a slow drip. Inside of tank looks clean so something has junked up sediment bowl/fuel petcock assy. Does not look to be an original, sort of like a Tisco? Were the originals like the ones on the N Fords with on 2 turns, and the reserve setting full out?

I need to drain the tank and take off the sediment bowl. I've heard it's hard to find a good replacement that is not a new POS.

Anyway that is were it sits now, until I get fuel flow. Plugs need a cleaning and will check compression when I have those out.

How did I do for $500? Rear rubber is almost new/no wear but is older and has a few cracks.

I'll have questions when I get into it deeper.


mvphoto97551.jpg


mvphoto97552.jpg


mvphoto97553.jpg


mvphoto97554.jpg


mvphoto97555.jpg

mvphoto97556.jpg
 
Same fuel system with same problems. I usually start at the brass fitting into the carb but sounds like you already found the source of
restriction.
You probably don't know how to act with the better running boards or brake pedals compared to a Ford.
If you ever go to adjust those brakes, tie the brake rods up high, steering wheel is a good point) removing any pressure. Jack up the back,
tighten until the just don't turn, back off 3 maybe 4 clicks and the wheels turn, release the ropes holding up the brake rods and check your
clearance. Those rods should be off the running boards and working properly.
IF you have leaky brake seals you can either replace the wheel seals or install Sure Seals.
 
Hi Mad Farmer, Yeh, I hang around this forum too as I also have a '50 TO-20. I think you got a good deal.
I wanted to replace the valve assembly on mine, but found that the threads in the tank itself had been cross threaded at some point so had to stay with the old one. It doesn't leak, but the valve doesn't shut off.
 
In which case you can go to RedRockMFG and get the electric in line shut off solenoid. I did that to the wife's Fergy and no longer worry
about fuel contaminated oil.
 
Bruce and Jim. Thanks for the tips and advice. I've not played with the brakes yet (or had running boards, well I have a 3 cyl 2000 too) but I'm sure Bruce's advice on brake adjustment will come in handy. No sign of leaky seals like on my 9N.

Hdonly, looks like you will be chasing some of same TO problems as myself. Concerning the red tractor, I've seem SBC painted Ford red and SBF painted Chevy orange. Oh the horrors......

Concerning the fuel shutoff leak. Someone on my mine added a 2nd shutoff just before the carb. It's just a simple shutoff that fits inline with compression fittings. Seems a simple way out without resorting to a selinoid shutoff, but you still have to remember to shut it off......I'll get a picture.

I dug into the tractor more yesterday afternoon. And found more stuff to fix while working on sediment bowl assy. I asked about the bowl assys on the 9 2 8 N forum so will cross post the response/questions here.

The ugly was: sediment bowl w/O screens, fuel line froze to fitting, and gunked up carb

Post #1

"PITA getting the bowl assy off. Fitting for gas line froze/rusted into fitting and fitting rounded off by prior monkeys work. I got the reducer fitting loose from the bowl assy, but had to disconnect the gasline at the carb, bend it straight, so I could spin off the reducer fitting without twisting the line. Should have just cut it off and put in new as will be now anyway.

The bowl assy was missing both screens and plugged with junk on the tank side.

Carb was full of E-10 snot from sitting two years. So much it plugged the bowl drain so no gas flowed out, I thought the needle/float was stuck.

Off to order a carb kit......"

Post #2

"Tractor is a Franken-Fergie. I knew this to start with and have downloaded and read operator/service manuals.

Been looking at carb kits. Not sure what the subtle differences are in the kit contents? Engine got a switch, it's a Z129- Continental TO30, carb is a TSX 361A (from TO20) not the TSX 458 (TO30). Looks re-buildable. Return spring for choke shaft is rusted/shot (fits on shaft where choke lever hooks up). The partial kits don't seem to have that but full kits are a lot more $$$$.

I have the MF Parts Book for the TO20 TO30 TA20 tractors. Seems there are some slight changes to internals to TSX 361 vs TSX 458 carbs (i.e. main nozzles different, main needles the same). I guess this will effect tune a bit? This is pages 46-47 TSX 458 and pages 48-49 TSX 361A of MF parts manual.

NAPA lists same kits for partial and full repair kits, TO20 and TO30. Kits here at YT are different for TSX 361A and TSX 458.

Any thoughts suggestions on this? I still need to tear down carb and dunk it to see the good the bad and the ugly.

I should cross post these questions in the Ferguson Forum here where I started a thread on the tractor. Done!"

This post was edited by Mad Farmer on 09/25/2022 at 04:44 am.
 

Inline fuel shutoff I mentioned. I'm keeping that when I replace the fuel line.

One other thing of live and learn...... Be careful tightening down the brass fuel inlet/filter to the carb. It's thin where the fuel line screws in near the middle, and easy to squish when tightening down inlet. Was a PITA trying to get fuel line fitting started, now I know why, but I'll get by without replacing it.

Looked over 12V conversion. Seems done proper with amp meter instead of idiot light and internal resistance 12V coil. I might later run thicker main wire(s) from alternator to/from amp meter. Battery cables nice thick ones but insulation getting cracks. For now will clean the cable and use liquid electrical tape as a band aid fix.


mvphoto97596.jpg
 
(quoted from post at 12:18:24 09/25/22)
Bump up Sun PM.

Suggestions on carb kit and sedmient bowl assy sources?

Good is better than Chi-Com pot metal crap.......

Update. Still working on getting carb cleaned out. Can't find anybody with an old time carb dunk tank.

Looks like I'll be getting one of the carb kits from here and a Ford N type sediment bowl assy. Working on fabricating new fuel line today too.

Some useful contact info. Parts/tech help Standard Ign. Can call there and get ignition and carb kit parts #s

(718) 729-4357
 
(quoted from post at 10:31:26 09/26/22)
(quoted from post at 12:18:24 09/25/22)
Bump up Sun PM.

Suggestions on carb kit and sedmient bowl assy sources?

Good is better than Chi-Com pot metal crap.......

Update. Still working on getting carb cleaned out. Can't find anybody with an old time carb dunk tank.

Looks like I'll be getting one of the carb kits from here and a Ford N type sediment bowl assy. Working on fabricating new fuel line today too.

Some useful contact info. Parts/tech help Standard Ign. Can call there and get ignition and carb kit parts #s

(718) 729-4357
You. An get a 1 gallon can of chem dip at your local auto parts store.. it even comes with a plastic basket for ease of use.
 
You. An get a 1 gallon can of chem dip at your local auto parts store.. it even comes with a plastic basket for ease of use.

I checked that cleaner a little pricey at ~$40/pail. That's near the price of the complete carb kit from here, $48.

Once I got inside the carb it's not as horrible as I thought. All the parts seem reusable except the spring on the choke shaft and a slight groove on the tip of the main adjusting needle. I might be able to get by with one of the basic kits ($20-21.50)? But they don't have the choke shaft spring or the main needle.

I cleaned out the carb halves and the passages are pretty clean, I'm soaking them in vinegar to get rid of the rust. Will give them another scrub tomorrow then blow out with air. I had to cut it short as was working outside and a rain shower came by.

I'll get some pictures of the cleaned up carb tomorrow.
 
(quoted from post at 06:11:39 09/27/22) I have purchased the choke shaft spring from MF dealer.

Good to know. I have MF parts book for the 20-30 series, not sure if numbers are still valid. Nearest MF dealer is a road trip though.

The spring comes in the more complete carb kits but I'll have other parts I don't need.

I have a box of springs might be able to find one I could bend into shape..........
 

Making some slow progress on the fuel system. Have new fuel sediment bowl and complete carb kit from here. Got a piece of nickel copper brake line to plumb it in with, need to cut and flare that.

After stripping/scrubbing carb and using carb cleaner I soaked it in vinegar. That took off the light rust, but needed to use muriatic acid on a q-tip to get the pitted crust out of the bottom of the bowl. The passages were pretty clean, just the bottom of the bowl rusted up/pitted from sitting with E10 in it.

All the channels got blown out with air, then flushed with carb cleaner and blown out again. Put a coat of paint on it too. Just have some flash rust on the inside now as didn't coat with oil before painting so paint would stick. Will wipe that out out and put the carb kit in.

Before and after pictures.
mvphoto98284.jpg


mvphoto98285.jpg


mvphoto98286.jpg


mvphoto98287.jpg


mvphoto98288.jpg
 
This project got put on the back burner and I'm just getting back to it. I've the carb cleaned up but have not put it back together yet. I got a kit for it from here YT Item #: 119391, Ref: C548V $48.26.

Concerning the parts a lot of the parts are still in good condition and if not worn is it better to reuse some of the old stuff? I had to buy the more complete kit as I needed some of the springs.

No idea how many times this carb might have been rebuilt?. I'll do the intake needle and seat and the main needle shows some wear on the tip. Most of the remaining stuff seems to be in good shape.

I haven't taken out the shafts yet. I need to remove the choke shaft to replace a spring. The kit has a throttle shaft. If the original is in good shape should I leave it be?

Also unsure of how the seals for the shafts fit in? I'm assuming those are the smaller ones in the kit? The three red ones for the main nozzle, inlets seat and main needle.


mvphoto100050.png


This post was edited by Mad Farmer on 12/09/2022 at 09:14 am.
 

I need to update thread. I got it running real nice. Still some work to do but engine is fine. Carb rebuild was a sucess, I don't know if I'll even need to adjust.

Thanks everyone for the help.

Will be back with a summary of so far and pictures. Hope to be using it soon.
 
OK, so now it's running great but not charging.

12V 3-wire Delco conversion.

Appears to be wired correctly, except #1 wire is not through charge light or diode, it goes to acc post on key switch. Charge light is no longer there, Fergy has an ampmeter. When I replace wires should I add a diode? #2 is connected to bat terminal. Bat to ampmeter.

So where is the problem? Instead of taking things apart I got the Ohm meter out. Most everything checked OK, except #1 wire did not have continuity to battery with the ign key on....

On to the switch. 3 Postion switch. Hot side of switch has continuity to ign post (well it runs!), coil is wired here. #1 is wired to acc post.

Switch Acc post has no continuity to hot post with key in any position----BAD SWITCH!

This took all of 10 minutes with the Ohm meter. No cleaning connections or testing alternator..........

Current plan is to hook #1 wire to ign post on switch to get it to charge.

This post was edited by Mad Farmer on 10/09/2023 at 09:30 am.
 
I spent yesterday working on the tractor. Hooked up the carb to the intake/filter. Found that to be a PITA. Took mounting nuts off carb to get some wiggle and finally got it on. Prior owner used something that resemble sections of radiator hose for connections. Are these correct? They seal well but stiff as a Sailor on shore leave.

I next went to the charging problem. I've been inventive as my good battery is a side mount and have made that work with a MacGuyver. I'll post a picture of that later. Had to be careful + terminal does not contact ampmeter. I put a piece of wood wedged against the battery and it's securly distant.

As stated in last post problem is 3-pole key switch. #1 from alternator went to acc pole and was not making contact. Before I played with that spent some time with the soldering iron fixing questionable wires. Splices and I hate crimp connectors......I think Bat wire from alternator might be smaller than 10 gauge? I'll replace a lot of wires later.

I switched the #1 wire on the switch to the ign/coil wire post. When I fired it up it charged fine. Ampmeter was showing strong charge at first then went down after juice from starting was replaced.

Did I mention I'd never driven this yet?

I checked the brakes then restarted it and engauged the PTO, I raised the lift arms so hydraulics work. Put it in first and headed to the barn, been working outside.

I got near the barn and parked it, intention to grease it and keep working on it. This is when I discovered why you need a light/resistor/diode in line of #1 wire from alternator; tractor would not shut off. In my case the 3-pole ign switch isolated alt from coil with key off.

I left key off and shut off gas. It ran out and stalled. Strange thing is sometimes it will shut off, sometimes keeps running. I need to replace ign switch anyway. Good things are I know it charges properly, and from my short drive the brakes are excellent, can lock up either wheel.

Not sure of sourcing a decent switch local, might check the marina. Also need to replace +bat cable. I've got used 2/0 welding cable free from a friend, another friend gave me a huge old spool of rosin core solder, and NAPA has solder on terminals in stock. I'll have a nice cable for cost of terminals.

One question. I see these wiring conversion harnesses to make a 3-wire into a 1 wire alternator. They seem to connect #1 and #2 and run 2 to alt bat terminal. Is this a solid conversion? I have a bunch of used 1-wire alts, but then it's work switching the alts out and changing pulleys.......

EDIT Just got a new switch, Dorman (# 85936) , at Orielleys. Marine rated has an extra post/key position for start. $15.

Looks just like old switch otherwise. Has posts (good), not spade connectors.

This post was edited by Mad Farmer on 10/11/2023 at 11:51 am.
 

OK, I ASSumed something and made a mistake.

I was doing my testing with the switch on the tractor. Thought #1 wire from dist was to a acc post. When I pulled switch, 4 posts with start post and switch is OK. I could not see 4th post when it was mounted...........the switch is the Dorman mentioned above.

Also discovered some Farmer wiring I've not seen mentioned here, but a great way to hook up a 3-wire Delco.

Switch was wired OK and switch was OK.

Here is the trick, the person I got the tractor from never mentioned. Switch wired bat to bat post, coil to ign post, #1 wire to START POST.

You start tractor with ign switch on using shifter start. Once started using key turn to start position, this energizes #1 and alternator. Now tractor is charging.

Nice thing about this is it totally isolates #1 so there is no need for a light/resistor/diode on #1 wire. If you let someone else use the tractor explain starting up. You also still have the acc post for lights and such.

One more point, when wiring in the switch make wires long enough to unmount switch with wires attached. Then you can connect/disconnect the wires out in the open. Those little 5/16 nuts and washers get lost easy.
 
I got finally got to work the tractor some this week but need some help tuning it. Was working a back blade moving wet snow, grading it and pushing it. It did it's job but could run a little better

Tractor seemed to stumble some if I got a good load of snow to push. I made the main jet a little richer and that helped some but still stumbled some under heavy load and and did not seem to want to get full rpms. Eventually got too rich so backed off main. Seems not to want to rev fully.

This leads me to adjusting the governor linkage. I think. I've got the IT and Fergy shop manuals and read through both that but any tips would be appreciated, as I work through this.

I'm not sure who originally put together this "Franken-Fergy", and if the governor was ever properly adjusted? It has the carb from a TO-20 (TSX 361A) that I rebuilt. Initial Lo and Main carb settings (suggested in manuals) seemed OK upon first running and have not had to move idle setting. There is not much response to the Lo setting?

The Governor. The Fergy manual does not cover the "minor adjustment" done running, covered in the IT manual. The major adjustments are about the same in both manuals. The serial # on the T0-30 engine indicates a "cast weight" governor (Z129-334116), adjustments should be the same. The governor could have been updated to ball type in the past? Have not looked inside.

The IT manual suggests the minor running adjustment first (IT manual p.11 paragraph 50). They mention using the PTO rpm to determine engine RPM? WTF? How do you tell how fast the PTO is spinning? I have an old craftsman Tach/dwell meter that should work for RPMs, correct?

Should I look over the major adjustment to see if anything obvious is amiss before the minor adjustment?

I won't get to this tuning for a while unless we get warm weather. It runs good enough now so I can push some snow and pull my cordwood trailer. Thank the Lord for that.

Thanks in advance.

1 plowing.jpg1 plowing 3.jpg
 
Last edited:

We sell tractor parts! We have the parts you need to repair your tractor - the right parts. Our low prices and years of research make us your best choice when you need parts. Shop Online Today.

Back
Top