Hydraulic Pump repair or replacement. Which Pump is correct?

NWBuckeye

Member
I believe my TO-35 serial number to be 148762 or 548762. If I lift the Top off, will I be able to tell which Pump I have, and what parts I will need.
The Old pump still works but it leaks down & it won't lift well. I think either gaskets or O-rings are shot.
mvphoto34431.jpg


mvphoto34432.jpg


mvphoto34433.jpg

[/img]
 
It could be that you may just need new rings on the lift piston and not the pump. Not sure till you take the cover off.
 
Will it be quite apparent or will I have to do take some measurements?
As it has never been touched nor replaced as far as I know, should I just replace the rings or include the piston too? What is the Piston OD and cup ID supposed to be? Do you know?
Thanks.
 
Before taking anything apart, remove the right round inspection cover, have a flash light ready.

Have an implement on the 3 point, or chain the 3 point down to a midway position. Start the engine, tell it to lift.

Look inside BUT DON'T REACH IN!!!

Looking up you will see the bottom of the lift cylinder. Some dripping of oil past the piston is normal, but should not be streaming.

In the bottom photo, the 2 bolt cap, under that is the standpipe. That is where the oil comes up from the pump. There are orings at top and bottom of the pipe. Any oil driping down or boiling up from below indicates a blown oring. They can be changed from up top.

When the 3 point is going up, is the lift smooth and steady, or jerky? If it is jerky, the pump valves are bad, a common problem with those.

But, bad pump valves won't effect the leak down rate. They were never intended to hold position with the engine off. The piston uses iron rings, so never a perfect seal.

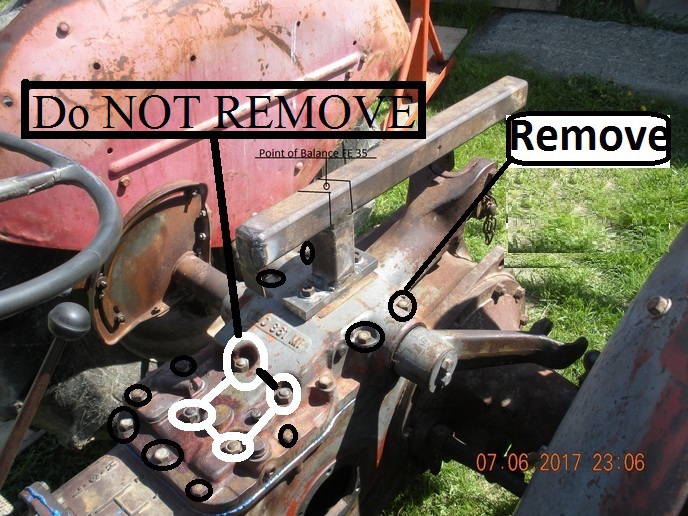
If you do go in after the pump, or plan on taking the top cover off, best have a shop manual in hand first!

Dealing with the control linkage is critical, the components are fragile, the cover is heavy! Don't try to lift it off by hand by yourself! The linkage you see through the inspection cover goes all the way up to the cover, it all comes out the top.

There was a major change in the hydraulics at some point in production. I don't have the info here today, but it involved the pressure setting (the relief valve), the design of the top cover, and the diameter of the lift cylinder bore.

The early model, low pressure system, used a 2 1/2" piston bore, the later high pressure system uses a 3" piston bore. The parts and pressures cannot be interchanged, going with high pressure on a low pressure model will break the top cover!

If the pump turns out to need valves, and everything else is good, then just replace the valves. Going deeper into the pump is an exacting area of measurement and clearances. Buying the replacement parts and expecting them to fit is not likely to happen. Best buy a rebuilt pump. BUT, call and compare, or send the old pump in first for comparison because there were several changes and confusion over serial number changes. Be sure the proper relief valve is in the pump. Again, I don't have the book here, but there is a high and low pressure, be sure to get the right valve, and don't reuse the old one, they are known to rust and erode internally.

While the top cover is off, be a good time to replace the draft link boot. It can be quite a job. Typically the rod will not unscrew and will have to be cut with a Sawzall working between the spring coils. Best do it now than later... Without a good boot water will enter the transmission. There are intricate adjustments to be done in the spring preloading procedure, a shop manual is a must!

Have fun! This is not a pleasant job, but doable. Just be careful, take pictures, get a manual, ask questions!
 
Do some basic diagnostics first, don't let it intimidate you.

It's not that difficult. At least know what to expect if you do take it in...

One thing for absolutely sure, it will not need the computer flashed! LOL
 
One more thing...

How well do you know the mechanics at the tractor shop?

These old things are dinosaurs, probably older than anyone working there. Chances are they would be starting from scratch diagnosing and sourcing parts, if they even want to work on it.

Good chance there is more experience and attention to detail right here in this forum than most shops are able or willing to give.

At least that's the way it is here, I don't know of any shop that will even look at one as anything but a haul away trade in.

Think about it, don't let it intimidate you. Just like eating an elephant, one bite at a time!
 
I've got a TO20 and wouldn't even consider taking it to someone else to fix. I don't know who I'd take it to anyway. As Steve pointed out, the tractor is older than anyone working at any of the shops around here and they'd pretty much be starting from scratch if I could even convince them to have a crack at it.

There's a big advantage to be gained from all the cussing and strain of working on the tractor yourself. Once you see inside of it, there's much less mystery of how the system works and why things happen and when. This will make diagnostics much easier on down the road and may get you stopped before a minor issue turns major.

The various manuals are an enormous help, and well worth the expenditure.

I recently pulled the top cover off my tractor (several times) by hand and by myself. I'd guess that assembly weighs about 130 pounds and really wish there'd been some stout, young help around, but there wasn't. Read up on the process before you try such a thing, as on the TO20 you can add to the repair's time and expense by going about it incorrectly. Not sure if the TO35 is made likewise.

A resource you might look into is "Bundy Bear's Shed" on YouTube. I think Lance restored a 35 last year and may have a whole series of videos on the project that you might find helpful.
 

We sell tractor parts! We have the parts you need to repair your tractor - the right parts. Our low prices and years of research make us your best choice when you need parts. Shop Online Today.

Back
Top