4H project update

JRSutton

Well-known Member
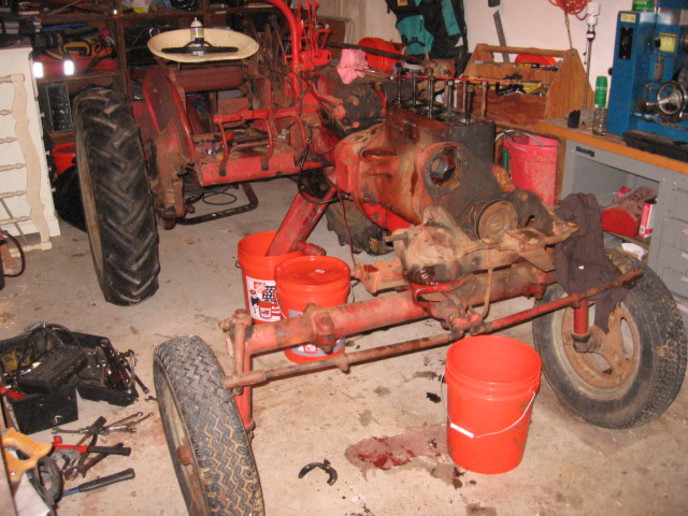
Man, a tractor sure does come apart fast when you have 8 hands doing all the work for you.

The 4h kids are working out better than I expected. They did all this last night, I was hands off, just coaching.

They're learning fast, and they're all putting in a solid effort.

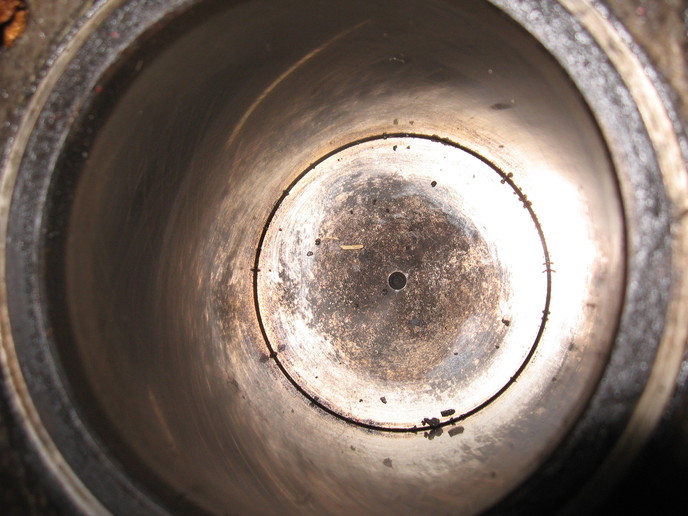
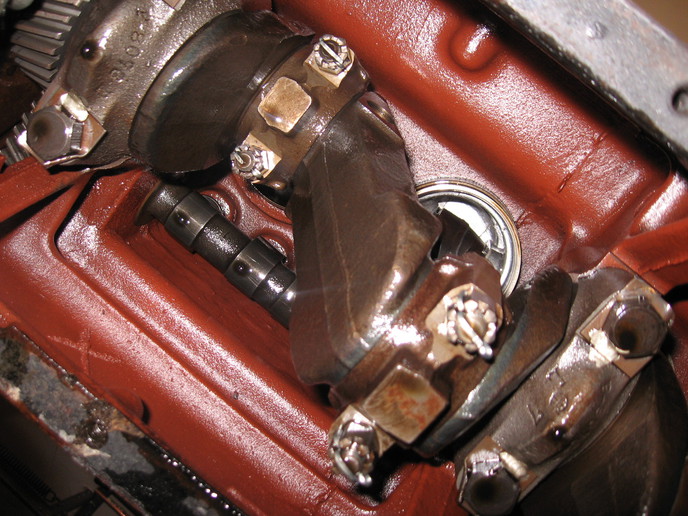
Next step is all the heavy stuff - block it all up, pull the front end, yank the engine, take off the back wheels and final drives.

Just searching for a cheap engine hoist now...
a51886.jpg
 
When you remove the flywheel clean the spot and mark it with a white line on the TDC mark so you will be able to find the timing marks when installing the mag
 
Actually I'm kind of bummed out.

I took a closer look at the engine today, and it appears that it was already rebuilt, and fairly recently!

I was really looking forward to having the kids rebuild the engine completely... but I'm suspecting that it's really not going to need much work.

I was picturing an inch thick, 60 year old layer of slime inside the block, and nasty scratched and worn cylinders.

And then getting a box full of nice new shiny parts the kids could install.

Instead everything's squeeky clean inside. It's even got the oversized pistons.

I bought this from a guy I KNOW never would have done it, and he had no knowledge of a rebuild before he owned it (which was only a couple of years).

Not sure exactly what I'll do now.

It was burning a lot of oil, but I really believe that was coming through the valve guides. And I'm assuming whoever did the work, didn't do the valves.

Compression was ok. But I never really tested it accurately. And I don't know for SURE that the oil's coming from the valve guides...

I just assumed this engine was on its last legs, just because of its age.

Guess it just goes to show you - never assume.
a51912.jpg

a51913.jpg
 
Put perfect circle valve seals on it. They are a bit more expensive, but are found (or equal) on all cars today. They meter the oil into the guide, and are superior to umbrella seals by a factor of 5. It will be a good idea to check the piston ring gap on at least one piston, as well as the piston fit in the bore. If the gap is fine, putting it back together is easy, if it is out of spec, putting correct rings in it will cure oil issues as well.
It will also require a light honing of the walls.
Check for bore wear at the top of the ring travel with a telescopic gauge, and a micrometer. Compare it to the size at the bottom of the sleeve. Check 3 or 4 directions to assure getting a repeatable number on each cylinder checked.
Best of luck to those 4Hers, Jim A 4H leader and past member till 18. Jim
 
Rings should not be that expensive. Just replace them and oil usage should not be a concern and they get the practice.

Can plastigage (remove oil first) all rods and mains and if ok just button it up.
 
yeah, after I got over my initial bummed-out-ed-ness, I realized we can still take it apart and change the rings, and take some measurements here and there.

There is enough to do for them to get the full experience.

Of course, on the plus side, this leaves more money to put towards other stuff that we might have planned to skip - like a real wiring harness, or unexpected expenses.
 
I appreciate the recommendation. I will try those.

Do they just go right on top of the valve guide? or do the guides need to be stepped down in any way to accomodate them? how do they "stay put"

This is a 48, so I think the guides are longer than later models... (or at least different in some way that I can't remember right now).

Also while I'm asking questions... I haven't inspected the valves at all yet. I was going to do a leak test with some kerorsene, as well as take everything apart to inspect visually.

But I'm curious what you USUALLY find with valves on these 113 engines - do they typically need re-grinding? lapping? anything?

New guides? New valves?

I realize every engine is different, but curious about what the "norm" is for an original head. Or more directly, if it's a given that I should plan on replacing certain parts.

Seems like you've worked with enough of them to declare what the "norm" is.

Just curious.

Thanks again

(oh - and I already had you pegged as a former 4h-er. And I mean that as a compliment)
 
(quoted from post at 07:14:25 10/20/11) I appreciate the recommendation. I will try those.

Do they just go right on top of the valve guide? or do the guides need to be stepped down in any way to accomodate them? how do they "stay put"

This is a 48, so I think the guides are longer than later models... (or at least different in some way that I can't remember right now).

Also while I'm asking questions... I haven't inspected the valves at all yet. I was going to do a leak test with some kerorsene, as well as take everything apart to inspect visually.

But I'm curious what you USUALLY find with valves on these 113 engines - do they typically need re-grinding? lapping? anything?

New guides? New valves?

I realize every engine is different, but curious about what the "norm" is for an original head. Or more directly, if it's a given that I should plan on replacing certain parts.

Seems like you've worked with enough of them to declare what the "norm" is.

Just curious.

Thanks again

(oh - and I already had you pegged as a former 4h-er. And I mean that as a compliment)


If you want to give them the full experience build a wiring harness! And don't do it with crimp connectors, do it with solder and shrink tube! I'm sure someone on here has a wiring diagram they can scan and post for you! Saves some money too!.

Rick
 
The problem is that I don't have much left to try to replicate. Most of what's there has been reworked over the years. My goal is to get this as original as we reasonably can.

Was going to just do a best guess, but there's something to be said for buying exactly what you need...

But you're making me think about it.

I did find a local source for cloth covered wire, that's part of the battle (though it isn't cheap)

Would like to see what the original connectors looked like. If anybody has pictures...
 
(quoted from post at 10:14:25 10/20/11)Also while I'm asking questions... I haven't inspected the valves at all yet. I was going to do a leak test with some kerorsene, as well as take everything apart to inspect visually.

But I'm curious what you USUALLY find with valves on these 113 engines - do they typically need re-grinding? lapping? anything?

New guides? New valves?
Same suiggestion as made earlier on the cylinders, have the kids measure and decide what is needed. Check valve stem clearance, if excessive measure the stem diameter to determine if it is the stem, the guide or both. Replace as needed. Even if the valves/seats look good, reface them. If the step wasn't really needed, the material removed to dress them up will be almost nothing. (It can be a surprise how out of round or off center a good looking valve can be. Stem wear is often on one side.)

The cylinder bore almost looks like the cross hatching is still showing! If so, you might want to consider just doing a valve job and leaving the pistons in place. You don't want to pull the pistons then reinstall the old rings. It is possible somebody reringed (or sleeved) it and didn't do the valves, leaving it as a oil burner just because of valve stem wear. If you leave the pistons/rings alone, I would still check the main and rod bearings. You won't know if they were recently replaced until you check.

(I know, a lot of this is just repeating what you or others have already said.)
 
Pressed in guides have a ready made extension into the spring that provides the surface for the seals to be attached (mini spring clamp) around the synthetic rubber "cap". Jim
 
Yes, the crosshatching is still perfectly visible. That's what I noticed first that tipped me off that we may just be undoing somebody's hard work!

And everything I've seen so far looks as if the person knew what they were doing. No signs of any real "hacking".

Because the oil burning only happened on start up, and every now and then at low idle, I'm pretty sure it's just leaking past the valve guides. the valve springs etc, look old. hard to really say, but they definitely look older and more untouched than everything else in the block.

I'm really on fence about even pulling the pistons. I'm torn between the kids getting the experience - and wasting money on new rings when I really think they're ok.

If this were just me I'd do a valve job and call it a day. Remember, aside from the initial start up smoke, this engine ran like a top.

... need to think about it more...
 

We sell tractor parts! We have the parts you need to repair your tractor - the right parts. Our low prices and years of research make us your best choice when you need parts. Shop Online Today.

Back
Top