Did I put my clutch in backwards?

lam0082

New User
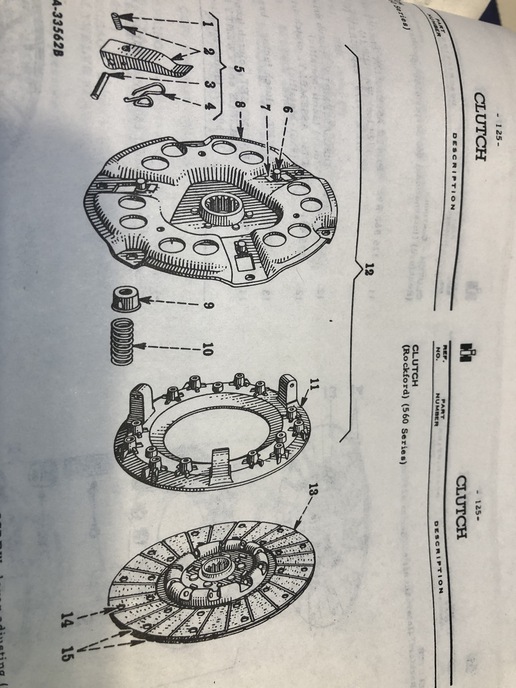
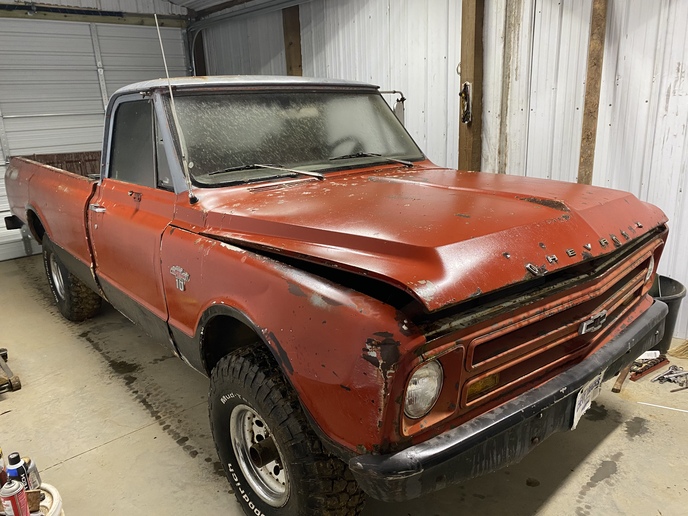
Changed the clutch, pressure plate, throw out bearing and carrier on
a Super A.

Tractor will not come out of gear or respond to the clutch in anyway. I
can observe the throw out bearing pushing the fingers enough that
the pressure plate completely comes off the clutch disk. However, the
clutch doesn’t seem to be coming off the flywheel, and the shaft
never stops.

When I tested it initially, the clutch worked one time to stop the
tractor. I didn’t change gears, just stop and go. The next time I
pressed clutch, i had no clutch. Resplit the tractor to make sure
everything is in the right way (I was afraid the bushing inside of throw
out bearing carrier had slid forward enough it was pushing on clutch
and not allowing it to release). After putting the tractor back together
it still will not go into gear while running. Shaft does not stop while
clutch is pressed.

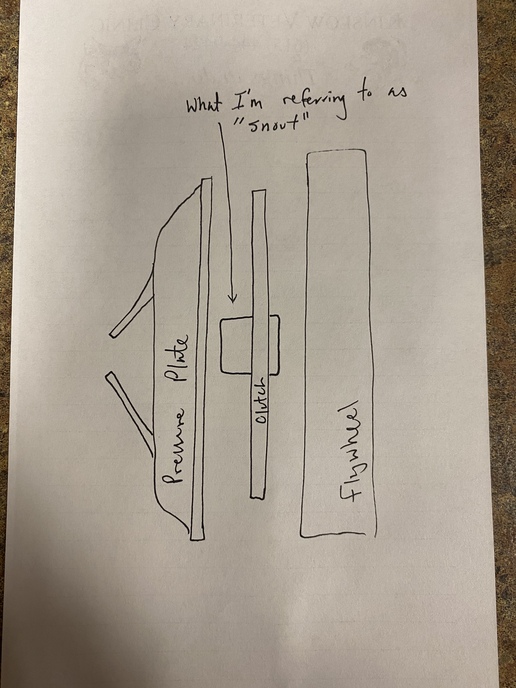
I put the longer “snout” end of the clutch disk towards the rear of the
tractor. This was the way the previous clutch was in so I assume it is
correct. I did not turn the flywheel on a lathe before reassembling, but
it seemed fairly clean and I wire wheeled it before assembly.

Only things I can think of at this moment:
-clutch is in backwards
-flywheel not being turned leaves the surface rough enough that
clutch is “letting go” of it
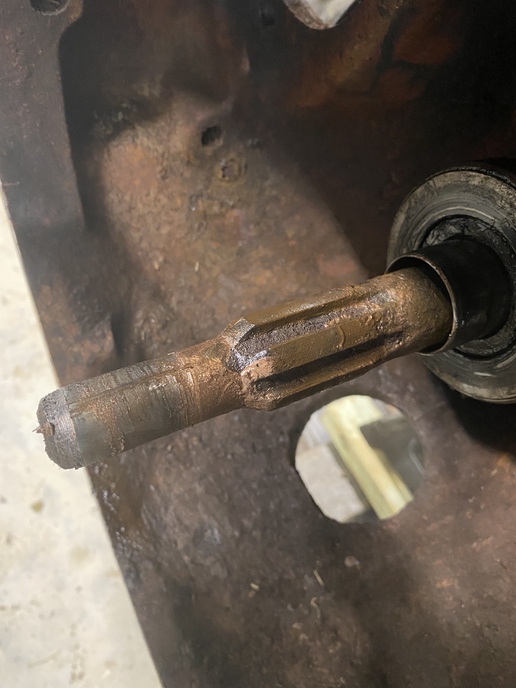
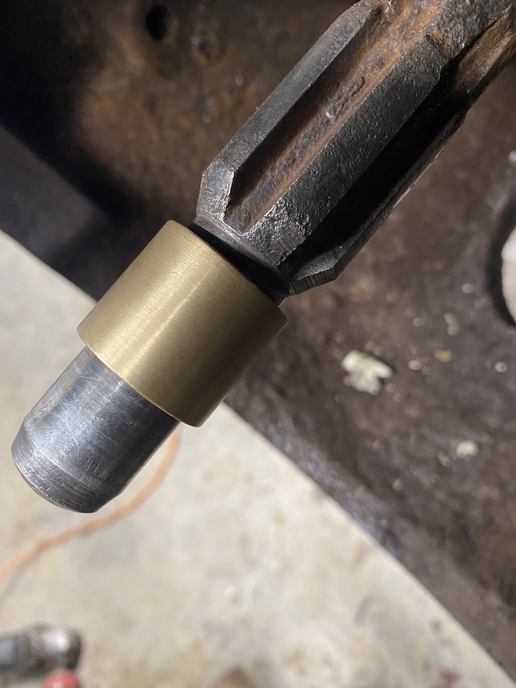
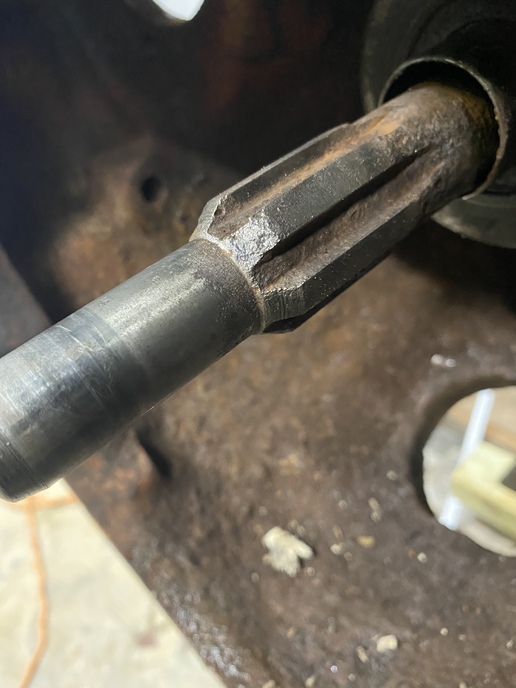
-somehow tip of shaft is stuck/in a bind with the pilot bushing/hole
and this keeps the shaft turning even though the pressure plate is off
the clutch
-somebody sent me the wrong clutch or I ordered the wrong clutch

Really want to avoid splitting it the 4th time but pretty much expect to
have to split the tractor a third time to correct whatever is current
going on. Thanks for any help.
Clutch kit I ordered for Super A
 
Hello lam welcome to YT! I am not sure what you are describing as ..the long snout.. but in the attached link it shows the clutch plate YT sells for a Super A. In the view of the part photo the side you are looking at should go to the rear of the tractor. The raised area that holds the torsional cushion springs fits inside the steel friction surface of the pressure plate. If that side is placed against the flywheel it will not release as yours is doing. If you feel it is in correct the other question is how easily did the two sections of the tractor slide back together. If it came together at an angle or was forced together with the bolts that could distort the clutch plate making it run in a wobble pattern instead running true. This can also cause the clutch to not release.
YT Super A clutch plate
 
I will add that worn clutch shaft splines can bind up the travel of the disc on the splines and push the front friction side of the disc against the flywheel. If you have the tractor out in the clear, try putting it in 3rd gear pushing the clutch down all the way, and starting it. If it jerks forward and drives off with the clutch pushed, it is split time. if it wants to go, but actually kinda works it is possibly warped. Split time again. As noted, the fat side of the hub goes away from the F/W. Jim
 
I do have flat side of clutch towards flywheel and the longer splined portion of the clutch towards rear.

When I’ve put the tractor back both times we did use the bolts some to bring it together.

So your guys advice is to resplit, probably replace pilot pushing, clean input shaft splines very well. Do you think I need a new clutch disk after putting it through these splits/reassembly? Thanks for the help.
 
yes you sure did put it in backwards. the hub with the springs face the pressure plate. the snout as u call it faces flywheel.
 
here is the pudding with the proof. 560 but should be the same deal.
cvphoto72434.jpg
 
Spinning the friction disc on the clutch shaft (neutral) should show it to not have axial runout (wobble) it needs to be very very straight. If you can see wobble, it is bent. I would replace it if it shows visible wobble. Jim
 
The clutch kit I got from YT does not have any spring on the clutch itself. It has a longer splined portion rising around 1” from the face of the clutch. This is what I’m calling the snout. The other side of the clutch is much more flat. I have this flat surface against the flywheel, and the snout towards the pressure plate.
 
I do have the clutch in as you have describe as above. Mine doesn’t have the springs on it, but the flatter portion of the disc is towards the flywheel.

The tractor did not come together very smoothly. With around 1” to go we used the bolts to bring it together.
 
(quoted from post at 08:48:26 01/23/21) T he input shaft is binding on the pilot bushing in the crankshaft

Hard to be sure from a distance but I'm leaning towards Gene's idea. Saying the last inch it needed pulling together with the bolts adds a little bit to that idea!
 
i still think its backwards. post a pic of the old disc. i know if the disc is backwards you cant shift. this clutch disc in the picture has that longer snout portion towards the flywheel. the springs on this one is a cushion and the cheaper discs dont have then springs, its called a heavy duty disc.
 
The old clutch looks just like the one you’re manual has from the 560. It had the little spring type things on it and it came out with those facing the rear of tractor. The link I have on another post above shows the kit and what that clutch looks like.

But here’s a drawing of what mine looks like the way I have it installed right now:
 
A different style of hub is way more likely to catcch on slight wear on the clutch shaft splines. The location that overlaps the wear can be both tight because it is unworn, and probably a bit crusty. I have needed to use a Dremel tool to ease the fit of the spline components that overlap. Disc hub, not the shaft got the treatment. I did use 320 grit paper on the shaft splines to assure their cleanliness. A small spritz of Tri-Flow or other PTFE based dry lube on the shaft won't hurt either. Jim
 
ok , you have the lighter disc. the old one was correctly installed. i still say u have the new disc backwards. because the snout on yours is the same as the snout on the old one. my reason is because i think the snout is jamming in the spline ends on the input shaft. meaning the snout is too long and bottoms out in the splines, the other way around the disc has more spline area to move on. that is my reasoning with out getting hands on measurement where the disc sits on pilot shaft. the way it is now the disc cant slide rearward and is rubbing on the flywheel which keeps it turning.
 
yes that is correct the spring hub to the rear of tractor, but in your first post you said you put the snout to the rear so that is not correct. and you said that the way the old one was, well no it is not cause you said it had the springs to the rear. it is getting confusing now. but i am certain it is backwards now the way you have it.
 
pilot bearing is wrong. split tractor and go to caseih get pilot bearing from them .bearing in those kits are junk.
 
You need to split one more time and then mike the pilot bearing as it is too tight so the shaft still turns when the clutch in released. When you installed ti you just mite have deformed it just enough for a tight fit
 
I can't tell you exactly what went wrong, but having to draw it together with bolts is a dead giveaway that something is wrong. Lesson I learned the hard way about 50 years ago.
 
(quoted from post at 09:49:25 01/26/21) That's my plan. Thanks. I will get it done at the end of this week and post results.

I would strongly suggest taking pictures before and during removal so you can post them if there are any questions. Also it may help someone else in the future who is going to be doing this job.
 
I am 100% sure this entire time I had the clutch in the right way. I changed my pilot bushing and began putting the tractor together. I could tell it wasn’t going together smooth enough, it seemed like the shaft was binding/not entering the pilot bushing correctly.

I pulled the tractor back apart, took pressure plate and clutch off, and started pushing the tractor back together to make sure my issues were completely related to the pilot bushing. Once the shaft got close, it would not fully go into the bushing. I had no hammered the bushing, I put it in liquid nitrogen for 5 min and it went in easily. At this point I hand filed on the end of the shaft and got it smoothed down a little. Maybe spent 2 or 3 minutes filing the tip of it down. I added a small dab of grease and started pushing the tractor back together (still did not have plate or clutch in). Even after this I could tell it was still wanting to bind just a little, but with the tractor in high gear I started being able to turn the flywheel with a screwdriver through the starting port and the shaft remain stationary.

I reinstalled pressure plate and clutch as I had been previously, with the “snout” or longer splined portion of the clutch pointing to the rear of the tractor. My dad helped me push the tractor back together, I turned the flywheel with a screwdriver every time we made a little progress to make sure things were good. We got it together, started it and it worked great. Thanks to all for the help, I hope this helps someone else. Check your pilot bushing, be religious about cleaning the tip of the shaft. Mine had some surface rust and I think that was the main reason it was binding the original bushing. I cleaned it up and the near bushing slid all the way to the splined portion before I installed it. I’ll post pictures of that. It was a little catchy at first on the clutch, but as it wears in a little bit I think it will be great.

***Side note: I had a major issue after I got it back together. I put a brand new battery and replaced the very worn bendix on the starter. I cleaned the flywheel up the best I could with a wire wheel. I think the new battery threw my bendix further than it had been in a long time up on the flywheel and it got stuck. Starter would just make a little squeaky sound. When pulled, one rear wheel turned clockwise, and the other counter clockwise. I was afraid my engine had locked up. I removed starter and fired it while it was loose to make sure it worked correctly. I reinstalled it and everything worked fine. Goodluck everybody, here’s my next project.
cvphoto73813.jpg


cvphoto73814.jpg


cvphoto73815.jpg


cvphoto73816.jpg


cvphoto73817.jpg
 
If you start to have problems, and end up pulling it apart again, try to dress up the splines on that input shaft a little more. It looks like there is some flaky rust in the grooves yet.
 
I used a hand file on those and cleaned them up some. Also took a
Dremel and got between them. I think all the mouse pee has rusted it
so bad it pitted some. Thanks.
 

We sell tractor parts! We have the parts you need to repair your tractor - the right parts. Our low prices and years of research make us your best choice when you need parts. Shop Online Today.

Back
Top