painting question

I want to prep and paint my Ford 600 myself. I have read many posts here but am still a bit unclear. I want to apply the best paint possible with minimal health risks. I do not have supplied air system. What should I use?
 
The best paint is Urathane with hardner. You absolutely need supplied air for that.
Basically if it doesn't have hardner you don't need supplied air from what I have read. CNKS will come along and bring you more targeted advice if you need it.
 
Acrylic enamel by PPG, DuPont, Martin Senour (NAPA), etc--does not require hardener. If you make some mistakes and have to reapply you will have to wait several days. Acrylic enamel is higher quality than the so called premium paint sold at farm stores. Your CNH dealer may have an "Acrylic modified" alkyd enamel which is ok also, but don't get the straight alkyd enamel, it will fade. And the can probably will not say what it is and your dealer probably won't know what you are talking about, best to stick with a major brand of acrylic enamel.
 
So here are the steps I have read about in this forum:
1. Remove paint with oven cleaner and cup brush on angle grinder for cast parts.
2. Sand Blast sheet metal.
3. Clean with wax and grease remover
4. Wash with phosphoric acid
5. Picklex 20 if it can"t be primed right away.Sheet metal only?
6. Surfacer to fill in small pits.
7. Epoxy Primer (how many coats?)
8. sand primer
9. Paint with PPG Omni MP 170

Am I close?
 
You flip flopped your epoxy primer and high build/surfacer. I am not going to do all of those steps, but some do.

You will have to put body filler in there somewhere. I have seen a few different opinions, but I would follow the label for the body filler.
 
2. Sand blasting sheet metal will warp it, even with my small sandblaster. I have done it. I use a fiber wheel on an electric drill, Makes deep scratches that the surfacer will fill.
3. Wax and grease remover is the last step before painting.
4. I don't do acid washes, I use Picklex 20 if I think it is necessary, it just needs to have the residue mostly scuffed off, wax and grease remover will get the rest of the residue. Do not wash it off. It will neutralize any rust in the bottom of pits if you have any after the fiber wheel. I do not use any phosphoric acid product on cast, that includes Picklex 20 because it gets in the pores and might lift the paint. It didn't the one time I used it, but I haven't used it since.
7. 2 coats of epoxy primer, do NOT sand it. You sand the surfacer. Go to PPG's website look up refinishing and print off whatever you are using. Follow the instructions for each step you do, you will not go wrong.
8. Surfacer is sanded with 400 grit, will likely require more than one application and sanding to get a flat surface, use only on the sheet metal. By application I mean 3 coats 10-15 minutes apart, let dry and sand.
If you have supplied air use PPG Omni MP 182 for the surfacer, Omni MTK single stage acrylic urethane for the topcoat, 3 coats. I use base clear for the topcoats, which work best for me. Both 182 and MTK require hardener and supplied air for your lungs. If you do not have supplied air, use MP 181 surfacer and MAE acrylic enamel. You will be happier with urethane, though.
 

Mark, I have two tractors that had their sheet metal prepped and painted by pro body guys with their own shops. Both took the pieces down to bare metal with DAs, then primed and painted. Both tractors looked good for about four years, then the paint on both started to bubble at places where there had been little pits in the metal, where the paint had worn a way first, like right in front of the five speed shifter on my 960. Soon after I was sandblasting and painting the body on my dump truck myself. The counter guy at the paint jobber told me that I needed acid wash. Looking into it I found out that little bits of rust will be left down in the rust pits in flat steel or cast iron, and even with epoxy or etching primer, they will slowly enlarge until they bubble up. Phosphoric acid converts rust to iron phosphate which is a strong, inert black film. The product instructions tell you to keep the surface wet with the product for ten minutes, then wash it off, I do this by tossing small parts in a bucket of water and spraying larger parts with a hose stream. A little brushing is good too. After it dries if there is any of that "white residue" another acid application will dissolve it, followed by a little better rinse. The rinse is followed by wiping with the final prep product. If you plan to sell within three years, or you can check pits and depressions in cast iron microscopically for remaining rust and there is none, then you can skip the acid wash. I will never skip it again though, on anything with rust on it.
 
Showcrop, my point is that Picklex 20 will do everything that you say. You can brush it on and forget about it until you are ready to paint, then scuff it with a scothbrite pad and remove most of the rest of the white residue with wax and grease remover. The instructions say it can be painted over, but I don't paint over residue, which is one reason I don't use true rust converters. Picklex is expensive but it goes a LONG way. I was told about it 10 years ago by a long term painter, who told me to forget metal prep, which is about the same as what you are using. I used Picklex over a sanded and mostly clean hood also 10 years ago. There was some residual rust I could not sand out, before I started using the fiber wheel. The rust was neutralized. I have never seen rust bubble on anything because there is no rust when I paint. Pro body guys (I will exclude B Maniac and Glennster, because they know what they are talking about) are for the most part "shortcut guys" who want to get done and make money off someone else. I can prepare surfaces better than they do because I take the time to do it right. Don't take me wrong, there is nothing wrong with what you are doing, it just takes more time, and you have to be sure the surface is absolutely dry, with Picklex you don't have to do that. It appears that I am going to tell people what I do, you are going to say what you do, so on this forum that "conflict" is always going to be here -- so be it. Done properly they both work.
 
Thanks a bunch for the clarifications. I now feel more prepared. I understand there is some variation in the approach based on personal experience. I plan to keep the tractor and pass it to my son someday so I want a nice job that will last. I totally rebuilt the engine 10 years ago with help from this website and it turned out great. I remember how difficult it used to be to get quality information before the internet. This is great.

One more question: Would it be smart to invest in an HPLV gun?
 
(quoted from post at 06:38:53 07/04/12) Showcrop, my point is that Picklex 20 will do everything that you say. You can brush it on and forget about it until you are ready to paint, then scuff it with a scothbrite pad and remove most of the rest of the white residue with wax and grease remover. The instructions say it can be painted over, but I don't paint over residue, which is one reason I don't use true rust converters. Picklex is expensive but it goes a LONG way. I was told about it 10 years ago by a long term painter, who told me to forget metal prep, which is about the same as what you are using. I used Picklex over a sanded and mostly clean hood also 10 years ago. There was some residual rust I could not sand out, before I started using the fiber wheel. The rust was neutralized. I have never seen rust bubble on anything because there is no rust when I paint. Pro body guys (I will exclude B Maniac and Glennster, because they know what they are talking about) are for the most part "shortcut guys" who want to get done and make money off someone else. I can prepare surfaces better than they do because I take the time to do it right. Don't take me wrong, there is nothing wrong with what you are doing, it just takes more time, and you have to be sure the surface is absolutely dry, with Picklex you don't have to do that. It appears that I am going to tell people what I do, you are going to say what you do, so on this forum that "conflict" is always going to be here -- so be it. Done properly they both work.

CNKS, You have I believe mentioned a few times that you are in Arizona. Here in NH it seems nothing ever gets really dry without a little help. So rust, and thus pits, thrive. A few years ago I took a'67 car down from a storage rack after not looking at it for maybe three years and found a damp place under a floor mat despite the dry air of three winters. Perhaps the climate difference has to do with our different observations. I am never pressed for time with my hobby work so I can take the time to let the iron phosphate dry completely.
 
I'm in southwest Kansas, not as dry as as Arizona. Maybe 5 inches of rain so far this year, 18 average/year, daytime humidity 10-20% can be 100% early in the morning but it doesn't last. You have high humidity in NH, plus salt air, you do have to take more precautions. Although I mention it, I seldom see the need for phosphoric acid, Picklex included. As to Picklex, I only use it in out of the way places I simply cannot get to. I am not going to wash off anything close to the time I paint. It is not the Fe phosphate it is the flash rust that happens immediately when water is used in NH, KS, AZ and anyplace else. Picklex does not need to be washed off, thus no flash rust to contend with. It will prevent rust from forming for months as long as it is inside. In your case, with the salt air even Picklex needs to be watched. We really don't disagree, it is just how each of us gets there.
 
Yes, if you are not used to painting, HVLP is definitely the way to go. If you are used to suction guns, it takes a while to get used to HVLP.
 
CNKS, Not stiring the proverbial pot here but just adding my input. I have been sandblasting or having pro blasters do the job on some large scale projects for MANY years and I must be just plain lucky, if I take your sage advice to heart. RE: "Sand blasting sheet metal will warp it" I agree, sandblasting is not the operation to be taken on by the novice without some education and guidence. Hope I haven"t upset anyone, just adding my point of view.
 
(quoted from post at 21:10:42 07/07/12) CNKS, Not stiring the proverbial pot here but just adding my input. I have been sandblasting or having pro blasters do the job on some large scale projects for MANY years and I must be just plain lucky, if I take your sage advice to heart. RE: "Sand blasting sheet metal will warp it" I agree, sandblasting is not the operation to be taken on by the novice without some education and guidence. Hope I haven"t upset anyone, just adding my point of view.

I have sand blasted some tractor panels with no warping, It was a small unit with not very high pressure.
 
The guy who is going to paint my WD-9 sandblasts classic cars without warping. Their sheet metal is way thinner than a tractors. I'm sure it all has to do with technique. There are people who can wreck anything...
 
I was surprised when I warped mine. This was the hood off a 460, it flattened the lengthwise crease in the center of the hood, the rest was ok. I hope the guy or you that does your WD9 disassembles more than Colby64 did his 560. He didn't even remove the distributer or the oil cansiter, or the seat, or the steering column, etc. Anyplace there is a part left on, the rear of the part and the cast, etc behind it does not get proper coverage. Hard to do with a diesel like yours unless you remove the injection pump and all the tubes, which you or him probably does not want to do. Colby's gas tractor has a lot of unpainted parts, regardless of how good it looks. I have nothing else to do, so mine get 100% stripped -- but I don't have a diesel.
 
I've heard it before from several people, it only takes one mistake--I'm not going to leave my sheet metal with anyone and I choose not to do sandblasting on sheet metal or assembled tractors myself. It is not worth the risk. I have taken larger parts to pro sandblasters, their large units actually use less sand than my small sandblaster, factor in the price of my sand, and it is faster and cheaper to let someone else do it, however I have no nearby sandblasters.
 
CNKS, I am with you 100% on not blasting assembled tractors or many other things completely assembled, that"s just asking for a long term PITA. In my area I am fortunate to have a PRO that knows his stuff and travels around 80 miles one way to my shop to do work that makes better finacial sense to me, price is reasonable for his experience and knowledge. Happy painting !
 
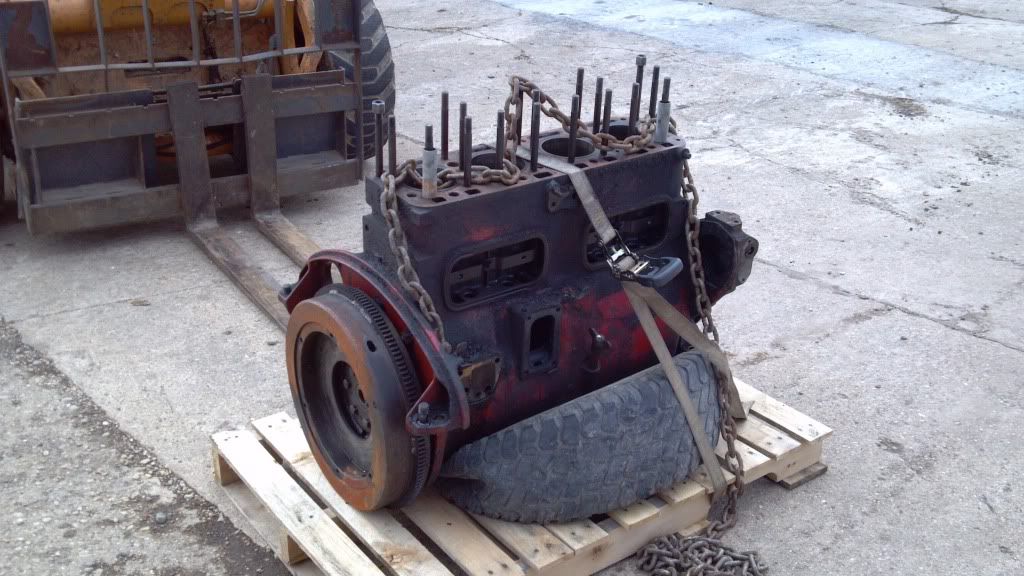
(quoted from post at 08:08:47 07/08/12) I was surprised when I warped mine. This was the hood off a 460, it flattened the lengthwise crease in the center of the hood, the rest was ok. I hope the guy or you that does your WD9 disassembles more than Colby64 did his 560. He didn't even remove the distributer or the oil cansiter, or the seat, or the steering column, etc. Anyplace there is a part left on, the rear of the part and the cast, etc behind it does not get proper coverage. Hard to do with a diesel like yours unless you remove the injection pump and all the tubes, which you or him probably does not want to do. Colby's gas tractor has a lot of unpainted parts, regardless of how good it looks. I have nothing else to do, so mine get 100% stripped -- but I don't have a diesel.

Don't worry, mine is already further apart than that. Can you imagine if he would have blasted and painted it when he first started showing pictures!?!

You brought up something I never thought would make such a difference. Gas start diesel. Truthfully I should have restored something like my '43 H before I took on a gas start.

I just bought a large TP pressure blaster. I think I will blast my own stuff now. I am going to leave the sheetmetal to the pro. This guy restored a $250,000+ Corvette this winter. Right now he has some Pontiac that looks like a 442 and a Chevelle in the shop.

Here are a couple shots of everything I have off the tractor. That new dstates guy was asking about what I was taking off so I took some pictures.

Don't worry about that fuel filter. It is a junk one off a parts motor I bought back from a scrap yard. The mag crane wrecked it when he picked it up. I am keeping it around for the fittings.
2012-07-08_20-00-04_132.jpg


This is the bulk of the parts. A few of those things are going to be done by hand like the air cleaner. Will I get the oil pan or air intake pipe clean enough if I blast them?
2012-07-08_19-59-50_294.jpg


Just got the radiator back. I am thinking about spraying the fins rattle can black. I know it hurts their cooling, but I don't think it would look very good all green and not evenly colored.
2012-07-08_20-11-10_379.jpg
 
I usually leave my radiator cores unpainted, but yours looks like it could use some help. Painting probably ok as long as you keep it light.
 
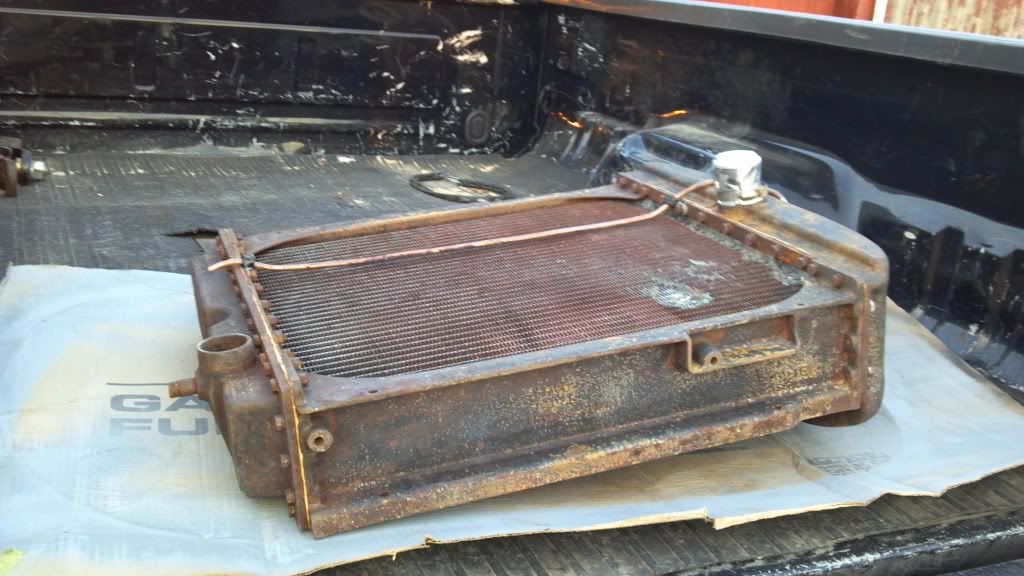
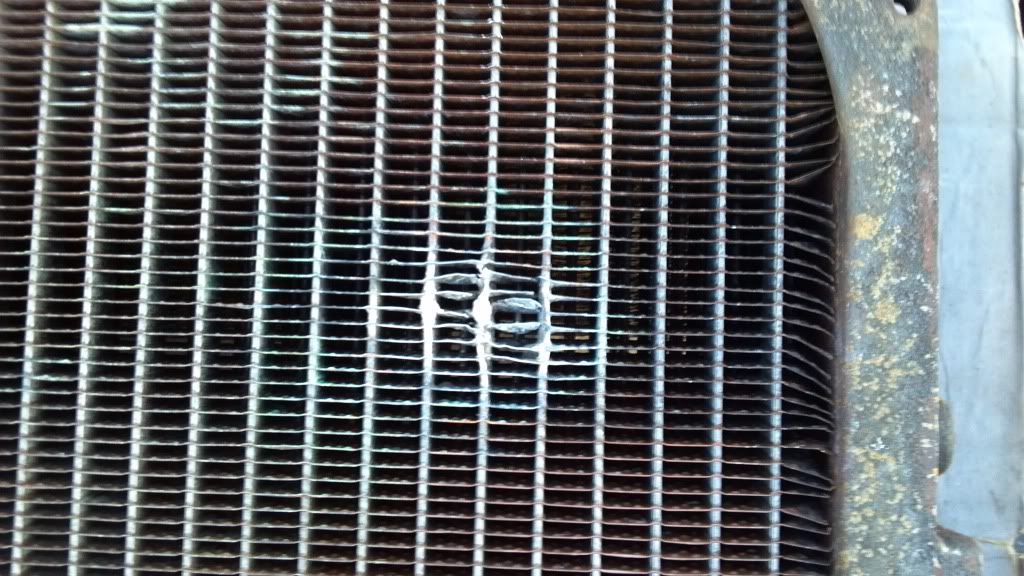
(quoted from post at 06:10:25 07/09/12) I usually leave my radiator cores unpainted, but yours looks like it could use some help. Painting probably ok as long as you keep it light.

Yeah, it had a hole punched in it and I wasn't going to spend $6-800 bucks to get it recored. I guess you have to draw the line somewhere. You will hardly see it when it gets in the tractor especially if I cover it up with a little black paint.

Here is a picture of the repair. I actually thought they did a pretty good job. Boiled, tested (including the cap), and repaired for $90.

2012-07-08_20-11-27_191.jpg
 
My engines getting rebuilt so it already has all the stuff off it.

2012-03-11_14-26-42_90.jpg


Do you repaint it like that? Water jacket and tappet covers on? How about the head and valve cover?
 
I had a fist size hole in an M radiator that I bought in 1993, changed the antifreeze and it leaked. Recommended or not I put Bars leaks in it and it lasted for 19 years before I sold it in Feb this year. Intended to restore it, which meant a new radiator, but never got around to it.
 

We sell tractor parts! We have the parts you need to repair your tractor - the right parts. Our low prices and years of research make us your best choice when you need parts. Shop Online Today.

Back
Top