
K-n-L Country Farms
Member
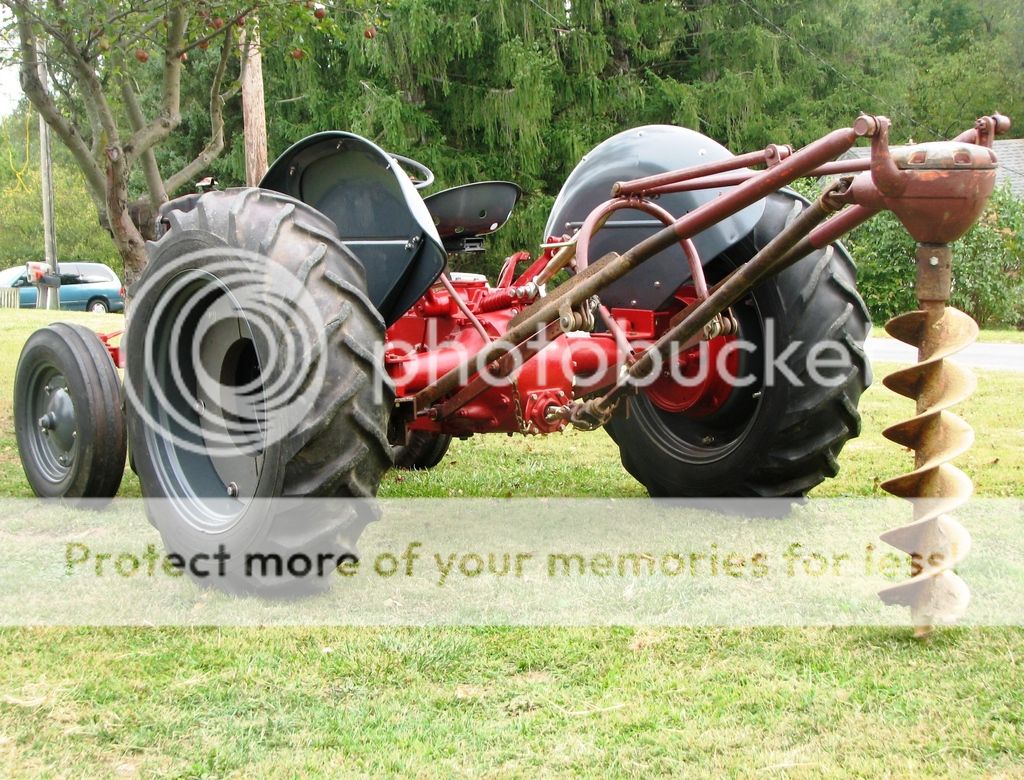
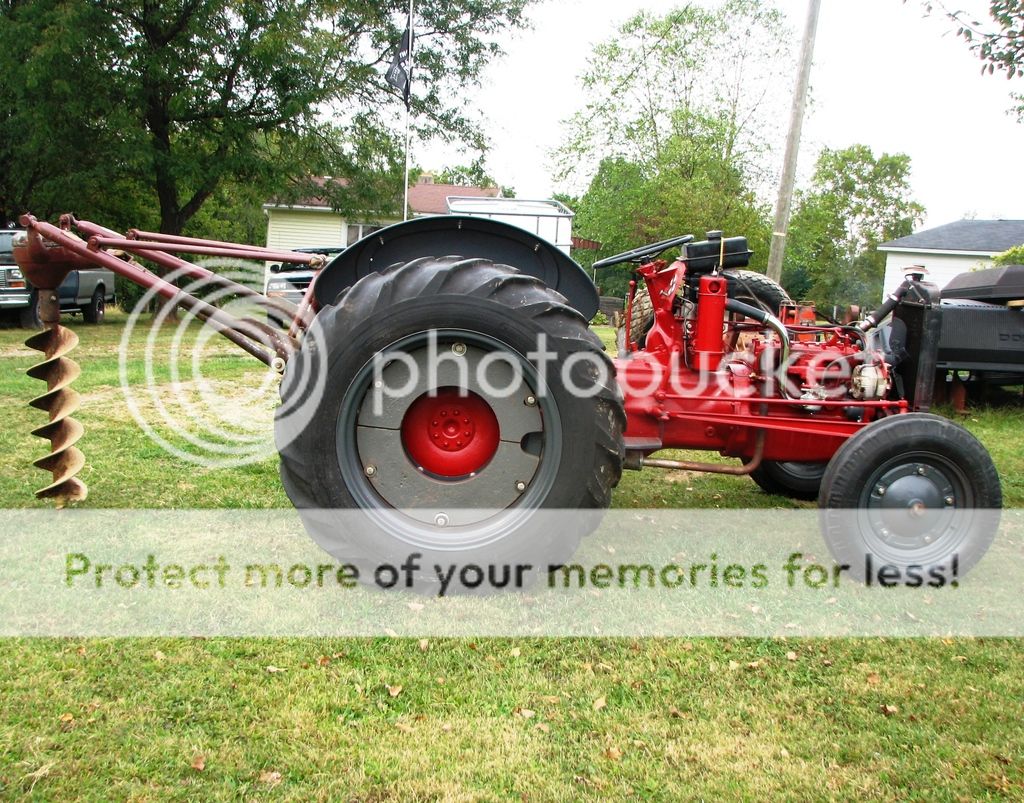
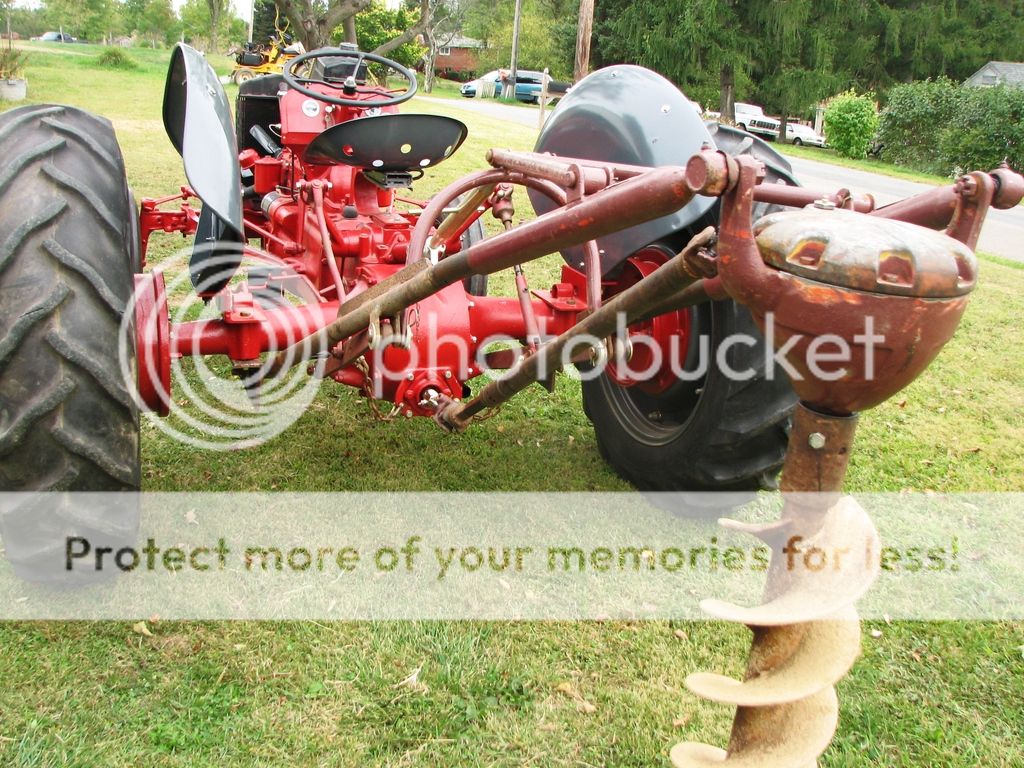
Well after much frustration of trying and failing to find detailed pics and diagrams of a 9N 2N or 8N tractor which actually has the Dearborn/Danuser posthole digger Model 22-11 ATTACHED to the tractor, we finally got our posthole digger attached and working 
We started our quest for the posthole digger approx. 4 months ago since I'm a recovering paraplegic and my wife has issues with her neck and so makes it extremely labor intensive and so too much abuse to our bodies to dig postholes the ol' fashioned way of using the 2 wooden-handled posthole diggers and a spud bar for breaking through shale.
So FINALLY here are some VERY DETAILED pictures where we tried our best to provide pictures from many different angles and distances to give those people out there a way to help them get their original posthole digger attached properly.
One of the main problems with trying to attach one of these posthole diggers is that even though anyone can find the original manuals free online or on ebay, the manual DOES NOT actually show the posthole digger mounted to the tractor...it only shows the parts laid out. Sure you can argue that a particular manual shows it attached to a tractor, but the problem is that the pictures are either presenting the tractor and posthole digger at such a distance you can't make out what is actually what or the pictures are taken at angles which doesn't allow us to see exactly how/where something needs to be mounted.
One example of this is the bracket which is mounted on the underside of the fender bracket. This bracket is attached with the same bolts which are used to secure the fender brackets and it has a pin which comes out 90 degrees from it for the long arm's eyelets to pivot on. NOWHERE does the manual say or imply the dimensions of the bracket and pin which the long arms of the posthole digger are mounted to....meaning where does the pin need to be located in order to know that all parts are going to pivot without binding up. Well after trial and error we found that the pin needs to be mounted directly across from (inline with) the lower mounting bolt where the 3 point arm attaches to....EXTREMELY IMPORTANT!
Well hope these pictures help and if we got anything wrong, please feel free to give us a heads-up...we always appreciate it when someone can save us from having to go through breaking something in order to know what not to do next time
:wink:
....oh and no, the gas tank is not staying there lol it's just a gas tank from a craftsman lawn mower that we're using to get us by until we finish the hood and original gas tank


