I'd do both the top cover & the pump. And the PTO seal as well.
Before you start, it would be a wise move to get a jig from Zane Sherman to adjust the internal linkage. And, make a couple of “guide studs” by cutting the heads off of two 7/16-14 x 3 5/8” bolts. Also, if your lift cylinder rebuild kit has the leather washer, get CNH part number 87051231 which is the neoprene washer for the lift piston instead of the leather one.
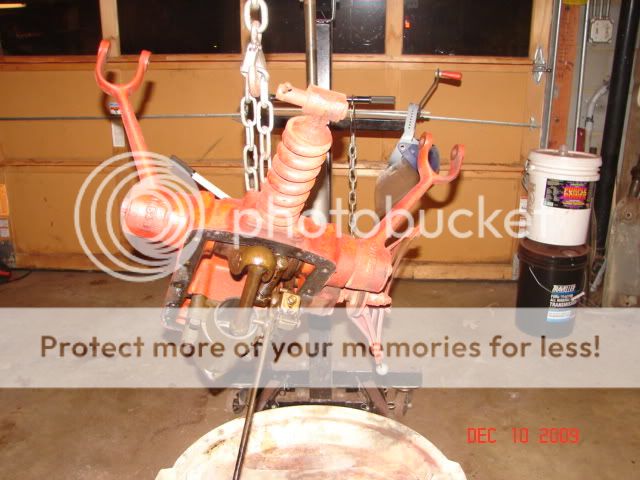
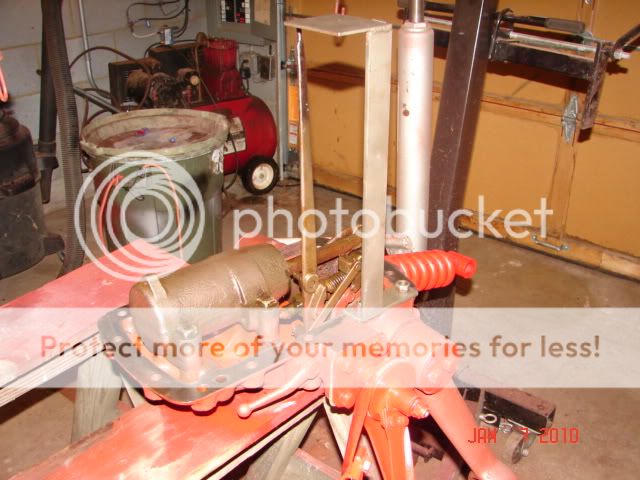
The lift cover weighs nearly 100 lbs with the upper lift arms attached, & is very hard to maneuver. An engine hoist is an excellent idea. Remove the seat and spring, disconnect the upper lift arms at the knuckles. Remove the 14 bolts that hold the cover to the housing. (note that there are three different lengths) DO NOT remove the four nuts under the seat! Remove the right side inspection cover so you can remove the control rod tip from the pump intake valve. Lift the back of the cover straight up and slide a piece of wood under the cover to keep the tip of the control rod out of the rocker shaft. Once you are sure the control rod is out of the rocker shaft, you can then remove the cover. Turn the cover upside down, remove the four bolts that hold the cylinder to the cover, & use a little compressed air on the cylinder to remove the piston. Check the cylinder for excessive scratches, hone if necessary. Install a new piston with "0" ring and backing washer in the cylinder. Install the CNH neoprene washer w/ the concave side toward the “O” ring. At this point, check the cam follower pin & the control rod. If the cam follower pin is worn replace it. Then, if you have a jig, adjust the linkage to specs. The ‘shade tree’ adjustment was to bend the control arm to compensate for normal wear in the linkage, springs & cam follower pin. If the control rod is bent, remove it & straighten it. (very carefully; they break easily!) Replace the gaskets under the cylinder and bolt it back on the cover. Put the gasket on the tractor (no sealer) and put the gude studs in place. Unless you do this every day or have eyeballs in your finger tips, get some help to guide the tip of the control arm back into the rocker shaft. (this is the point you will wish you had a engine hoist to hold the top cover while the control rod dances around the intake valve arm on the pump!) Align the cover holes up with the housing holes. Remove the guide studs. Tighten cover bolts, connect lift arms install the seat. Re-install the inspection covers with new gaskets.
There are two ways to clean the pump; the “quick clean” that gets a lot of the sludge out of it, & the right way that gets all of it, including the hard packed crud in the pump base.
For the quick clean, after you get the old fluid drained out (overnight is best) remove both inspection plates & start pulling the sludge in the pump base out by hand. Then, get a couple of gallons of kerosene or diesel fuel & pour it into the pump base. Catch it in a bucket & reuse it. (Some folks use a hand garden sprayer.) Flush the pump base out 5 or 6 times. Do not start the engine to run the kerosene through the pump; kerosene and diesel fuel do not have sufficient lubrication properties for a 60 year old hydraulic pump designed to be immersed in 90w gear oil. Some folks say it’s ok to start the engine, engage the pump for a minute or two, then turn the engine off. Your call on that one.
This 'quick-clean' is not as effective as dropping the pump & doing a full job. But if the choice is between doing nothing & the quick clean, spray it out. It worked for me for 3 years on my 1951 N. If you have the time, drop the pump; that is the right way to do it. I’ve done it both ways & don’t plan on doing the quick clean again. That’s because dropping the pump is not a big deal. If you have hard packed crud in the pump base, you are wasting your time w/ the "quick clean".
With all of the fluid drained out, block the front wheels & get the rear wheels up at least a foot. (you'll see why soon enough) Remove the 4 bolts holding the PTO shaft in & pull it to the rear & out of the tractor. Loosen all of the bolts. Remove all but 2 corner bolts. Then, carefully remove them. If you are lucky, the pump will drop free (and dump a pint or so of hydraulic fluid down your sleeves). If not, wrestle it free. The pump has 'ears' that fit into the housing; wiggle it a bit & it will drop free. If you have the rear tires a foot or more off of the ground, you will have enough arm room to hold the pump & lower it at the same time. Put it on your work bench & remove the safety valve (p/n 638) and the control arm lever (p/n 643) which will allow you to remove the intake & exhaust valves (p/n’s 640 & 698) Drop all of it in a bucket of diesel (or mineral spirits) or your parts washer & let it soak overnight. Once it has a good soaking, get it on the bench & start blowing it out w/ compressed air. Run cleaning fluid into the hydraulic discharge near the test port & make sure you get a good flow out the small hole in the side of the pump were the control valve fits. I don't see much need to pull it down any further just to clean it. But, I always replace the safety valve (p/n 638, about $25) Reinstalling the pump is harder than pulling it out because you have a gasket to worry about. (no sealer on the gasket) And, you will probably need a helper to guide the control rod into the pump rocker shaft unless you’ve done this 6 or 7 times before!
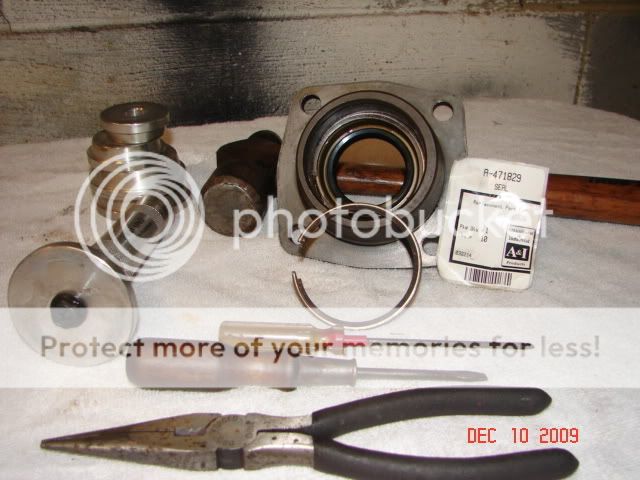
While you have the PTO shaft out, it would be a good time to replace the seal on it. It's got two spring clamps around it. Take your needle nose pliers & remove the one in the front. Then, hang the shaft & bearing housing in your vice & tap the butt end of the shaft; the bearing cap will come off (and the shaft will land on your foot). Then, remove the other spring clip from the other side of the bearing. At this point, remember that you never bought a seal driver & go get a BF socket & drive the seal out. If you have the new style seal, the white side goes out. (open side to the oil) Put some grease on it.
Contrary to conventional wisdom, not a lot of water gets in the oil from the shifter boot. Of course, if it's bad, replace it, but you get water from the draft control spring & the dipstick. But, most water is just a byproduct of the heating/cooling cycle of the oil.
You’ll need a pump gasket, safety valve, inspection plate gasket(s), PTO seal, PTO gasket, gasket sealer & 5 gallons of fluid to do all of the above.
75 Tips