1947 9N Starting issues

Ed Douville

New User
Hey everyone! This is my first posting on this. Hopefully someone can help me and my friend out.

A friend of mine has a 1947 9N tractor, the number on the engine is 9N273410 J86. I have NEVER worked on a tractor before until now and I was trained to work on motorcycles. This is the first vehicle I have worked on in 2 years since graduating from MMI.

I was told he had no spark, but I found out it did in fact have spark, but just wouldn't run. With the help of his father, who knows a little more about tractors, we cleaned out the fuel filter and carb thoroughly. It still was having trouble running. We looked at the distributor (first time ever dealing with one) and we found out that the condenser was never connected from the last person who worked on it.

Hooked it up and the tractor runs great...or at least it did....

Now the issue is it has a very hard time starting. The only way it seems to start is if we open up the distributor and spray contact cleaner and wipe it down. It's been the same situation with his Massey Harris. Only way they will start.

My thinking is maybe condensation is somehow getting inside the distributors and not allowing them to operate correctly.

Can someone help me out please? I'm slowly learning about tractors and it's fascinating and lots of fun!

Thanks again!
 
[My thinking is maybe condensation is somehow getting inside the distributors and not allowing them to operate correctly.]
WD 40 was invented for that reason. Spray the inside of the distributor before you start it.
The points may have moved, recheck.
HTH
DON TX
 
Did you change or at least clean and gap the points?
.015 on a front mount distributor.
When you check the spark, look for color. Yellow/orange spark is not good.
Blue/white spark is what you want, and it should jump a 1/4 inch gap.
The whole distributor/coil/cap assembly should be put together with gaskets
between each piece to keep out moisture, possibly yours is assembled without them.
Let us know how you come out.

PS, that serial number would make it 1947 2N, not a 9N.
Very hard to tell them apart. The 2N serial #'s started with 9N
 
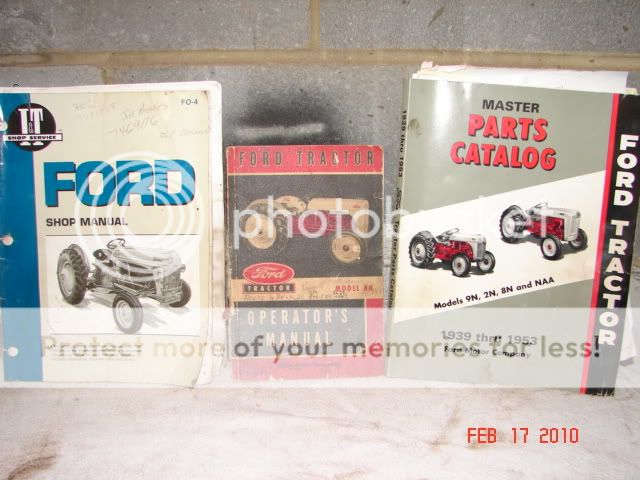
W/ that new tractor, you need manuals. Check out tip # 39.

" My thinking is maybe condensation is somehow getting inside the distributors and not allowing them to operate correctly."

Probably not.

When you remove & re-install the distributor, you are probably just making a better contact w/ the coil. (items 2,4,5,6 & 7, below)

Assuming that the bushings & advance weights are ok, & that you have correct voltage to the coil, the most common electrical failure (no spark, weak spark) points on the frontmount are:

1. The insulator under the brass concave head screw & where the copper strip attaches. (it’s fiber & will wear out; poke & prod w/ your meter leads to make sure it still works)

2. The pigtail at the bottom of the coil not making contact w/ the concave head brass screw inside the distributor. (With the coil on, the pigtail must firmly contact the brass screw. No contact = no spark.).

3. The copper strip is broken or grounded to the plate. (look very carefully for cracks & breaks)

4. The condenser wire grounding to the plate or side of the distributor.

5. The tab on the bottom of the coil not making contact w/ the brass button on the cap. (With the cap on, the tab must firmly contact the brass button. No contact = no spark.)

6. Incorrect positioning of the spring clip on the plate causing the pigtail to ground. (the open part of the clip goes between 7 & 9 o’clock on the plate. That puts the straight part of the clip opposite of the timing screw at 3 o’clock)

7. Incorrect seating of the coil on the distributor due to a loose bail or no gasket.(the coil must not move at all; if it does, replace the gasket or bail. Or stick some cardboard under the bail).

8. Water/moisture inside the cap due to gasket failure or the absence of a gasket. (the cap AND coil have gaskets)

9. Dirty/corroded/burned/incorrectly gapped or misaligned points.

10. Burned rotor, cracked/carbon tracked cap.

Unless the coil is cracked or shows a dead short, chances are it's fine; square coils rarely fail cold. Pull the distributor & do a continuity check.

First, make sure your meter/light works (don't ask....)

You can change points everyday & it will not fix bad bushings. If you are having trouble w/ points failure, check the shaft. If you detect movement, chances are it needs new bushings.

Inspect the points; if they are pitted or burned, replace them. Next, dress the points by running a piece of card stock or brown paper bag through them. New points sometimes have an anti-corrosive dielectric coating on them & old points can corrode or pick up grease from a dirty feeler gauge or excessive cam lubricant. Make sure the points align correctly. Proper alignment is also critical to longevity. Look at the points when they are closed; both sides should mate evenly. Then, check the gap at .015 on the high point of all 4 cam lobes.

Now, follow these steps:

1. Coil off, cap off, points open. One probe on the brass screw & the other on both sides of the open points. On the side closest to the cam, you should have continuity. Not on the other side! If you do, you will also have continuity everywhere because the points are grounded.

2. Coil off, cap off, points open. One probe on the brass screw & the other anywhere on the body of the distributor. You should have no continuity! Now, rotate the tang on the distributor....as the points open & close, you have continuity (closed) and lose it when they open.

3. Coil on, cap off, points open. One probe on the lead on the top of the coil, the other on the cam side of the open points. You should have continuity!

4. Coil on, cap off, points open. One probe on the lead on the top of the coil, the other anywhere on the body of the distributor. You should have no continuity!

At this point, I just put the distributor, coil & cap all back on the tractor as a unit. The reason I do this is because it is real easy to get the cap or coil mis-aligned trying to put it back together one piece at a time & the result is something gets broken or you get a ‘no spark’ problem.

It's possible to put it back on wrong & break it. Look at the slot on the end of the cam shaft. What ever angle it happens to be, turn the distributor tang to match it. Make sure you can tell the wide side from the narrow side on both the cam & distributor! (close counts) Then place the distributor on the front of the engine, gently push it in place & slowly turn the distributor body until you feel the tang slip into the slot. Rotate the distributor body until the bolt holes line up. Then, hand tighten the two bolts until the distributor body is flush w/ the timing gear cover.

Finally, double check your firing order & plug wires. It’s 1-2-4-3, counterclockwise. It’s very easy to cross 3 & 4.

Post back w/ results & any other questions.
DSC03063.jpg

DSC03217.jpg

75 Tips
 
NO SUCH THING AS a 1947 9N. 9n made form 1939 to 1942 note the first year built as the same as the model. Then the 2N came out in 1942 again note the first year made as the same as the model so it has to be a 2N if a 3 as in forward gears or a early 8N which came out in 1948 but like cars started being built in 1947 but still called a 1948
 
Ed.......welcome, you'll find yer weird 4-nipple dizzy a little "different" from conventional 5-nipple dizzys. Ittza 2-bolt, 15-min job to remove the dizzy and adjust the points (0.015") on the kitchen table. Just un-snapple the capple and letter dangle. Installation is a reversal of the removal ...except... finger start the 2-bolts and install the rotor. Now rotate the rotor until the OFFSET drive tang drops into the OFFSET drive slot in front of camshaft and now tighten yer 2-bolts. Now re-snapple yer capple. Simple, eh?

By being OFFSET, you can NEVER install yer dizzy outta time. (without breaking sumptin)

Remember to polish the INVISIBLE corrosion from between the points (0.015") after installation. Me? I use a clean $1-bill clamped between the points (0.015") and pull. Iff'n yer really cheap, tear a strip from HEAVY brown paper grocery sack and use that.

Ennytime you have starting issues, replace yer sparkies, NO ARGUE!!!
Recommend AutoLite 437's gapped 0.025". Don't throw yer FLOODED sparkies away, clean'n'dry them one-atta-time in HOT running engine and save'um fer the next time. (and there will be a next time)

Iff'n I hadda make a guess why yer engine don't run fer you, check yer FIRING ORDER. 1,2,4,3. #1 is next to the radiator. Many nuebie shadetree mechanics swap sparkie wires 4 & 3. The N-Engine is SOOOoooo GOOOoood that it will start on just 2-sparkies but won't have enny power just as you are complaining. .......Dell, yer self-appointed sparkie-meister
 
Sounds like you're having fun.
Tractors, motorcycles, VWs, Packards or Lycomings, even Briggs and Strattons gotta have the same three things to run.
Air, fuel and spark at the right time.
This board can take you from the most basic to the most advanced to even the most esoteric on these tractors.
Welcome.
 
Rolla........'cuz dist don't mean ennythang, but dizzy makes an understandable shorthand for distributor ........sheesh, the dizzy Dell
 
Bruce, I've tried all of the above plus some continuity checks of my own and still no spark. I don't seem to have continuity from the spark plug holes back to the brass screw when the points are closed. I spin the rotor but no plug wire is hot. How can I test for a misaligned coil? All parts are new except the dist. cap.
This is an early 8N Front Mt.
 
" I don't seem to have continuity from the spark plug holes back to the brass screw when the points are closed."

Not sure I'm following you here.......

Are you checking for continuity between the holes in the distributor cap (where the plug wires insert) and the brass screw in the distributor?

Because if you are........you're wasting your time.

The rotor never touches the brass nipples in the cap. It's a HV connection.
75 Tips
 
I guess I wasted my time. If all of the continuity checks are OK, where can I look next. With the distributor installed on the tractor I never get spark. Believe it or not, this tractor used to run before I started messin' with it.
I WILL NOT GIVE UP!
 
You've done all 4 continuity checks I suggested, correct?

Did you put the distributor & coil back on the engine as a unit?

Do you have battery voltage at the top of the coil?

Keep at it.......
 
I installed the dist. both ways - coil on and coil off. No luck either way.

I have voltage to the top of the coil. I know I've read somewhere that the wire to the top of the coil must be a minimun size. Unfortunately I don't remember what. Is there any other component that might affect the spark, ie., the alternator?

BTW many, many thanks for taking the time to respond.
Untitled URL Link
 
The alternator is in the charging circuit. It has nothing to do w/ ignition.

Don't worry about wire size; you either have battery voltage at the top of the coil or you don't.

Make sure the battery is fully charged. That's critical.

Do you have a spark checker or are you using an old plug?

In other words, tell me exactly how you are checking for spark.
 
Bruce, I may have found the problem --I hope.
I was checking the connection of the coil to the dist. The spring was contacting the brass screw ok but I noticed the silver tab on the coil did not touch the contact "button" on the dist. cap. I tried bending the tab a little but I broke one off in the past so I'm very cautious now.

I'll keep trying to align the tab to the dist cap button.
 
Ahhhhhhh yes, tip # 5 on my list of 'frontmount failure points':

5. The tab on the bottom of the coil not making contact w/ the brass button on the cap. (With the cap on, the tab must firmly contact the brass button. No contact = no spark.)

Chances are you found the problem.
75 Tips
 
Bruce,
I"VE GOT SPARK !!!

Getting it to start should be a piece of cake compared to what I"ve been thru,

Again, many thanks for sticking with me.
Joe L.
 
You're welcome. Glad to help.

Just don't flood it.

While each N has it's own starting sequence, none of them will start well by just yanking out the choke rod & holding it out for 5 or 10 seconds while the engine cranks. This is an updraft carb w/ a gravity fuel system; it is by it's very nature subject to flooding. Too much choke makes it happen.

Try this:

Key on, gas on 2 full turns, clutch in, 3/4 throttle, press the starter button. Let it crank for at least 3 - 4 seconds before you pull the choke rod. Then, don't hold it out for more than 2 or 3 seconds.
 

We sell tractor parts! We have the parts you need to repair your tractor - the right parts. Our low prices and years of research make us your best choice when you need parts. Shop Online Today.

Back
Top