First let's start off with I own and HAVE the Ford IT FO-4 Manual. Extremely helpful. But only being 35, and living a somewhat sheltered life growing up have not had the fun of doing tuneups on older cars or in this case a tractor.
I bought all the parts and was able to easily remove and reinstall NO LEFT OVER PARTS. But, I fail to understand exactly what is meant by contact point gap is 0.015 air gap.
It says make sure the contact points are parallel when closed. But makes no mention of exactly how to do this. Where any sort of adjustment is or how you need to assemble it to ensure this happens.
"Rotate the distributor cam until the rubbing block of the breaker arm is positioned at a high point of the cam." Ok obviously the distributor cam is the nice keyed piece in the center that the rotor will fit on. I got that. Now when I rotate it is the high point where the rubbing block is closest to the cam and then I adjust the eccentric screw to ensure the air gap at the two points it 0.015 gap with the feeler gauge at that point?
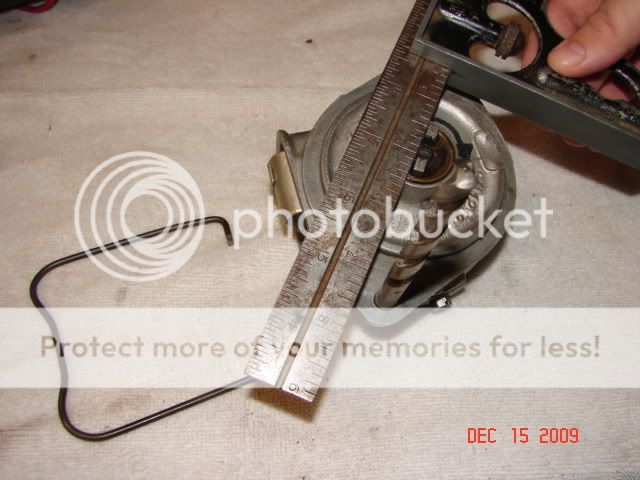
Next step timing to engine. Now the introduce a term but don't call it out anywhere that I see. "Tang" having drank this as a kid, and having looked in the dictionary this word seems to be possibly not used right, but I'm going to go by the Illustration and assume that the tang is the piece that spins again this time with two metal blocks on top. Place a ruler so it lines up 1/4 inch from the small hole nearest the timing plate and a quarter inch from the top hole.
Now I need help with understanding what it means by adjustment plate on the left side of the distributor. Then how do you know proper timing is obtained? It mentions to turn shaft backward 1/2 turn to eliminate backlash then repeat the check? Can someone please try and simplify this or put it into something maybe a first grader could do? I'm failing to understand this.
I bought all the parts and was able to easily remove and reinstall NO LEFT OVER PARTS. But, I fail to understand exactly what is meant by contact point gap is 0.015 air gap.
It says make sure the contact points are parallel when closed. But makes no mention of exactly how to do this. Where any sort of adjustment is or how you need to assemble it to ensure this happens.
"Rotate the distributor cam until the rubbing block of the breaker arm is positioned at a high point of the cam." Ok obviously the distributor cam is the nice keyed piece in the center that the rotor will fit on. I got that. Now when I rotate it is the high point where the rubbing block is closest to the cam and then I adjust the eccentric screw to ensure the air gap at the two points it 0.015 gap with the feeler gauge at that point?
Next step timing to engine. Now the introduce a term but don't call it out anywhere that I see. "Tang" having drank this as a kid, and having looked in the dictionary this word seems to be possibly not used right, but I'm going to go by the Illustration and assume that the tang is the piece that spins again this time with two metal blocks on top. Place a ruler so it lines up 1/4 inch from the small hole nearest the timing plate and a quarter inch from the top hole.
Now I need help with understanding what it means by adjustment plate on the left side of the distributor. Then how do you know proper timing is obtained? It mentions to turn shaft backward 1/2 turn to eliminate backlash then repeat the check? Can someone please try and simplify this or put it into something maybe a first grader could do? I'm failing to understand this.