MF 50 Clutch Not Engaging

SaveMy50

Member
This message is a reply to an archived post by SaveMy50 on September 03, 2014 at 13:12:29.
The original subject was "MF 50 Clutch Not Engaging".

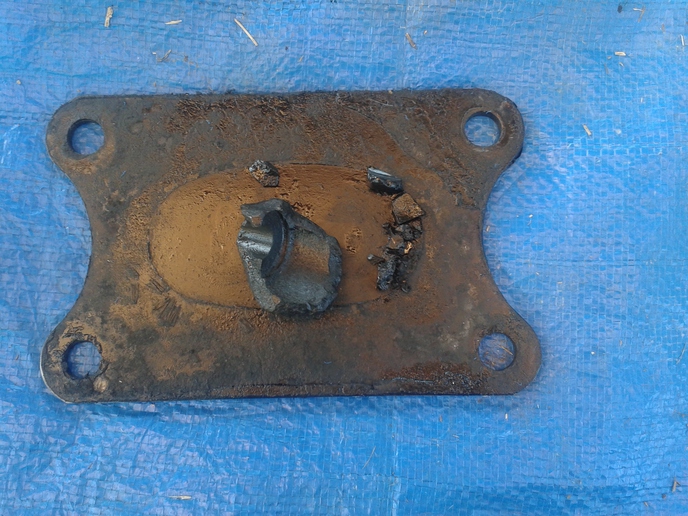
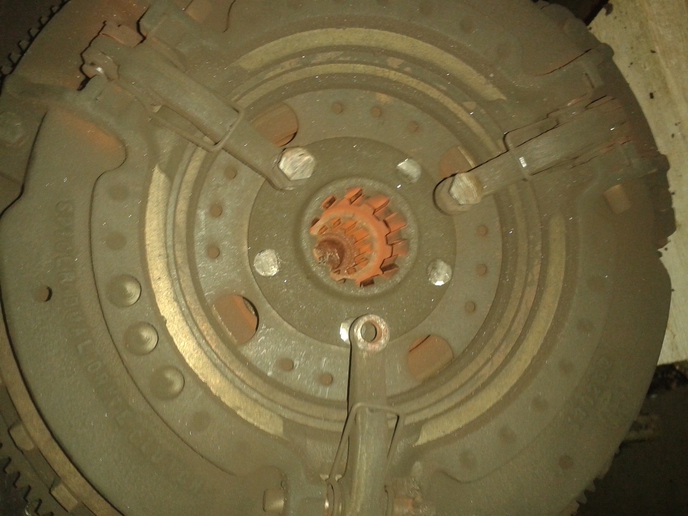
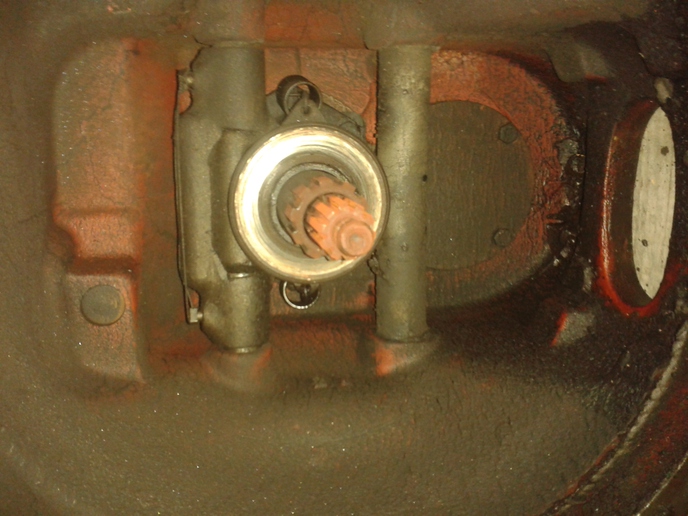
Attached picture of what I found on top of the inspection plate, still don’t know where it comes from after splitting tractor. Lost one adjusting screw. See I have to replace the clutch cover (cracked and housing broken for release lever), likely the whole assembly I suspect. Do I have to worry about marking the clutch and flywheel if I replace whole assembly? Do I need the T bolts? The release bearing appears to be ok, but will likely replace as well.
a184100.jpg

a184101.jpg

a184102.jpg
 
Not sure why this post didn't link up to original post, but thanks for any insight from anyone. For clutch removal, procedure lacking detail but reads:
1. split tractor
2. install special T bolts (3?), nuts, washers to hold assembly together while removing from flywheel
3. reference mark assembly and flywheel and remove cap screws (6?) securing assembly to flywheel
4. remove assembly and primary friction disc from flywheel making sure not to damage air ring.
 
The unknown part is likely the drive end off a starter that was replaced sometime ago… Apart from that, I made t-bolts out of 1/4-20 hardware. I cannot recall the specs but basically, I ran washers and nuts up a bolt then threaded the bolts into the housing using the washers and nuts to tighten down releasing the clutch. Hopefully someone will chime in on the exact particulars.

PS Don't forget the release bearing when putting tractor back together. If you get it all lined up but the clutch is still laying on the footboard, ya gotta pull it back apart. Voice of experience,

Aaron
 
You don't have to mark the clutch/flywheel, your best bet is a new clutch kit that comes with the throw out bearing, pilot bearing, and alignment tool for the clutch disks. They sell the clutch kits here at Yesterdays Tractor.
 
Thanks for all the insight, didn't think about starter, will look at it. T-bolts made of 1/4" dia x 2" long bolt with washers, should hold it together. Good to know about kit and contents, likely the route. I have the old 35 and up assembly notes from this site that should help. More as I go.....
 
Ok, have the clutch off, its a Spicer Dual Drive Clutch 130252 on cover plate, called local dealer who suggested replace whole assembly at $500 Cdn (not installed). I see this site has Part No: 526666M91 that's supposed to fit, but how do I know for sure? Dealer suggested some difference between release levers with a # stamp and without (mine). Appreciate any tips. I have the 3 bolts still on the assembly, is it ok to pull off? Guess it makes sense as I'm probably replacing. How much pressure will be on those bolts? The 9" disc and other plates appear loose inside.
 
Before ordering a clutch what is the serial number? Some of the early 50 models before serial number 515395 used a different a little different clutch.
 
My SGM 530098 tells me I have a 1961 MF 50. Agco Parts tells me I need a 184541M94 Clutch Assembly. Yesterday Parts shows a Dual Clutch Assembly 526666M91, along with a 11" Clutch Disc 185892-RF (not sure why not part of assembly), plus I should get a release bearing 892862M2, pilot bearing 832953M3, and the alignment tool 1212-1600. Sound correct
 
Hello all, ordered and received my clutch assembly (possibly older style even though my SN 5300098?) Procedure I have indicated that MF 50 since SN 515395 should have had the combination coil and Belleville spring dual clutch (different release lever?). Once installed, procedure indicates remove T bolts and adjust the clutch release lever height and secondary pressure plate clearance. For the secondary pressure plate clearance, the proper clearance between the adjusting cap screws and the secondary pressure plate is 0.090 +/- 0.002 inch (seen recommendation of 0.08 is better), using a feeler gauge on all three.

Setting the release lever height calls for a Clutch Finger Height Adjusting Tool, but I am wondering what manual measurement (measured from the machined surface of the clutch cover to the adjusting screw on the release levers) I can do instead? I've seen a few measurements out there, can't tell which one is for my clutch?

Any insight is appreciated.
 
On the 3 secondary bolts adjust them to .080" instead of .090" .

For setting the 3 primary bolts here is one way to do it without
the tool
2z5kwbc.jpg

Then you can measure from the clutch disk to the top of the bolts, as long as they are within .015" of each other it's good.
 
Thanks, for the info and picture, will do as noted, (although pic shows adjusment while T bolts in, while procedure calls for removal of T-bolts prior to final adjustments?) Will update and ask more as I progress, got new pilot bearing and release bearing in so far, installed 4x4" line-up bolts, picked up thread lock blue for clutch bolts...
 
In that picture the pressure plate was not bolted to a flywheel (thus the T bolts). Bolt the clutch to the flywheel using the alignment tool for the disks, remove the T bolts, then make your adjustments.
 

We sell tractor parts! We have the parts you need to repair your tractor - the right parts. Our low prices and years of research make us your best choice when you need parts. Shop Online Today.

Back
Top