Coil replacement for pony motor

chas036

Member
I don't want to deal with these darn coils anymore. Does anyone have experience using individual 6 volt coils to run the pony motor?

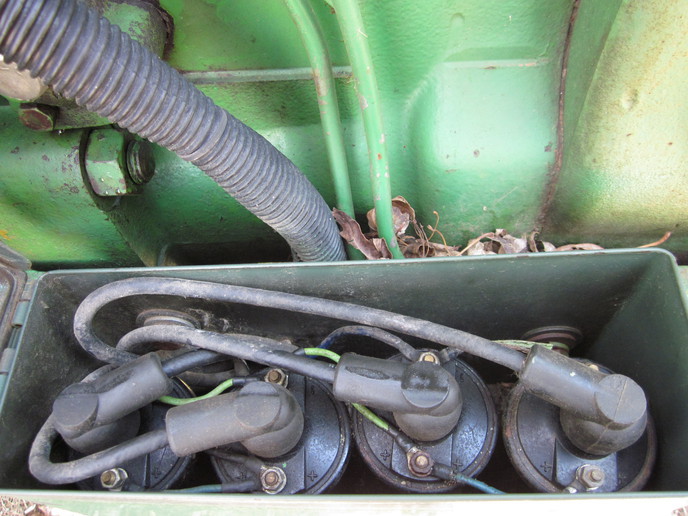
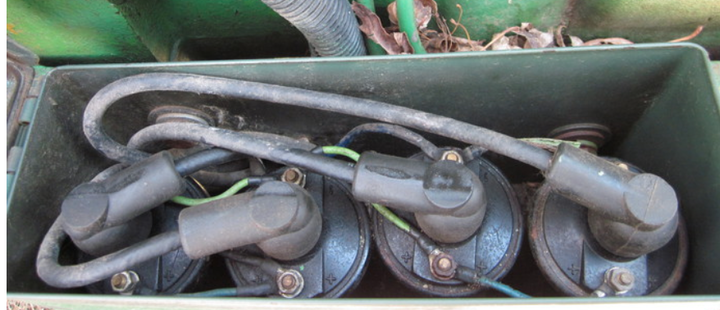
I saw on this board one time ago a picture of 4 coils in a box attached to the side of the tractor with spark plug wires running to each plug. My question is, can someone send me a wiring diagram on how I would wire it up if using 4 separate coils, and can you use any 6 volt car coil, or do they have to have a certain type of rating?
 
Here is the pic I saw, can someone send a wiring diagram on this works
a200198.jpg
 
"I don't want to deal with these darn coils anymore."

NOT sure what you mean by that because a good pair of OEM-style coils will outlast you.

WHY do you want to do that and double the current passing through the breaker points?

Replace the coils with two good new ones, and remember to shut the switch off when the little engine isn't running, and NO worries.

Your issue with this is WHAT?
 
FWIW I agree with Bob. The modern replacement coils I consider better then those originally used. The problem with using four automotive coils is how much current the points are having to switch which can, if excess, shorten point life considerably. Sure you can use 4 car coils, but its a jury rig and again the points can fail quite prematurely AND THEY ARENT CHEAP OR EASY TO REPLACE EITHER.

HOWEVER its your tractor and your choice for sure, not mine.

John T
 
I bought a new set of coils and plug wires, the ones made in USA after market type, but the dam plug wires refuse to stay in the coils. When I push them in there is no resistance and they just come out again , or there is not enough contact to pass the current. I am just frustrated and thought the other setup with four separate coils looks much easier to maintain.

I found 4 brand new 6 volt Ford tractor coils for $15 each. Would these work?
 
I bought the coils and wires as a set and the plug wires have a small metal plug on the end. One wire fits tight and snaps in, but the other three just won't stay in .
 
(quoted from post at 10:21:21 09/05/15) I bought a new set of coils and plug wires, the ones made in USA after market type, but the dam plug wires refuse to stay in the coils. When I push them in there is no resistance and they just come out again , or there is not enough contact to pass the current.

I guess you don't bother to pay attention at dozen or so times I have posted this year alone. Saying that the wires have to match the coils. There are two distinct different types.
 
Sounds to me like you are missing some basic information on how to build ignition wire sets. Having that knowledge might save a lot of money and headaches?

<a href="https://www.youtube.com/watch?v=8kQDSlpKrCw" target="_new">https://www.youtube.com/watch?v=8kQDSlpKrCw</a>

You don't need his wire or his crimper, this is just to show the basics and remember to slide the boot on first so it can be pulled back down the wire to enclose the spark plug terminal AFTER you have crimped the terminal on properly.

Even store bought wire sets are usually take apart assemblies. I would start with one that doesn't clip onto the spark plug like you need it too. With soapy water to add slickem to rubber parts and spark plug wire, reach inside the boot with needle nose pliers and try to pull the boot up the wire while feeding the wire thru this hole such that the boot is some distance up the wire from the end where you can work on it. If this doesn't work out, you will have to pull the spark plug boot off of the end of the wire which can be somewhat destructive sometimes, more important to preserve what you can of the boot itself than the wire at this point. If the metal terminal sticks and stays inside the boot, remove it as best you can with needle nose pliers, screwdrivers, etc.

Fold back method mentioned in passing in the video above is where you simply have a full inch of inner conductor stripped and you fold this back onto the wire and hold it in place while you crimp the proper terminal onto the wire itself. Other option is to cut the wire flush and insert a metal wire staple into the inner core such it that does the same job electrically as folding the conductor back onto the outside of the wire. Inch and a half of solid bare (scrape the varnish off) copper wire would be perfect for this, spark plug wire builder kits use steel staples for this work, so basically anything can be used here for this as long as it's long lasting metal.

Proper terminal is the real secret, don't settle for less than what you need. Terminal selection is really the most important part. In my opinion, only older volkswagens had a terminal that would work decently good with small machine screw type spark plug terminals and they were NOT 90 degree. So I would suggest you buy four screw on converters and tighten them pretty good onto the screw terminals of the plugs if you have this type of spark plug so you can use the larger clip on type for 90 degree boots.

<image src="http://forums.yesterdaystractors.com/photos/mvphoto27050.jpg"/>

And this is possibly the best 90 degree terminal to get:


<image src="http://forums.yesterdaystractors.com/photos/mvphoto27051.jpg"/>

Avoid like the plague this type of terminal: The point is supposed to pierce the wire and make contact with inner conductor, but one often can't control where it winds up when pulled into the boot such that the plug end is likely to NOT be entering the coiled wire hole that is supposed to grip the end of the plug. And they almost always come right off the wire when you go to take the boot off the spark plug. Given enough time, you can count on it in fact, it is a certainty.

<image src="http://forums.yesterdaystractors.com/photos/mvphoto27052.jpg"/>

eBay has all the above and for cheap too, search for spark plug terminals and select lowest price + shipping to weed out the gouging sellers.


For crimping you are looking for a crimper with a large W arrangement such as found at the second hole down from the hinge towards the handles on this set of pliers. The two wide open ends of the terminal go into the bottom of the W such that they will be turned and forced back into the wire when the pliers are closed. Three crimps along the length is usually what it takes to get the entire length of open wings to be turned back into the wire and gripping it very firmly. Crimping the 'best' type I show above would take six or nine half crimps to start all three crimping positions to be turning the wings back into the wire with progressively more closure each time around. Can't really do it with just one crimp and you don't want any part of the wings still open when done. Really need an inch wide crimper but they don't make them. You'll be doing real good to find a cheap pair of these pliers in the first place.

<image src="http://forums.yesterdaystractors.com/photos/mvphoto27053.jpg"/>
 
That set up is off my 720. The dark blue wire next to the block (photo 1) is from the ignition switch. I have it on the negative post of the coil. It is jumped to the other 3 coils-all on the negative post. (photo 3)
There is a green wire (photo 5) on the positive post of the one coil that goes to one condenser. (photo 2) The positive post is jumped to one other coil also on the positive post. These 2 coils will fire the 2 plugs that run off one set of points and condenser. There is a black wire (photo 4) on the positive post of the other middle coil that goes to the other condenser. It is jumped to the remaining coil also on the positive post. These 2 coils will fire the other 2 plugs. It works. I haven't replaced any coils after going this route 10 years ago. They are 6 volt coils. Last photo is how I routed the wires into the mag. Hope this helps you out without making it to confusing.
a200320.jpg

a200321.jpg

a200322.jpg

a200323.jpg

a200325.jpg

a200326.jpg
 
THANKS!!!! this is just what I have been looking for. thanks again. I have just at few more questions.

1) What type of coils did you use? I found a 6v ford tractor coil brand new for $15 ,,would these work?

2) What type of spark plug wires did you use? Would old wires from a truck that I find in a salvage yard work, or do you need special wires with copper core?

3) Where did you attach the box to the tractor frame? Did you have to drill any holes in the frame?
 
(quoted from post at 08:18:28 09/06/15)

2) What type of spark plug wires did you use? Would old wires from a truck that I find in a salvage yard work?


You are already having trouble, so why would you start using used ignition parts????????????????

:roll:

For the time and money spent on a 4 coil system you can fix the problem properly with original style parts.
 
I made up my own wires-copper core, but wouldn't necessarily need to be. The box is an army surplus amo box. I drilled a couple holes in it that came out with the ones in the frame. The coils were 6 volt but not sure what from if that would even make a difference here. I had brand new oem type coils in the thing and had only started it once to run it into the shed for the winter. Come spring the battery was down on it when one of the boys was going to move it. He hooked the battery charger up to it using the starting mode . Fried my new coils so I came up with this idea after that. It was mentioned above about burning the points but I have never had a problem in the 10 years it's been like this. Same condensers also. It won't meet the correct police standards but mine is a working tractor and I want it to start when I need it so they can look somewhere else if they don't like it.
 

We sell tractor parts! We have the parts you need to repair your tractor - the right parts. Our low prices and years of research make us your best choice when you need parts. Shop Online Today.

Back
Top