John Deere MT no start, starter surges.

olyellaferd

New User
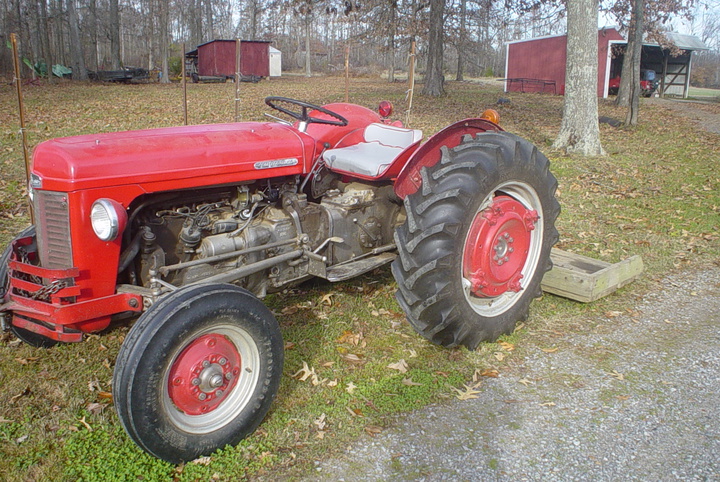
I have a John Deere MT and am having some starting issues. The tractor cranks good once for around a half a minute then if it doesn't fire up and you go to crank it again the starter cranks good for about 4 or 5 rotations then itll surge and crank real quick once then come to a crawl rotating the engine for about a rotation and then start normal again. I am going to probably take the starter apart tomorrow and try to find some issue. I am wondering how to get the starter out. There is a nut on the side of the frame that I can take out but then there is no way to take the starter out it seems cause there is no backside to the threads. Thanks
 

If the tractor hasn't started after 30 seconds of cranking it needs a tune up badly. Two completely separate things come to mind. First, (unlikely) something is dragging in the engine or transmission if the clutch is not pushed in. Second, if the starter has been cranking it for 30 seconds it's probably good and warm. If it's good and warm, bad field wiring or armature wiring might be shorting when the wires expand from heat. It cranks OK until things warm up in there. Oh yes,(most likely) you might just have a bad connection between the battery and starter.
 
Ok. I don't know how well old tractors like these start in the
cold. It's been in the teens all week and the thing sits for
weeks at a time outside. Probably does need a tune up
though. I'll check my wiring tomorrow. Thanks!
 
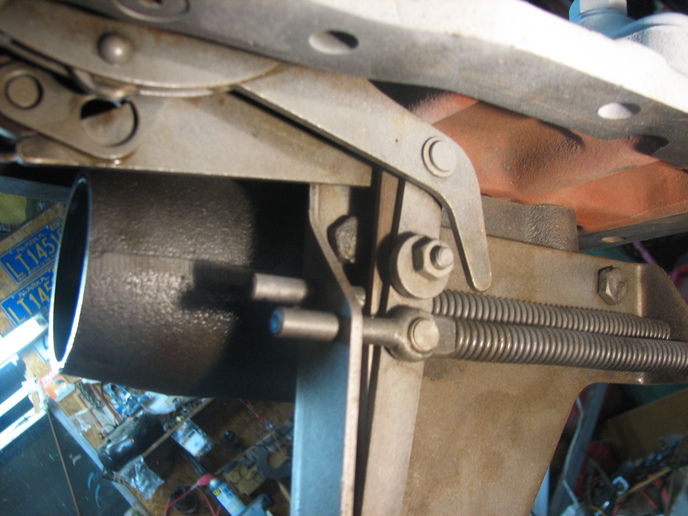
Take a look at the photographs below that display removing the starter.

<img src="http://photos.yesterdaystractors.com/gallery/uptest/a177672.jpg" width="650" />


<img src="http://photos.yesterdaystractors.com/gallery/uptest/a177673.jpg" width="650" />


<img src="http://photos.yesterdaystractors.com/gallery/uptest/a177675.jpg" width="650" />


<img src="http://photos.yesterdaystractors.com/gallery/uptest/a177676.jpg" width="650" />


<img src="http://photos.yesterdaystractors.com/gallery/uptest/a177677.jpg" width="650" />


<img src="http://photos.yesterdaystractors.com/gallery/uptest/a177678.jpg" width="650" />


<img src="http://photos.yesterdaystractors.com/gallery/uptest/a177680.jpg" width="650" />

Hope this helps.
 
If you have the tool box ahead of the battery box, there are 2 bolts in the bottom of it besides the ones in battery box and side panel. Usually ones on the bottom have rounded heads from being exposed to battery corrosion, I used a pair of vise grips to get mine out. I have a 320 that has always rolled over very slow, but often started before engine rolled over completely. It has supper heavy battery cables, more like welding cables. Pulled starter and found 2 of the brush springs were weak. After replacement rolls over really good now
 
James Howell. I did stumble across those pictures yesterday and that clears up any questions I have on that starter removal. So I'll work on getting that out.
Hayfarmer. That might be an issue I'm having so I'll have to calculate what wire gauge should be there and get those sorted out. I popped the hood off and was looking at the wiring and have a couple connectors that aren't connected to anything. I will post some pictures in a minute.
 
Here's the wiring pictures. This is the top of the generator. Unfortunately the last guy painted everything green. But the connector I'm talking about is the third wire on the generator wires that's just not connected to anything.
a177701.jpg
 
I'll post a couple more pictures of this loose connector on the right side (from sitting in drivers seat} of the battery box that is tied with a piece of wire to the starter switch.
a177704.jpg

a177706.jpg
 
Classic symptoms of marginal bushings in the starter. When they are worn beyond the ability to keep the armature away from the field magnets the two will make contact and start dragging against each other creating massive amounts of heat in the windings. If you want to ruin a starter real quick keep trying to start it like this.

Replacing both bushings should get you several decades of life yet if caught before your armature has suffered from too much heat. Taking it apart, pay particular attention to the area of the case behind the brushes, if you see a ring of solder splatters it may be too late. And fine balls of solder in that region indicate that the armature windings have heated to the point that they have come unsoldered from the copper strips of the commutator proper and at the very least need to be touched up - you should also have the armature 'growled' in this case. This is a test to determine if any of the armature coils has shorted or found it's way to ground, if so then you need a new armature and you were too late to save it.
 
Here's the pictures of the inside of the starter. There is a lot of copper dust up around the top section and the starter switch looks like it might need replacing.
a177771.jpg

a177775.jpg

a177777.jpg

a177778.jpg

a177779.jpg

a177780.jpg

a177781.jpg

a177782.jpg

a177783.jpg

a177784.jpg

a177785.jpg
 
Nice photos, thanks. It feels like I'm right there. All she needs is a clean up with a new rear bushing and it should go another 10+ years with no troubles is my take on it. I see no flung solder at all so no need to have it growled at first glance.

Yes the starter switch could be replaced and you might even get more contact between the pinon teeth and flywheel teeth if you turned the contact (battery cable connection) bolt to a position where is it parallel to the actuating contact bar. I always like to put some insulation between the switch case and the ends of the contact bolt's bar ends as they are quite close to the side of the starter switch when straightened up. It's working as is, but certainly would make better contact (and roll over better) if that contact bar were turned such as to offer a good deal more copper surface to the actuating 'shorting' bar also made of copper. I'd reuse it after straightening it. It got twisted because when they put it together at the factory, they did not tighten the first copper nut down very well - this saves them from twisting them off on the assembly line primarily, it's then on the end user to make the final tweak that is almost always very much needed. Get it back straight and tighten it very hard such that it won't twist into this same alignment when you tighten up the battery cable connection. First nut at least as tight as you will putting on the battery connection with or it might turn on you while not noticing again. Now that you know how this happens, you'll probably notice these things happening a lot, electrical gauges for one are quite common for this factory 'defect'. Even on the most expensive pyrometer you'll find this problem.

Brushes although worn have lots of life left in them yet, up to you if you want to replace them - I would get a new set so you have them on hand, but use these up until you need the new ones. I always fear parts like these may not be available in the distant future. Mount the armature horizontal in a vise on it's outer steel only and only tighten the vise enough to keep it in place. Use a cloth between the vise jaws and armature to lessen marks if wanted. Then using 2 or 3 feet of crocus strap looped over commutator surface and pulling on the ends of the strap first one side then the other, buff the copper till it's quite shiny and smooth. Rotate armature till you've got it all smooth. Don't worry too much about pits in the copper, the main issue is surface smoothness. Crocus cloth dust is death to this system so be sure to blow it very clean when finally done. Some might hide in between the commutator segments in the undercut area, get it out of there especially. Brushes could use some lengthwise stroking with a chain saw file to remove ridges on them as well. Not absolutely critical here, these kinds of brushes are a composition of copper dust and graphite that lubricates as it wears down. As such they will wear in to a perfect fit given time, a smooth commutator lets them seat in a jiffy and then the wear factor goes way down super fast. Come to think of it, most brushes are made this same way sans some of the old pure hard carbon ones common on Delco-Remy generators for one.

You can use a 3/16 punch with a modified tip on it to cut the old bushing out of the end cap. Start with a dressed perfectly flat bottom on the round punch stem and then barely sweeten it with an off angle of say 7 degrees, not very much at all. Less is better here. After placing the end cap face up in the vise with the jaws loose and open just enough for the bushing bump to locate in, place the modified punch 'tip' just behind the brass of the bushing so that it's barely against the steel bushing bore of the end cap and drive it straight down with a hammer using several moderate taps. This will cut the brass bushing in two while putting a small gouge in the steel bore as well but works in one shot if done right and the little groove left behind in the bushing bore of the end cap isn't the end of the world. Too much angle on the tip and it takes a lot of steel with it, not enough and it won't stay in the brass very well, forcing you to punch it from a steeper angle to keep it in the brass, just no need for this extra work, the right angle does it for you. Rounded edges on the end of the punch won't cut very well so they need to be touched up from time to time. Once cut, you just drive a small screwdriver down between the bushing and bore forcing the bushing to close up on itself and it will just fall out of there when turned over.

If the new bushing is a sloppy fit on the armature bearing surface then these bushings can be installed with shim stock behind them, but it's a catch as catch can sort of a deal. .010 shim stock will not result in the expected .020 shrinkage, but it will be a smaller bore than putting it in there without shim stock. Kind of an art to get the shim stock to follow the bushing into the hole, kind of another art to cut excess shim out of the bottom of the hole, it's kind of an art in six different ways, but I still try it when necessary. Putting in a loose bushing is just not the right thing to do here. New armature is the obvious solution, but one this cheap skate will try to avoid until the very last moment.

You should get out the ohm meter and test for commutator segments being grounded, should be no connection for any segment to ground or you need a new armature. Saving yourself work, do this first. You can also then test for segment to segment continuity, there should be very low ohms at either 180 or 90 degrees from one side to another all the way around. Not a good thing if one or more segments is not connected to it's mate at 90 or 180 degree location, this would be a good time to replace such an armature. I would expect yours to pass both tests with flying colors as the dragging damage is minimal and not really an issue except to actually note that it appears to be entirely dismissible. I have seen the surface of the armature with tempered blue steel, at that point just count on needing to buying an armature even if you can still luck out there. Growler test almost mandatory in that case too as the one thing you really can't see or test for by any OTHER method is internal winding shorts within that winding. The growler will ferret them out like magic and all within 10 seconds.
 
Don't see how she was working at all. Definitely time for new bushings, brushes, thrust washer and maybe springs. I would turn the stud to the new side and replace the switch while I was at it.
 

We sell tractor parts! We have the parts you need to repair your tractor - the right parts. Our low prices and years of research make us your best choice when you need parts. Shop Online Today.

Back
Top