Well, I am going to start posting photos and processes as I go. This will be my winter project for sure, if I can stretch it out that long and not get carried away!
Part I of my updating starts with 2 features not available in 1969. Super high visability lighting, and what I am goign to refer to as "Gleaner Kam."
Gleaner Kam is my new way of being able to monitor things going on, and replace the spotter mirrors for night-time driving in reverse. So far, I have installed 3 infrared color cameras on the combine, and a 7" lcd flat panel color monitor in the cab. I will need to wait until daylight to get pictures of this system. The 3 cameras are positioned:
1. reverse facing on right hand side of grain bin
2. downward facing into grain bin
3. left hand access panel between straw walkers and raddle chain, facing into the machine.
1. is self explanatory, it is night vision, and without any lights facing rearward on the machine, I can safely back up into the barn without hitting anything. I have tested it and it does work nicely, although, I may make a secodn camera mount that is more towards teh rear and facing down at a steeper angle so that I don't bump the back into anything going into the barn. So far, so good though.
2. will aid me in seeing into the grain bin on the machine without having to stand up and look out the back window. Since my combine has grain bin extensions, the bulk of the rear window view is obscured, and in the dark, is nearly impossible to see into the grain tank while trying to stay in a row. The 7" lcd monitor has 2 inputs, with a remote control, so I can switch views with the push of a button. For normal combining, I will probably keep the view of the grain bin on the screen.
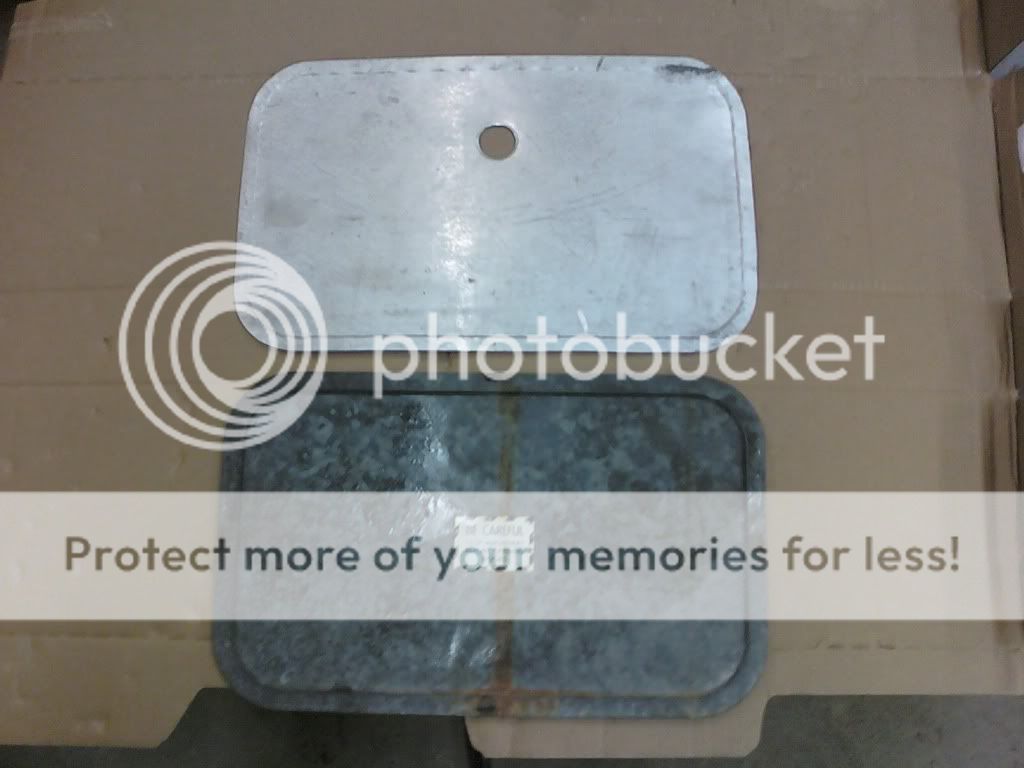
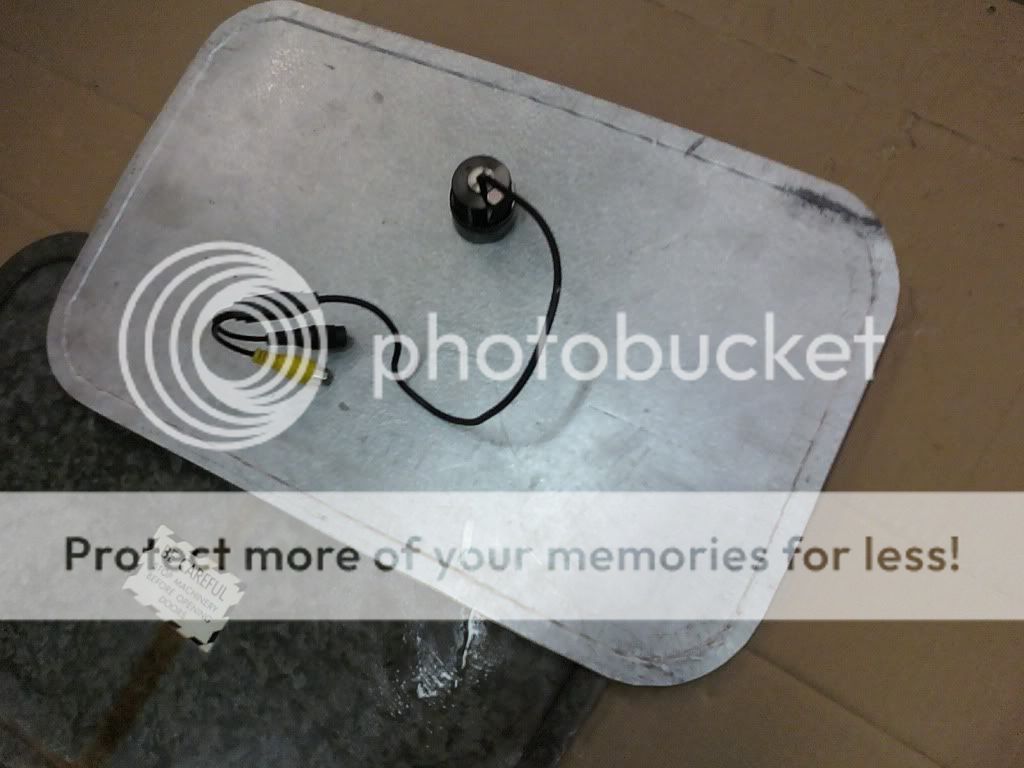
3. is what I think will be the most interesting to watch. I removed the left side access panel and copied it from galvanized sheet. Then I drilled an 1 1/8" hole in my copy (so as not to destroy teh original panel) and installed an infrared camera. Now, the refresh rate isn't the greatest, so when driving, it will give me a strobescope effect in that at any given time, the image will look like a snap-shot picture of the action. This will aid me in making adjustments that normally would be hard to fine tune, such as:
-straw walker position
-forward speed (putting too much material through the machine)
-hillside bunching to one side of the raddle
Also, when doing corn, I will be able to tell while in motion, if I am breaking up the cobs too much, and can adjust the cylinder speed from the cab. Also, since this machien is not a corn special, and is prone to getting cobs jambing under the raddle return false bottom, I can detect a problem before it becomes a bigger one.
And finally, this is just way too cool. Who wouldn't want to sit inside the guts of the machine and watch it work? It's an opportunity I have been drooling about for years.
Since my monitor only has 2 inputs, and I have 3 cameras, I will have to do some plug shuffling in the cab. For normal operation, the 2 that will be most useful are the bin kam (pardon my excess use of the letter K, it seems to be punny only to me) and the raddle cam. So, inside teh cab, at the monitor input controller, I just have to unplug one input from the reversing camera, and plug in the raddle camera. The cameras have 2 plugs. One plug is the power + and -, the second is a simple RCA yellow video plug, like any dvd player would have. I do have a single video audio ouput set on the monitor controller, and hopefully I can plug this into a video recording camera to get some youtube fodder for the masses. (what good is it to have a neat toy if you aren't going to share with everyone?)
Now, the second part of Part I, or Part Ib; is my installation of 7 55 watt high powered lights, bought on sale from Harbor freight. They are 55 watt in rubber housings, with adjustable single bolt mounts. $7.99 on sale.. how can you pass that up?
Originally, the combine had just 2 lights, mounted on the rails, facing the header, a single hazzard light on a flasher mounted on top of the clean grain elevator, and a single red tail light mounted on teh gas tank frame. There was not nearly enough light, and as the original headlights were long gone when I bought it, I decided now would be the time to update the system and make it user friendly for night work.
On teh console dash, to teh left of the ign key, a single throw switch to control the 2 driving lights and tail light, and to the right of the ign key, a single throw switch to control the hazzard light. That was the extent of the original wiring.
What I have now is a single pole/single throw switch to the left of teh key to control my railling mounted lights, shining directly on the header. This will make it easier to leave the lights off when not needed in order to see past teh header for night time driving, when not combining. To the right of the key, I have 2 push-pull double pole/double throw switches rated at 30 amp, with 2 30 amp circuit breakers. The first controls the high mounted cab lights, high and low beams. In the first position, the outter lights(low beams) come on, and in teh secodn position, the inner lights(high beams) come on, while the outter low beams remain on, to give twice the illumination. To the right of that switch, the second dp/dt in the fisrt position activates a single 55 watt lamp mounted to the clean grain elevator which will illuminate the auger and a gravity wagon, for nighttime unloading. in the second position, the auger light shuts off, and the original amber flashing light comes on, for road travel. This insures that the auger light cannot be left on, while traveling down the road. I figure that at dusk, I don't want a sideways facing light to be in the eyes on anyone passing me on the left. It may be a slight bit safer.
Since the original charging system on teh combine is only 35 amp 10DN alternator with an external regulator, I had to boost my output by upgrading to a new drive works 61 amp 10DN, for a huge huge price of $34.
My math as follows:
55 watt light @ 12 volts DC 55/12 = 4.58 amps
7 55 watt lights @ 12 volts DC 4.58*7 = 32.06 amps draw
following my wiring chart, 180 watts in a 15 amp circuit needs to be supported by #10 wiring for a maximum run length(out and back) of 13 feet.
wiring for two 55 watt lights at 12 volts, can be supported by #14 gauge wire for a distance of 8.5 feet, which is plenty long enough. So, the bulk of my wiring was done with #12 wire, to points of split, where the remainer of power was carried by #14 gauge. I am not a master of teh universe when it comes to wiring, but I don't believe I am downrating the amperage of the circuits by dropping wire size to single fixtures. I think that would be a problem if you were running AC wiring, in a circuit, where the return through the neutral wire would run the entire length of the circuit. I could be wrong, but, I don't see anything catastrophic happening to my new circuits.
I will have to get more pictures of the set-up in teh daylight, but for right now, here are some camera phone pics I grabbed with the new lights all blazing, at dusk, and in the dark-foggy conditions we had tonight.
I also did manage to get the cab heater working, turns out it just need a switch for the blower motor. $2.99 later, I now have blistering heat in the cab, adn it defrosts/defogs the windows very nicely, despite the fact my heater box was originally installed on it's side, with the side floor vent facing up, and not towards my feet.


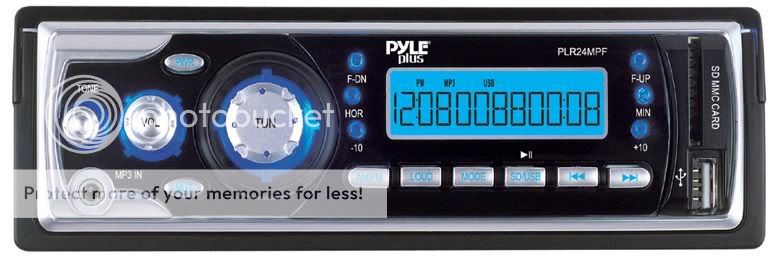
Part II of my combine ramblings hopefully won't be so wordy, with more pictures, but will include the fabrication and installation of an overhead console to better contain my 7" monitor, and a redux of the Allen-Aire vent system which is pretty primitive. Part II should also include teh installation of an AM/FM/MP3 radio, 2 speakers, and remote mounting of teh Allen-Aire cab pressurizer blower switch. I'm very excited to see my new head unit which should be comign any day now. It has an SD card slot, and a USB port. No CD player required when I can hold 50 CD's worth on a single USB thumb drive. No skipping either!
Sorry for the long ramblings... This thread is almost useless with out pictures, so I will be sure to go get a few more right now.
Part I of my updating starts with 2 features not available in 1969. Super high visability lighting, and what I am goign to refer to as "Gleaner Kam."
Gleaner Kam is my new way of being able to monitor things going on, and replace the spotter mirrors for night-time driving in reverse. So far, I have installed 3 infrared color cameras on the combine, and a 7" lcd flat panel color monitor in the cab. I will need to wait until daylight to get pictures of this system. The 3 cameras are positioned:
1. reverse facing on right hand side of grain bin
2. downward facing into grain bin
3. left hand access panel between straw walkers and raddle chain, facing into the machine.
1. is self explanatory, it is night vision, and without any lights facing rearward on the machine, I can safely back up into the barn without hitting anything. I have tested it and it does work nicely, although, I may make a secodn camera mount that is more towards teh rear and facing down at a steeper angle so that I don't bump the back into anything going into the barn. So far, so good though.
2. will aid me in seeing into the grain bin on the machine without having to stand up and look out the back window. Since my combine has grain bin extensions, the bulk of the rear window view is obscured, and in the dark, is nearly impossible to see into the grain tank while trying to stay in a row. The 7" lcd monitor has 2 inputs, with a remote control, so I can switch views with the push of a button. For normal combining, I will probably keep the view of the grain bin on the screen.
3. is what I think will be the most interesting to watch. I removed the left side access panel and copied it from galvanized sheet. Then I drilled an 1 1/8" hole in my copy (so as not to destroy teh original panel) and installed an infrared camera. Now, the refresh rate isn't the greatest, so when driving, it will give me a strobescope effect in that at any given time, the image will look like a snap-shot picture of the action. This will aid me in making adjustments that normally would be hard to fine tune, such as:
-straw walker position
-forward speed (putting too much material through the machine)
-hillside bunching to one side of the raddle
Also, when doing corn, I will be able to tell while in motion, if I am breaking up the cobs too much, and can adjust the cylinder speed from the cab. Also, since this machien is not a corn special, and is prone to getting cobs jambing under the raddle return false bottom, I can detect a problem before it becomes a bigger one.
And finally, this is just way too cool. Who wouldn't want to sit inside the guts of the machine and watch it work? It's an opportunity I have been drooling about for years.
Since my monitor only has 2 inputs, and I have 3 cameras, I will have to do some plug shuffling in the cab. For normal operation, the 2 that will be most useful are the bin kam (pardon my excess use of the letter K, it seems to be punny only to me) and the raddle cam. So, inside teh cab, at the monitor input controller, I just have to unplug one input from the reversing camera, and plug in the raddle camera. The cameras have 2 plugs. One plug is the power + and -, the second is a simple RCA yellow video plug, like any dvd player would have. I do have a single video audio ouput set on the monitor controller, and hopefully I can plug this into a video recording camera to get some youtube fodder for the masses. (what good is it to have a neat toy if you aren't going to share with everyone?)
Now, the second part of Part I, or Part Ib; is my installation of 7 55 watt high powered lights, bought on sale from Harbor freight. They are 55 watt in rubber housings, with adjustable single bolt mounts. $7.99 on sale.. how can you pass that up?
Originally, the combine had just 2 lights, mounted on the rails, facing the header, a single hazzard light on a flasher mounted on top of the clean grain elevator, and a single red tail light mounted on teh gas tank frame. There was not nearly enough light, and as the original headlights were long gone when I bought it, I decided now would be the time to update the system and make it user friendly for night work.
On teh console dash, to teh left of the ign key, a single throw switch to control the 2 driving lights and tail light, and to the right of the ign key, a single throw switch to control the hazzard light. That was the extent of the original wiring.
What I have now is a single pole/single throw switch to the left of teh key to control my railling mounted lights, shining directly on the header. This will make it easier to leave the lights off when not needed in order to see past teh header for night time driving, when not combining. To the right of the key, I have 2 push-pull double pole/double throw switches rated at 30 amp, with 2 30 amp circuit breakers. The first controls the high mounted cab lights, high and low beams. In the first position, the outter lights(low beams) come on, and in teh secodn position, the inner lights(high beams) come on, while the outter low beams remain on, to give twice the illumination. To the right of that switch, the second dp/dt in the fisrt position activates a single 55 watt lamp mounted to the clean grain elevator which will illuminate the auger and a gravity wagon, for nighttime unloading. in the second position, the auger light shuts off, and the original amber flashing light comes on, for road travel. This insures that the auger light cannot be left on, while traveling down the road. I figure that at dusk, I don't want a sideways facing light to be in the eyes on anyone passing me on the left. It may be a slight bit safer.
Since the original charging system on teh combine is only 35 amp 10DN alternator with an external regulator, I had to boost my output by upgrading to a new drive works 61 amp 10DN, for a huge huge price of $34.
My math as follows:
55 watt light @ 12 volts DC 55/12 = 4.58 amps
7 55 watt lights @ 12 volts DC 4.58*7 = 32.06 amps draw
following my wiring chart, 180 watts in a 15 amp circuit needs to be supported by #10 wiring for a maximum run length(out and back) of 13 feet.
wiring for two 55 watt lights at 12 volts, can be supported by #14 gauge wire for a distance of 8.5 feet, which is plenty long enough. So, the bulk of my wiring was done with #12 wire, to points of split, where the remainer of power was carried by #14 gauge. I am not a master of teh universe when it comes to wiring, but I don't believe I am downrating the amperage of the circuits by dropping wire size to single fixtures. I think that would be a problem if you were running AC wiring, in a circuit, where the return through the neutral wire would run the entire length of the circuit. I could be wrong, but, I don't see anything catastrophic happening to my new circuits.
I will have to get more pictures of the set-up in teh daylight, but for right now, here are some camera phone pics I grabbed with the new lights all blazing, at dusk, and in the dark-foggy conditions we had tonight.
I also did manage to get the cab heater working, turns out it just need a switch for the blower motor. $2.99 later, I now have blistering heat in the cab, adn it defrosts/defogs the windows very nicely, despite the fact my heater box was originally installed on it's side, with the side floor vent facing up, and not towards my feet.
Part II of my combine ramblings hopefully won't be so wordy, with more pictures, but will include the fabrication and installation of an overhead console to better contain my 7" monitor, and a redux of the Allen-Aire vent system which is pretty primitive. Part II should also include teh installation of an AM/FM/MP3 radio, 2 speakers, and remote mounting of teh Allen-Aire cab pressurizer blower switch. I'm very excited to see my new head unit which should be comign any day now. It has an SD card slot, and a USB port. No CD player required when I can hold 50 CD's worth on a single USB thumb drive. No skipping either!
Sorry for the long ramblings... This thread is almost useless with out pictures, so I will be sure to go get a few more right now.