TO-35 Disassembly

Inno

Well-known Member
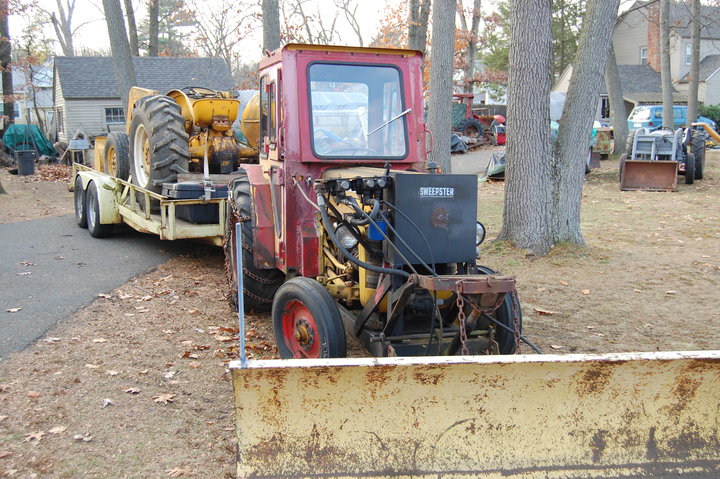
Well I finally got some time this evening after changing the oil in my truck to start taking apart the TO-35 that I bought a couple months ago.
I know these pictures are nothing spectacular but I enjoy looking at other peoples pics so I figured I'd start a thread and post some as I go.
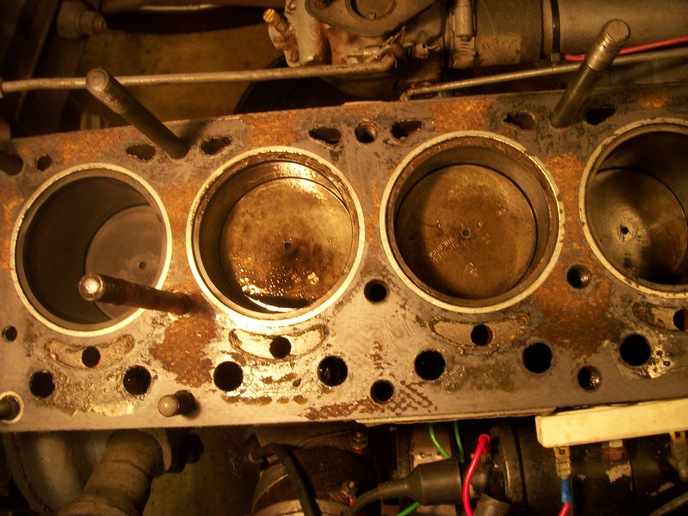
Got the hood, gas tank and rocker cover off so I can troubleshoot the odd chirping noise it has when running. A friend of mine who is a mechanic has his money on a burned exhaust valve. I'm going to borrow his compression tester and check all the cylinders before any further disassembly. I'm charging the battery overnight (2amp trickle) so I can make sure it's turning over well for the test.
I also drained the "coolant".......I put that in quotations because it wasn't exactly the colour I remember coolant to be. Well, one of the pictures shows it flowing from the drain. Quite a bit of sludge in the passages. It's going to need a good flush!
Without further ado, the pictures.
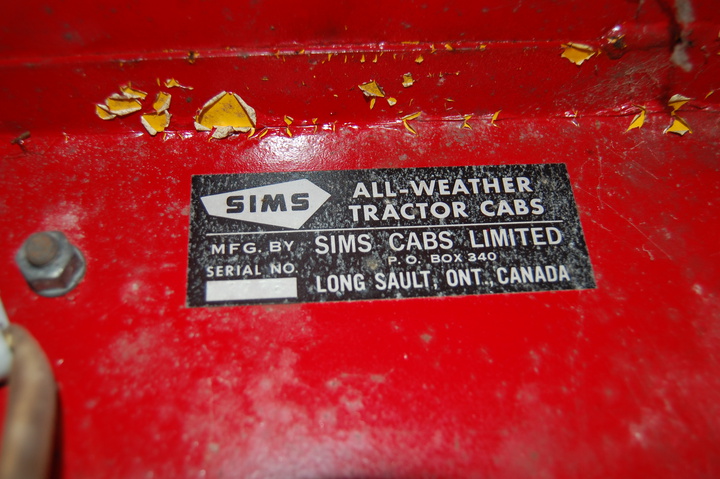
See Tony, Mine says MHF on it too......only not in the same place yours does.
12154.jpg
12155.jpg
12156.jpg
 
I was out there long past dark tonight...and the MHF on the trailer, in the distance... with a yardlight on it.... I am ready to paint everything yellow! The bulb gave it an almost AC orange glow... very emotional...
I was into a gas tank in the daily drivers...so there are no pics of that... moment...
just these... like a ford pushing a dodge with a rope between em joke. Neither one had anything useful in the back half, boring empty industrials.... insted of brain donors, both these guys need...butt donors???
a88968.jpg

a88969.jpg
 
I like naked pictures, you need my homemade gas tank. It's made from a 1 gallon plastic oil or anti-freeze container with a threaded brass thing a majig and a rubber hose.
 
That's exactly what I need. I bought extra fuel line and fittings the last time I bought for this tractor and couldn't figure out why.......now I know! Thanks for the idea.
I think we can learn a lot more from the naked pictures for sure, that's how I learned things when I was younger........wait, we're talking about tractors here :lol: . All that disassembly took maybe 20 minutes.......I love working on a tractor without a loader on it! I'll try to keep this thread updated although it might be days or even weeks between work sessions on it.
 
For those of you sitting on the edge of your seat, I now give to you day two!
Got the manifold and head removed, found a few interesting things but nothing I would consider my smoking gun when it comes to the strange chirping noise........well one potential thing but we'll get to that.
So in doing a compression test the results were as follows and in order of the cylinders, 120, 115, 120, 110. So nothing too exciting there except that when I removed the spark plugs, all were dark/charred except for #4 which was nice and shiny just like it was when I cleaned it not long after getting this tractor but #4 was the cylinder that had extra oil and crud in it. It would occasionally burn a bit of oil so now I know it was #4 that has the oil control issue.

12176.jpg


In looking at the head and gasket once removed I noted that it looks as though the 2 and 3 cylinders may have had a very small leak between them which might explain the chirp heard thru the exhaust........being as how the 2 and 3 piston travel together it would make sense that when one is at the top of it's compression stroke the other would be at the top of it's exhaust stroke and vice versa.........therefore if there were a leak between these two cylinders it would make sense that the compression from one is leaking out the exhaust of the other. BUT that does not explain the decent compression readings unless it's a VERY small leak.....and maybe it is/was I'm not sure.

12177.jpg


Something else of interest on #4 is that the piston has a nick/burn/something amiss. In addition to it looking much dirtier than the other 3.

12178.jpg


And for some reason the #1 piston is installed with the arrow towards the rear.
12179.jpg


And last but not least, for Tony, the picture of the MHF202 from my service manual.
12180.jpg
 
Inno I think 3 and 4 don't travel together. Looking at the plugs would make me believe that the other 3 are running rich and 4 is not firing.Compression looks normal. May want to check main jet setting, no more than 1 1/4 out.Here's a pic of mine.
 
(quoted from post at 09:23:37 11/14/12) Inno I think 3 and 4 don't travel together. Looking at the plugs would make me believe that the other 3 are running rich and 4 is not firing.Compression looks normal. May want to check main jet setting, no more than 1 1/4 out.Here's a pic of mine.

You are correct, I meant to say 2 and 3 together. 4 not firing would explain the way it was running and probably why it had to be so rich to make it run at all.........
Well now it's down this far the debate is should I re-ring it.......the compression looks fine as far as I know, just some excess oil in the #4 cylinder which could also be head gasket related because there was a lot more oil in that corner when I pulled the head. Could also be a valve seal I guess.
At the very least I'm going to pull the valves and check clearances etc.
New gaskets etc.
 
Anyone still following?
I took the valves out of the head this evening and cleaned up the head and put the valves and associated parts to soak in some carb. cleaner. Once they are clean I will evaluate whether or not to replace them.
Some of the seats look as though they have been ground although they don't look particularly smooth. Some of the intake seats are a little bit pitted but I think with some lapping they should come out ok. How does one go about checking clearances and valve angle etc. and determining if they need replacing? I read through that section of my repair manual but it's not entirely making sense. It is my understanding that the exhaust seats are replaceable but I would need a machine shop to do it for me. I don't really think they are all that bad and the decent compression I was getting would seem to support that.
12221.jpg
12222.jpg
 
zzzz.zzzzzzz.....zzzzz...Huh? What? did you say something? OH yeah. Valves. Looks good. Yes I am still following the ...... mumble mumble.... zzzzzz....zzzzzzzzz.... ump.... yeah put it all back together and wake me up when you are done... or in the morrrrr.....zzzzz....zzzzzzzzzz
 
Not only is he "sleepy" but suffers from A.D.D.I sent mine to a machine shop to put in all the new parts.
 
I can't justify sending it to a machine shop........well maybe I'm cheap......I just hate hiring anything out.
I soaked the valves in carb cleaner for 2 days then cleaned them, wire wheeled them and then lapped them with coarse then fine lapping compound. Everything looks great now, all the seats are uniform, the very slight pitting came out just fine and now I'm ordering parts to re-assemble. I wanted to clean it all up before ordering so I could make sure I ordered everything I might need. The valves are good, the springs are slightly under what they should be for length so I'm going to replace them.........for $18 I think it's well worth it.
So today I'm going to drain the trans/diff/hyd. fluid and remove the lift cover and pump and get it all cleaned up to install the rebuilt pump and lift cover from the 202.
Maybe re-assembly next weekend......we'll see. Although today it's 48°F so I'm not too sure I want to spend the day in the shop. Definitely a warm one for mid November.
No more pics for now, wouldn't want to put Tony back to sleep. Tony? HEY TONY! WAKE UP!!!
 
Good luck with it, pour some gas in the head chamber and give it a leak down test or will they need time running to get seated?Gas should still be there after 24 hours I think.
 
Do you think I'll have any issues? As far as I know it's pretty standard, lapping the valves should help them to seat and with some run in time all should be ok....shouldn't it? They weren't really in terrible shape to start with but since I had it apart I figured it was a good idea to clean things up and part of that was lapping the valves.
 
Parts for the engine have been ordered so while I wait for them to arrive I took the lift cover off and removed the hyd. pump so I can put the rebuilt ones on from the 202.
So here are some pics of that.

Mmmmm, coffee, double cream.........noooo, it's not coffee, it's the liquid that came out when I drained the trans/hyd/diff.......and I'm pretty sure it was quite over filled or maybe just water infiltration, either way it was a really nice beige color.
12337.jpg

Another sludgy hydraulic reservoir.

12338.jpg


As stripped down as it's gonna get.......for now.


12339.jpg


12340.jpg


My helper for the evening.
12341.jpg
 

We sell tractor parts! We have the parts you need to repair your tractor - the right parts. Our low prices and years of research make us your best choice when you need parts. Shop Online Today.

Back
Top