Pic of my W3 Case Model 42

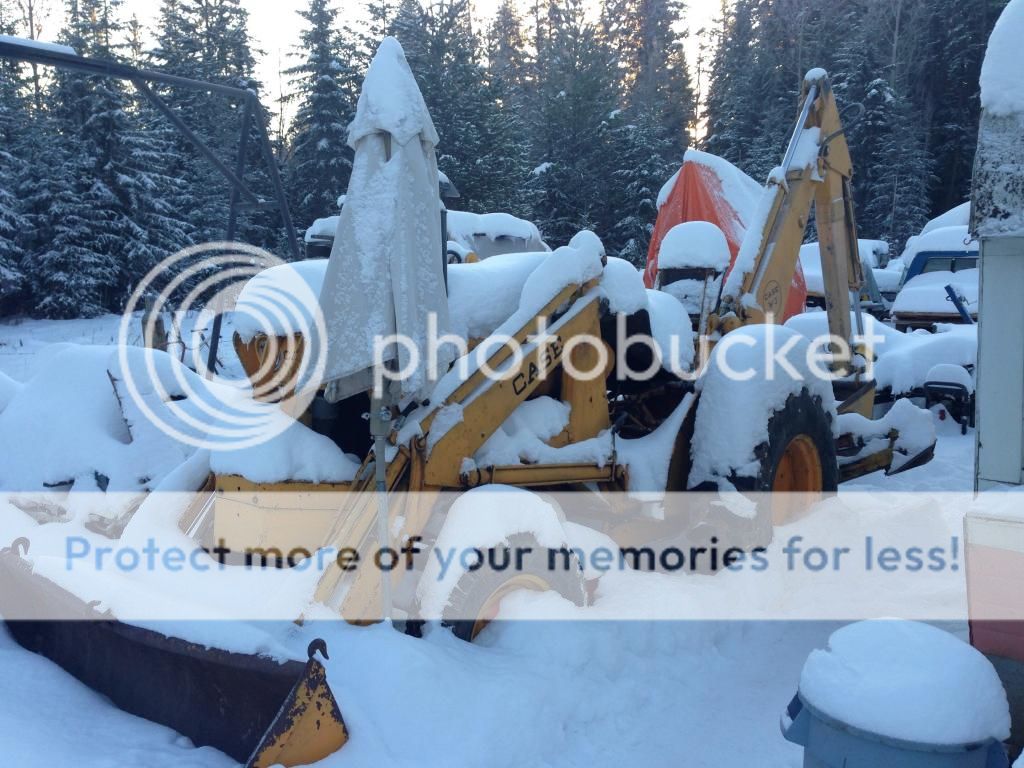
I took a pic of my case w3 this morning. It has a diesel 188 that was rebuilt. Runs really good up to a certain rpm. I was told it needs the injecter pump adjusted or rebuilt. Presently troubleshooting tranny. It has the torque converter drive and direct drive features. So far cleaned tranny filter in front of rad. I bought 2 psi gauges, a 300 psi and a 3000 psi. Lately its been -26 C so hope to run tests later this week. Hopefully temperature outside will be closer to zero. I'm also looking to buy some longer bucket links for backhoe. Based on extension of ram they are 1" too short so if you curl bucket hard repeatedly the arms crack and eventually break. Previous owner broke them then I broke them. I welded them back together and you may see in picture they are painted a different shade of yellow.


Currently it has no drive. I'm doing pressure tests outlined in the service manual to possibly isolate area to be inspected. Could be as easy as debris or broken spring on spool valve. I'll update this thread as I find time to work on it.
 
(quoted from post at 21:32:49 11/30/14)
Currently it has no drive. I'm doing pressure tests outlined in the service manual to possibly isolate area to be inspected. Could be as easy as debris or broken spring on spool valve. I'll update this thread as I find time to work on it.

Well Finally did tests. Transmission pump test was very good. About 195 psi if I remember correctly.

The Clutch pressure regulator valve is measured by disconnecting small copper line from Clutch Control spool valve that goes to Clutch Pressure guage. It is supposed to be 100-125 psi at goverened engine speed. It was only 15 psi.

Torque Converter Pressure Regulator at governed engine speed is 30-40 psi (regulator located inside beside Clutch Control Spool Valve) Lower pressure at idle. It had zero psi.

I'm also getting a external oil leak between tranny and engine. Plus engine is slowly filling up with tranny oil. So looks like I might have to remove engine. In service manual it states to replace flat rubber seal between flywheel and torque converter. Like 70-80's chev trucks the flex plate bolts to the auto tranny converter with 3 bolts. So as for my tractor, does the flywheel and torque converter spline together in some fashion I wonder? Anyone here know how they "fasten together"?

So tomorrow I plan to remove and inspect Torque Converter Pressure Regulator located inside beside Clutch Control Spool Valve to see if it has a broken internal spring. I'll try to remember to take pics :)
 

The flywheel has internal teeth and the TC has externals that match them, once everything external is out of the way it will slide right apart.

The thin nut between and below the spools contains the main pressure regulator, they have been known to burr up and stick the inner plunger. I would probably check the regulator first. An extremely worn converter will give low pressure readings as well.

I would diagnose the TC problems prior to splitting it for the oil leak as the converter comes out the bell housing split. Keep us posted.
 
Thanks for reply and info. Today I removed Torque converter pressure regulator from beside spool valve. Plunger inside felt like it was stuck. I took it apart and managed to knock out parts by tapping regulator on my vice. Saw some debris on plunger. Not metal debris, felt more like a piece of fiber. Specified spring length is supposed to be 1.375" and it was 1.25". I put it back together and started engine. After about 15 minutes pressure at Torque converter pressure regulator finally climbed to 5 psi. The oil leak at engine\tranny is a constant drip, each drip about 1-3 seconds apart only when engine is running and starts to drip within a couple minutes of engine running. Possibly I'm losing pressure from leak in gasket that is between flywheel and torque converter OR ?? I drained a few liters from engine. It does not smell like diesel. I put engine oil in a clear container to cool overnight. Maybe see some layering tomorrow? I'm pretty positive tranny fluid is leaking into engine due to seeing that external leak between engine and tranny.

So plan of attack:
1. Re & re spool valve and check main pressure regulator spring\plunger behind thin nut as "mEl" stated.
2. Start engine and re-check pressures.
3. Remove front axle pivot from bottom of torque tube and look for source of external leak. Possibly start engine to check for leak?
4. Last owner removed engine without taking loader off. I figured it be best I remove backhoe and loader and split tractor at engine tranny position.

Tractor place in town said they can service torque converter if needed. I'm thinking most expensive route may be having to take torque tube into town. I most likely could fab hoist attachment outlined in service manual to remove guts of torque tube but that won't be anytime soon.

I'll keep this updated as the days go by. My fantasy plan is to have the tranny working well before Spring is over. I REALLY APPRECIATE the reply "eMl"!I
 
Here is some history on my teactor: Last owner (Fred) rebuilt the engine and re and re'd it without taking loader off. External leak between engine tranny was there when he owned it. He figured it may be gasket between torque converter and flywheel. As for engine oil level going up that was not happening till after I bought it. Clutch pressure guage was low when I bought it and dropped even more right about the same time I seen engine oil bubbling from engine dip stick. Fred the last owner said clutch pressure gauge was well up to spec until one day it suddenly just dropped considerably. It would propel itself on the flat but would only go up slight hills in 1st gear low range. He also rigged up the direct drive to come on when the clutch was let out.
 
Removed control spool valve today. I slid a 4"x6" piece of shhet metal underneath to keep indent balls and springs in place. Turned it upside down and removed sheet metal. No balls and no springs!!?? Took thin nut off and spring was intact. Looks like a bit of a burr in there. Manual says to fit piece of 1/2" dowel into innermost plunger so plan to do that Monday. Now where do I buy 1/2" indent balls and springs? I figure I'll phone Case. Also I want to get springs tested with a spring scale. I wonder if I can still buy new springs for regulator in spool valve and torque converter pressure regulator? Manual says I have to buy complete TC pressure regulator. Guess I'll have to wait till Monday to call. I'm thinking put it all back together as is and start task at removing backhoe, loader, and engine since the TC pressure may be leaking from a gasket between flywheel and TC. (TC - torque converter)
 
Removed control spool valve today. I slid a 4"x6" piece of shhet metal underneath to keep indent balls and springs in place. Turned it upside down and removed sheet metal. No balls and no springs!!?? Took thin nut off and spring was intact. Looks like a bit of a burr in there. Manual says to fit piece of 1/2" dowel into innermost plunger so plan to do that Monday. Now where do I buy 1/2" indent balls and springs? I figure I'll phone Case. Also I want to get springs tested with a spring scale. I wonder if I can still buy new springs for regulator in spool valve and torque converter pressure regulator? Manual says I have to buy complete TC pressure regulator. Guess I'll have to wait till Monday to call. I'm thinking put it all back together as is and start task at removing backhoe, loader, and engine since the TC pressure may be leaking from a gasket between flywheel and TC. (TC - torque converter)
 
Just read in manual that some production yrs of tractors came without indent balls and springs. Manual says to add balls and springs if valve has none. Can I buy complete gasket kit for TC tranny I wonder?
 
I'm going to check if allen plugs fell out of converter and multi disc clutch. Also a really worn TC (torque converter) means it simply needs to be rebuilt with new bushings, beatings, and seals? Heres a pic of clutch pressure control valve, oil distribution plate and torque converter pressure regulator I removed Friday.
mvphoto16685.jpg
 
Well finally got to cleaning spool control valve. Clutch Pressure Regulator Valve, small plunger bore had a burr on it which I removed with valve lapping compound. Im not sure if that will solve anything but Im told that could be causing pressure issues. Drained torque tube oil and very dark and metallically looking. Small metal chip on front drain plug. Still have to locate inner drain plugs. Previous owner had set up direct drive so it was operated with foot clutch and manual outlines direct drive should only be used after tractor is moving. So Im thinking multi-disc clutch may be toast due to color of oil and direct drive being used from a standstill. Can anyone here tell me what happens when you let out the clutch out simultaneously with direct drive being engaged? According to my research my Case W3 has the "case-o-matic" exactly like the Case 530CK has. Can anyone confirm this?

So putting parts back in to move tractor out of shop to remove hoe and loader so as to put tractor back in shop to split engine from tranny torque tube.

I'll continue to update in a week or so...
 
So putting plungers back in for Clutch Pressure Regulator Valve and the following diagram in my service manual states to make sure hole is open in outer plunger and its plugged!! I could insert a 1/16" drill bit about 1/8". I tried drilling it out but I think its full of hardened steel flakes or clutch material. Drill bits keep going dull so I'm thinking I need to drill it with a carbide bit. Will go get a couple in town tomorrow. I'm thinking does this hole definitely have to go right through into center of plunger? looking inside it looks like it goes all the way through because you can see a burr where holes comes in from outside of plunger.

mvphoto17535.jpg
 
My curiosity got to me. Sat in the dark and shone a LED through end of plunger and sure enough right in the center of the 1/16" hole I could see a round hole of about 10 thou. As for debris I must be seeing things. Had my hawk eye Wife take a look to and she figures it's supposed to be that way. So going to put it together tomorrow and go from there. Still any clarification would be great from the well seasoned people here :)
 
It turns out small hole in large plunger was correct size. I put everything back together with old gaskets until new springs and gaskets arrive. They arrived the very next day after I got backhoe back running. I still have to split tractor between engine and transmission to fix external oil leak. Testing results were:
At full rpm:
Clutch Pressure Gauge:
Top of green, clutch out.
Converter Pressure 30 psi w\
Clutch in

Before with no clutch pressure tranny oil was leaking into engine. Now Clutch Pressure is in the top end of green zone.

Now with normal clutch pressure engine oil is leaking into front of torque tube. Also transmission oil is building up in quantity over just a few minutes of running in front of torque tube as well. Service Manual says only 1 quart should drain out. I'm getting a few quarts after 5-10 minutes of running!! I'm thinking with oil level rapidly rising in front of torque tube = cracked torque converter, or seal between flywheel/converter leaking, converter sealing rings leaking, snap rings not in correct position or converter hub cracked; one or several of these can be the culprit. Oil continues to drip from rear area of where oil pan attaches to block.

"mEl" here has said converter bushing could be worn causing converter leakage.

To split tractor between engine and torque converter tranny I have started to remove backhoe. I been having to torch off the 1-7/8" bolts/nuts up top and the lower bolts/nuts. My sockets and breaker bar\cheater did not budge anything even with heat!! I think buying new nuts & bolts are cheaper than using up my acetylene & oxygen to heat up the darn things. I have all the sockets I need yet been buying used wrenches in the meantime for putting it back together. One side of backhoe bolts done and just started on other side...
 

Hey Cariboo, it is good to see an active W3 owner on here. I just bought a gas W3 and am starting to dig into it. I drove it around once and thought the shuttle seemed weak, although better as it warmed up. I bought a filter and am going to pick up some generic TCH fluid and change everything out. My tach cable was rusted in half so I bought one of those as well. I hope it is just the fluid because I bought this tractor to use it not to work on it! I really don't want to have to split it or anything like that.

Anyway, keep up the posts.
 
(quoted from post at 09:32:34 04/16/15)
Hey Cariboo, it is good to see an active W3 owner on here. I just bought a gas W3 and am starting to dig into it. I drove it around once and thought the shuttle seemed weak, although better as it warmed up. I bought a filter and am going to pick up some generic TCH fluid and change everything out. My tach cable was rusted in half so I bought one of those as well. I hope it is just the fluid because I bought this tractor to use it not to work on it! I really don't want to have to split it or anything like that.

Anyway, keep up the posts.

Welcome Scrubulum!

I was advised to use the hi low tch fluid recommended iny service manual. An older fellow who worked for a case dealer for years and now restores Case machines said to use the hi low tch fluid rather universal tractor oil. I wanted to go with universal tractor oil because Case dealer an hour away. Ive decided just to drive the hour there and do other errands lol.

Yes mine works better to once tranny oil warms up. Service manual says that tranny will not work properly if oil is too cold.
 
My 1962 580 CK is the same way, in the winter when it is really cold it will not move at all until the transmission warms up, in the spring and fall below 50° it moves very sluggish, and in the summer I can take off as soon as it starts. What I do when it's cold is lift the rear tires off the ground with my outriggers and let it idle in 2nd or 3rd gear for about 15 minutes to a half hour, with the tires off the ground the wheels will spin even with the transmission cold the movement and oil flow warms the transmission quicker than with the tractor just sitting there. If I remember right the mechanics at my local case dealer recommended that to me and said that that was the nature of the beast
 
(quoted from post at 16:20:48 05/05/15) My 1962 580 CK is the same way, in the winter when it is really cold it will not move at all until the transmission warms up, in the spring and fall below 50° it moves very sluggish, and in the summer I can take off as soon as it starts. What I do when it's cold is lift the rear tires off the ground with my outriggers and let it idle in 2nd or 3rd gear for about 15 minutes to a half hour, with the tires off the ground the wheels will spin even with the transmission cold the movement and oil flow warms the transmission quicker than with the tractor just sitting there. If I remember right the mechanics at my local case dealer recommended that to me and said that that was the nature of the beast

Good to know. Thank you!!
 
Good to know since machine does not like to move until its warmed up.

So took hoe off in last couple weeks. Had partially cut bolts off or nuts with oxy\acet. I bought a "torque multiplier" tool since to help remove and tighten these big bolts.


I then was able to remove loader. I was able to break them loose at front and rear most bolts were easy. Like almost loose. The two drains on either side I removed so they would not catch and something caught rad support and twisted rad very slight so hopefully no future leaks. I learned hydraulic pump can be easily removed and set to the side to change fan belt in the future.


So made jigs outlined in service manual to split engine from torque tube...

Engine Bracket:


Stand still needs 5/8" bolt holes drilled to bolt angle iron to bottom of torque tube. I could have used wood blocks but I want this to go back together easy so figured a adjustable stand would be handy and use it on future projects. I already had two bases for stand so that saved time on fabbing and welding.


I was able to twist rad back nearly straight. Discovered fuel gauge wire broken off back of guage and converter temp guage sending wire broken.


So hopefully split machine today and start fabbing jig to remove torque converter and multi-disc clutch...
 
Today a friend came over and we split tractor:


Service manual states rear main seal should be flush with back of seal retainer and it is not. Figure since its apart replace rear main seal.

I think engine oil may have been leaking where I'm pointing these needle nose plyers:


Here's pic of adapter plate removed off torque tube. In days ahead I'm fabbing up jig to withdraw torque converter and multi-disc clutch. Service manual states to put two jack screws into multi-disc clutch to make removal easier and safer. Manual says not too make jack screws to tight. So hand tight??


Last pic is top of adapter plate. These 8 bolts hold this cover onto adapter plate. In manual it shows a larger component bolted on here but its not on mine. I wonder if I should take it apart and check for debris? There was strands of silicone caught up in end of suction tube so sounds logical to take everything apart. Pump for tranny had specified pressure yet should I put in a new relief spring anyways?


Hope this post helps other W3\CK530 Case-o-matic owners. More to come!
 
Made device to pull torque converter\multi-disc clutch out of torque tube. Then my hydraulic jack failed on my cherry picker. So heading into town tomorrow to pick up new seals.

 
Here is a pic from my W3 service manual showing the tool to remove torque converter\multi-disc clutch:


DKase suggested I add in guide pins to ease removal and installation so i fabbed this up yesterday... hope to remove parts diss-assembly and inspection later today!

 
So finally slid torque converter and multi-disc clutch out today.
Took multi-disc clutches off. Seemed in good condition. Used 3 jaw puller to remove piston assembly. Took piston assembly apart. Lots of muck in there. Looking at seals they appear to be made of metal? Any tips for removing them?
 
Finally got torque converter all apart. Bearings seem good and ring seals look fine however not sure how to tell if any are worn out. Brass bushing in end of clutch drive shaft and large bushing in pump drive gear both seem scored so taking them into lical Case dealer to see what they think. Going to post pics very soon.
 
(quoted from post at 08:26:21 07/20/15) Finally got torque converter all apart. Bearings seem good and ring seals look fine however not sure how to tell if any are worn out. Brass bushing in end of clutch drive shaft and large bushing in pump drive gear both seem scored so taking them into lical Case dealer to see what they think. Going to post pics very soon.

Found out sealing rings get worn on their sides from being thrust back and forth. Most parts for a rebuild located by my local case parts person. I'm in BC, Canada, and nearly all the parts located in the USA. Parts to do Diesel 188 oil pan gasket and rear seal retainer just arrived so will start re & re'ing those parts. Back in the day Case had a tool for centering the rear seal retainer. I figure I'll have one made unless someone here has one for sale. Either way picking up parts early next week and drop off retainer with crank dia with local machinist to make one.
 
So Mel here suggested I update my clutch drive shaft with a sealing ring which was installed on later versions. For $60 canadian my local machinist put the groove in for the sealing ring, pressed in new bushings in hollow shaft for clutch drive shaft and pump drive gear. Plus polished up all surfaces of parts that sealing rings rub on. I ended up getting some parts through Coleman Equipment and still waiting for delivery of parts from saliimplement. This job is taking quite awhile so one new part at a time I hope to take a few hours each week to put it back together. With hunting and firewood season on full tilt and running our small farm hope to get everything back together by december. Also bought a sleeve kit for where rear crank seal rides through case for my diesel 188. I will post pics as I go.
 
Just started putting torque converter back together. Quite a few 5/16"-18 bolts to tighten. I wonder if I should use blue loctite? Also for these small bolts, I don't have torque specifications. Seems standard setting is 12-18 ft lbs for this size\grade of bolt. Also if using loctite I assume torque setting may be 10-16 ft lbs or less. I'm thinking use a bit of blue loctite and 15 ft lbs (180 inch lbs). The first part I'm assembling is the 8 bolts that bolt pump drive gear to the part (forget the name of it) in the following pictures: The manual I downloaded off the net this past summer has no torque specifications...
 
so cleaned all parts with solvent. Gave bolts and threaded holes a spray with brake clean, and a shot of air. Used blue loctite and 220 inch lbs on bolts. Bolted torque converter together today. I'll post some assembly pics soon.
 
So torque converter and multi-disc clutch all back together. I put in new cast iron ring seals, and had clutch main shaft machined for additional cast iron ring seal. Also new plate for single disc clutch and 4 new seals for multi-disc clutch piston.


Here's new plate in single disc clutch in front of torque converter:


I ground this old pair of snap ring pliers to fit the snap rings:


This converter multi-disc clutch required a shop press that was more than 11" wide on inside and able to fit parts 17" tall. Also a 3 jaw puller, a steering wheel type puller and a few plastic falling wedges lol. Case uses these nicely shaped snap rings so I fashioned some old snap ring pliers to make assembly easier. I should have made them for dis-assembly too.

So next is to replace oil pan gasket, crank shaft rear main seal (using a speedy sleeve due to groove worn in crankshaft), rear crankshaft retainer gasket and camshaft plug. And clean out torque tube and line up multi-disc clutch teeth with hub out of torque tube.

I also have an awesome original Case W3 service manual (CK 530) and was able to print off Case-O-Matic Service Manual. Many special thanks to Mel here, and Bud at Grassland Equipment in Williams Lake, BC, Canada. Parts I received from John at external_link in NY, NY, USA, and Brandon at Coleman Equipment in the USA. Also the fellow who posted all the great Case 530 CK info where I printed off Case-O-Matic Service Manual.

More pics to come!! I hope this thread helps others!
 
So torque converter and multi-disc clutch all back together. I put in new cast iron ring seals, and had clutch main shaft machined for additional cast iron ring seal. Also new plate for single disc clutch and 4 new seals for multi-disc clutch piston.

 
I ground this old pair of snap ring pliers to fit the snap rings:


This converter multi-disc clutch required a shop press that was more than 11" wide on inside and able to fit parts 17" tall. Also a 3 jaw puller, a steering wheel type puller and a few plastic falling wedges lol. Case uses these nicely shaped snap rings so I fashioned some old snap ring pliers to make assembly easier. I should have made them for dis-assembly too.

So next is to replace oil pan gasket, crank shaft rear main seal (using a speedy sleeve due to groove worn in crankshaft), rear crankshaft retainer gasket and camshaft plug. And clean out torque tube and line up multi-disc clutch teeth with hub out of torque tube.

I also have an awesome original Case W3 service manual (CK 530) and was able to print off Case-O-Matic Service Manual. Many special thanks to Mel here, and Bud at Grassland Equipment in Williams Lake, BC, Canada. Parts I received from John at external_link in NY, NY, USA, and Brandon at Coleman Equipment in the USA. Also the fellow who posted all the great Case 530 CK info where I printed off Case-O-Matic Service Manual.

More pics to come!! I hope this thread helps others!
 
When I took torque converter apart there was no evidence of sealant. I've put it back together with no sealant. Service manual did not describe putting sealant anywhere. Anyone know if I should use a anaerobic sealant between halves of torque converter?
 
So yesterday finally was about to test drive tractor and drivers side brake was seized. Fixed that then backed it out of shop. Took it for a good 20 minute test drive. It ran awesome and now can put fenders and hood back on!

Torque converter temp gauge did not come up though. Torque tube was warm to the touch. It was just under 40 degrees F outside, +4 Celsius. Engine block was warm too but definitely not hot and end temp gauge did not come up either.

It pops out of high range right after you let go of dual range lever so I guess that's why a previous owner cut off dual range lever. 4th gear low is definitely fast enough for the hilly terrain we live in. Maybe fix that next winter.

I'm really glad I built jig to install torque converter in torque tube. It took two us to insert multi disc clutch into its hub even though I took hub out and fitted it onto plates before installation using jack screws.

Machining ring groove in main clutch shaft and adding ring seal I believe made a huge difference with fluid leakage. Thanks Mel!!

New bushings, ring seals, and direct drive plate in torque converter and new seals in multi-disc clutch piston I believe made a huge performance difference too! In 4th gear low and then engaging direct drive, tractor really hummed up our local access rd.

Previous owner did not time engine properly after rebuild and now with it timed correctly and new valve springs it sure sounds nice! Thank you JC Marleau for the comprehensive shop manual!

Many thanks to John Saeli for parts and his knowledge.

I need to buy the perforated grill for this tractor still if anyone has a used one for sale.

I sure learned lots and now am officially a heavy duty backyard mechanic!


I forgot to put my other front wheel weight on. I had taken wheel off to get different tire mounted.

This past summer I was at our local landfill and seen some tire chains poking out from under the metal pile. Hooked on a chain to my truck and pulled them out. Another treasurer seeker helped me slide them up a board into my truck box. So just finished adjusting one to fit one rear wheel. They were made for larger tires and a slew of clevises had been added so it was a great find. The chains currently mounted are worn down flat. I should have flipped them yet still these other chains I found are way more aggressive for our hilly terrain here. I'll post pics when done. Also putting hood and fenders back on over the next week.
 
Chains mounted finally. Definitely a workout and a 1/2 to get these in place. Used to come-a-longs to cinch them up and too many hours to mention. I shortened them by one section yet will keep extra sections for newer tires or bigger tires one day. Seen two tires yet still tracking down owner. Going to run them on the ice a bit to polish them up and then tack weld all the clevises. Looks like fenders will have to move in a couple inches too.


We sell tractor parts! We have the parts you need to repair your tractor - the right parts. Our low prices and years of research make us your best choice when you need parts. Shop Online Today.

Back
Top